Love this? Save it for later!
Share the inspiration with your friends
The woman at the community garden plot next to mine watched me stare at a mountain of zucchini I’d just harvested—honestly, I had no idea what to do with it all. She didn’t say anything at first. Then she reached into her own basket and pulled out a single, perfect, lumpy butternut squash. “You’re thinking too hard,” she said, wiping dirt off her cheek with the back of her hand. “Kids don’t want complicated. They want something that looks like fun.” She showed me how she cuts fruit into shapes for her grandchildren, nothing fancy, just clever. That conversation stuck with me. It wasn’t about the zucchini at all—it was about the whole approach to feeding little ones.
So when fall rolled around and my own kids started eyeing the Halloween candy weeks early, I remembered her words. I needed something that felt special, festive, and like a treat—but that was actually just fruit. That’s how this Kid-Approved Pumpkin-Shaped Fruit Tray Platter was born. It’s not about perfect knife skills or expensive ingredients. It’s about taking simple, affordable fruit and arranging it into a shape that makes kids grin. I mean, let’s face it, getting them to eat fruit during the candy season is half the battle, right?
Maybe you’ve been there—standing in the grocery aisle, trying to convince yourself that the bag of fun-size chocolate bars is “just for the trick-or-treaters.” This platter is my secret weapon against that. It’s a little bit of work upfront for a whole lot of peace of mind later. And honestly, watching my youngest daughter’s face light up when she saw the pumpkin shape made every minute of slicing worth it. This is the kind of recipe that stays with you because it turns a simple snack into a moment.
Why You’ll Love This Recipe
Let me tell you why this Pumpkin-Shaped Fruit Tray Platter has become my go-to for every fall gathering. It’s not just another fruit platter—it’s a conversation starter, a kid-pleaser, and a budget-friendly lifesaver all rolled into one.
- Quick & Easy: This platter comes together in about 20 minutes of active prep time. Honestly, that’s faster than baking a batch of cookies, and there’s zero oven time. Perfect for those after-school afternoons when you need a win.
- Simple Ingredients: You likely already have most of these fruits in your kitchen or can grab them without a special trip. I use whatever is on sale that week—cantaloupe, honeydew, oranges, grapes. The star is the shape, not the specific fruit.
- Perfect for Fall Gatherings: Whether it’s a classroom party, a family movie night, or a Halloween get-together, this platter fits right in. It’s festive without being fussy.
- Crowd-Pleaser: I’ve served this at three different events now, and every single time, the kids go for the fruit first. Even the ones who usually push their veggies around the plate. It’s like the pumpkin shape tricks them into trying things.
- Unbelievably Delicious: The combination of sweet melon, tart grapes, and juicy oranges is just perfect. It’s refreshing and satisfying—the kind of snack that makes you feel good about what you’re eating.
What makes this platter different from the rest is the technique. Instead of just piling fruit on a plate, I use a simple template to create a pumpkin shape that’s instantly recognizable. It’s not about artistic talent—it’s about a clever arrangement that anyone can do. This isn’t just another version of a fruit tray; it’s your best version, because it actually gets eaten. And isn’t that the whole point?
This recipe connects emotionally because it solves a real problem. We all want our kids to eat well, especially during the sugar-filled holidays. This platter gives you a way to offer something healthy that feels like a treat. It’s comfort food reimagined—healthier, faster, but with the same soul-soothing satisfaction of sharing something special with the people you love.
What Ingredients You Will Need
This recipe uses simple, wholesome ingredients to create a stunning visual effect. The beauty is in the arrangement, not in expensive or hard-to-find items. Here’s what you’ll need to gather.
For the Pumpkin Body
- 1 medium cantaloupe or orange-fleshed melon (this gives the pumpkin its classic orange color; look for one that’s fragrant at the stem end for best flavor)
- 1 small honeydew melon or green apple (optional, for contrast; I sometimes skip this to save money)
For the Pumpkin Stem and Details
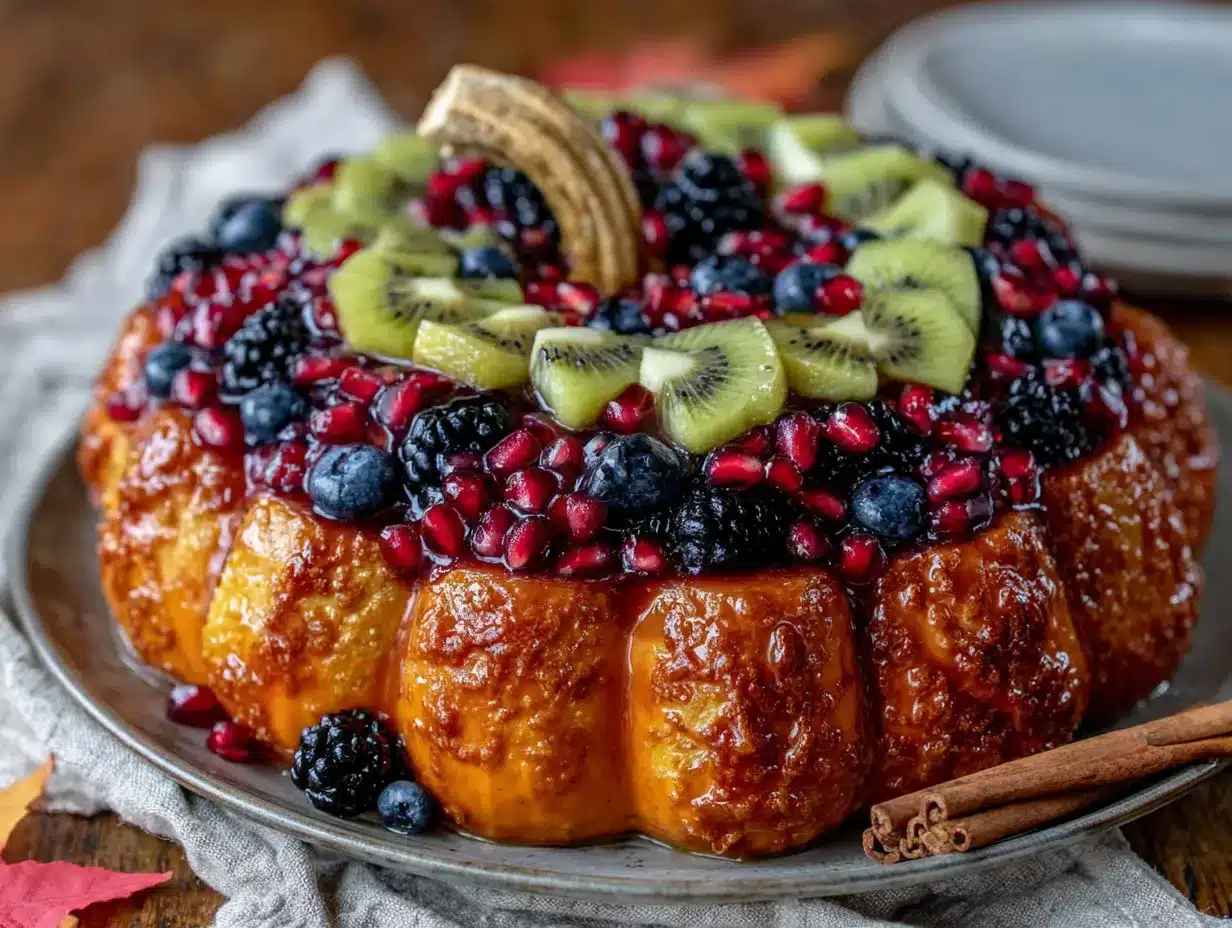
- 1 piece of celery stick (about 3 inches long, for the stem; it looks just like a pumpkin stem!)
- 1 small cucumber or green bell pepper (for pumpkin ridges and leaf accents; I prefer cucumber for its mild flavor)
For Filling and Color
- 2 cups red and green seedless grapes (washed and dried; red grapes add beautiful color contrast)
- 2 large oranges or 1 small grapefruit (peeled and segmented; the citrus adds a bright pop of flavor)
- 1 cup fresh blueberries or blackberries (optional, but they add a lovely dark contrast; I use whatever berry is on sale)
- 1 apple, sliced thin (tossed with a little lemon juice to prevent browning; it adds crunch)
For the Base and Garnish
- Large round platter or wooden board (at least 12 inches in diameter; a white platter makes the colors pop)
- Fresh mint leaves (optional, for garnish; they make the platter look extra polished)
I recommend using a ripe cantaloupe for the best sweetness—it’s the star of the show. If you can’t find a good cantaloupe, you can use a small pumpkin-shaped cheese ball as a centerpiece (just make sure it’s on a separate plate to avoid mixing flavors). For the grapes, I prefer seedless ones to make it easier for little hands. And honestly, the celery stem trick is my favorite—it looks so realistic that my kids always ask if it’s a real pumpkin stem.
Equipment Needed
You don’t need fancy tools for this platter, which is part of its charm. Here’s what I use.
- Large round platter or wooden serving board (at least 12 inches; I use a white ceramic platter I got at a thrift store for $3)
- Sharp chef’s knife (for cutting melons and larger fruits; a dull knife makes melon cutting frustrating)
- Small paring knife (for detail work like cutting the stem slot and shaping cucumber slices)
- Melon baller (optional, but it makes creating uniform pumpkin shapes from melon flesh much easier; I bought mine for $5 and it’s worth it)
- Cutting board (a large one is best to give you room to work)
- Paper towels (for drying fruit; wet fruit makes the platter slide around)
- Small bowl of lemon water (to keep apple slices from browning)
- Cookie cutters (pumpkin shape optional) (if you want to cut melon into tiny pumpkin shapes for an extra cute touch; I found a set at a dollar store)
If you don’t have a melon baller, you can simply cut the cantaloupe into cubes or wedges. The shape doesn’t have to be perfect—it’s the overall arrangement that creates the pumpkin illusion. I’ve made this platter with just a chef’s knife and a cutting board, and it turned out great. The most important thing is a large, flat surface to arrange everything on.
Preparation Method
Here’s how to put this Pumpkin-Shaped Fruit Tray Platter together. Take your time with the first step—it sets the foundation for everything else.
- Prepare the cantaloupe base (5 minutes): Cut the cantaloupe in half and scoop out the seeds. Use your melon baller to create small, round balls of orange flesh. If you don’t have a melon baller, cut the cantaloupe into 1-inch cubes or thin wedges. You want pieces that are roughly the same size so they fit together nicely. Set aside about 2 cups of melon balls for the pumpkin body.
- Create the pumpkin shape on the platter (3 minutes): Place your large platter on a flat surface. Arrange the cantaloupe balls in a large circle in the center of the platter—this is the outline of your pumpkin. Fill in the circle completely with more melon balls, creating a solid, round shape. Don’t worry if it’s not perfectly round; pumpkins are naturally lumpy. The goal is a dense, orange circle about 8 inches in diameter.
- Add the pumpkin stem (2 minutes): Take your piece of celery and cut a small slit at the top of the melon circle. Insert the celery piece so it stands upright, looking like a pumpkin stem. If the celery is too long, trim it to about 2-3 inches. For extra realism, leave a few small leaves on the celery if they’re still attached.
- Create pumpkin ridges (4 minutes): Slice your cucumber into thin rounds or half-moons. Arrange these in curved lines radiating outward from the center of the pumpkin, like the natural ridges on a pumpkin. You want about 5-7 ridges total. This step is what makes the platter look like a real pumpkin instead of just a pile of fruit. Space them evenly for the best effect.
- Fill in the background (5 minutes): Now it’s time to build the “canvas” around your pumpkin. Arrange the red and green grapes around the edges of the platter, creating a border. Place the orange segments and apple slices in the spaces between the grapes. Scatter the blueberries or blackberries for pops of dark color. The goal is to fill the entire platter so no empty space shows—this makes the pumpkin pop.
- Add final details (3 minutes): If you have mint leaves, tuck them around the base of the celery stem to look like pumpkin leaves. You can also add a few thin slices of green apple or cucumber cut into leaf shapes around the edges. For an extra touch, use a small pumpkin-shaped cookie cutter to cut a few pieces of honeydew or apple into tiny pumpkins and place them around the platter.
- Finish and serve (1 minute): Give the platter a final look. Adjust any fruit that has shifted. The platter should look full and abundant—like a cornucopia of fall fruit. Serve immediately, or cover with plastic wrap and refrigerate for up to 2 hours before serving. The fruit will stay fresh and crisp.
A few notes from my kitchen: If the melon balls are rolling around too much, you can cut a tiny flat spot on the bottom of each one. This helps them stay in place. Also, if you’re making this for a party, prep all the fruit ahead of time and arrange it just before serving. The cantaloupe balls can be made a day in advance and stored in an airtight container in the fridge.
Cooking Tips & Techniques
After making this platter about a dozen times, I’ve learned a few things the hard way. Let me share so you don’t make the same mistakes.
Don’t overthink the shape. The first time I made this, I spent 20 minutes trying to get the melon balls into a perfect circle. It was stressful and unnecessary. Pumpkins are naturally uneven, so a slightly lumpy shape looks more authentic. Just pile the melon in a rough circle and move on. Your kids won’t notice the imperfections—they’ll just see a pumpkin.
Dry your fruit thoroughly. This is a mistake I made more than once. Wet fruit slides around on the platter and makes the whole thing look messy. After washing your grapes and berries, pat them dry with a clean kitchen towel or paper towels. It takes an extra minute, but it makes a huge difference in how the platter holds together.
Use the right melon. I’ve tried this with honeydew and with watermelon, and honestly, cantaloupe works best. Its orange color is the closest to a pumpkin’s, and its firm texture holds its shape well. If cantaloupe isn’t in season, you can use a mixture of mango and orange segments to get a similar color. Just be aware that mango is softer and might squish more easily.
Timing is everything. This platter looks best within the first hour of being assembled. After that, the fruit starts to release moisture and the edges can get a little soggy. If you’re making it for a party, assemble it no more than 2 hours before serving. Keep it refrigerated until the last minute. I once made it the night before, and while it was still edible, it didn’t have that fresh, crisp look.
Get the kids involved. Honestly, this is the best tip I can give. Let your kids help arrange the fruit. My daughter loves placing the grapes around the edge, and my son thinks the celery stem is hilarious. When they help make it, they’re way more likely to eat it. It turns snack time into a fun activity.
Variations & Adaptations
This platter is incredibly versatile. Here are some ways I’ve adapted it for different needs and occasions.
Seasonal Variations
Fall Harvest Version: Add sliced pears, pomegranate seeds, and figs around the pumpkin base. The deep red of pomegranate seeds against the orange melon is stunning. I did this for a Thanksgiving potluck and it was the first thing to disappear.
Winter Holiday Version: Use a mix of green and red grapes, plus star-shaped pieces of pineapple or apple (use a star cookie cutter). Arrange the fruit in a wreath shape around the pumpkin. It doubles as a Christmas centerpiece.
Summer Version: Swap the cantaloupe for watermelon and use a honeydew melon for contrast. Add fresh berries and mint for a refreshing summer platter. The pumpkin shape still works—it just becomes a “summer pumpkin.”
Dietary Adaptations
Low-Sugar Option: Focus on berries, green apples, and cucumber for the base. Skip the grapes and melon, which are higher in natural sugar. The platter will be less sweet but still visually appealing.
Allergy-Friendly: This platter is naturally free of the top allergens—no dairy, gluten, nuts, or soy. Just make sure your platter and cutting board haven’t come into contact with allergens if you’re serving someone with severe allergies.
Flavor Twists
Citrus Burst: Add grapefruit and blood orange segments for a tangy twist. The bitterness of grapefruit balances the sweetness of the melon beautifully. I tried this on a whim and now it’s my preferred version.
Herb Infusion: Tuck fresh basil or mint leaves throughout the platter. The herbal notes complement the fruit in a surprising way. I thought it would be weird, but honestly, it’s amazing.
Serving & Storage Suggestions
This platter is best served chilled, right out of the refrigerator. The cold fruit is refreshing and crisp, especially if you’re serving it alongside warmer fall treats like cider or baked goods. I like to set it out about 15 minutes before serving to take the chill off slightly—it lets the flavors come through more.
For presentation, I place the platter on a large wooden board or a white ceramic serving dish. The contrast between the bright orange pumpkin and the white background is striking. If you’re serving it at a party, put it in the center of the table where everyone can see it. It’s a conversation starter—I can’t tell you how many people have taken photos of it before eating.
This platter pairs beautifully with a warm drink like apple cider or hot chocolate. For a full fall spread, I serve it alongside a cheese board with sharp cheddar and apple slices, or with a bowl of popcorn for a movie night. It also works as a healthy dessert option after a heavy meal—the lightness of the fruit is a nice palate cleanser.
Storage: If you have leftovers (which is rare in my house), store the fruit in an airtight container in the refrigerator. It will keep for 1-2 days, though the texture of the melon will soften slightly. The apple slices will brown, so you might want to pick those out before storing. I don’t recommend freezing this platter—the fruit will become mushy when thawed.
Reheating: You don’t need to reheat this platter. Just take it out of the fridge about 10 minutes before serving. The flavors actually develop a bit as the fruit sits, so leftovers the next day are still tasty, just not as visually perfect.
Nutritional Information & Benefits
Here’s an estimated nutritional breakdown for a serving of this platter (about 1 cup of mixed fruit). Remember, these are estimates and will vary based on the exact fruits you use.
| Nutrient | Amount Per Serving |
|---|---|
| Calories | 80-100 |
| Total Fat | 0g |
| Sodium | 10mg |
| Total Carbohydrates | 20-25g |
| Dietary Fiber | 2-3g |
| Sugars | 15-18g (natural) |
| Protein | 1-2g |
| Vitamin C | 60-80% DV |
| Vitamin A | 40-60% DV (from cantaloupe) |
The cantaloupe is a powerhouse of vitamin A and vitamin C, both important for immune health—especially during cold and flu season. Grapes provide antioxidants, and oranges add a hefty dose of vitamin C. This platter is naturally low in fat and sodium, making it a heart-healthy choice. It’s also gluten-free, dairy-free, and nut-free, so it works for most dietary needs. The only potential allergen is if you use fruits that have been processed in facilities that handle other allergens—always wash your fruit well.
From a personal perspective, I love that this platter lets me feel good about what my kids are eating during a season that’s full of sugar. It’s not about deprivation—it’s about offering something delicious and healthy that they actually want to eat. That’s a win in my book.
Conclusion
This Kid-Approved Pumpkin-Shaped Fruit Tray Platter has become a fall tradition in our house, and I hope it becomes one in yours too. It’s simple, affordable, and genuinely fun to make. The best part? It actually gets eaten. No more sad bowls of untouched fruit at the party—this platter disappears.
I encourage you to make it your own. Use whatever fruit is on sale, let your kids help arrange it, and don’t stress about perfection. The pumpkin shape is forgiving, and the whole point is to have fun with food. If you try it, I’d love to hear how it went. Did your kids help? Did they eat the grapes first? Did anyone try to eat the celery stem? (My son did.) Leave a comment below and share your experience—I read every single one.
Here’s to happy, healthy fall gatherings and the simple joy of a fruit platter that looks like a pumpkin. You’ve got this. Now go make something beautiful.
Frequently Asked Questions
Can I make this platter ahead of time?
Yes, you can prep the fruit a day in advance. Store the cut fruit in separate airtight containers in the refrigerator. Assemble the platter no more than 2 hours before serving for the best appearance. The fruit will release moisture over time, so fresh assembly is key.
What if I can’t find cantaloupe?
No problem! You can use a mix of mango, orange segments, and peach slices to create a similar orange color. The texture will be softer, but the pumpkin shape will still work. You can also use a small pumpkin-shaped cheese ball as the centerpiece and arrange fruit around it.
How do I keep the apple slices from turning brown?
Toss the apple slices in a bowl with a tablespoon of lemon juice or lime juice. This acid prevents oxidation and keeps them looking fresh for hours. You can also use a commercial fruit freshener, but lemon juice works just as well and costs less.
Is this platter safe for kids with allergies?
This platter is naturally free of the top allergens—dairy, gluten, nuts, soy, and eggs. However, always wash your fruit thoroughly and make sure your cutting board and platter haven’t come into contact with potential allergens. If you’re serving someone with severe allergies, check the labels on any pre-cut fruit you buy.
Can I use frozen fruit for this platter?
I don’t recommend it. Frozen fruit releases a lot of water as it thaws, which will make the platter soggy and unappealing. Fresh fruit is best for both appearance and texture. If you’re on a budget, look for sales on fresh fruit or buy what’s in season.
Pin This Recipe!
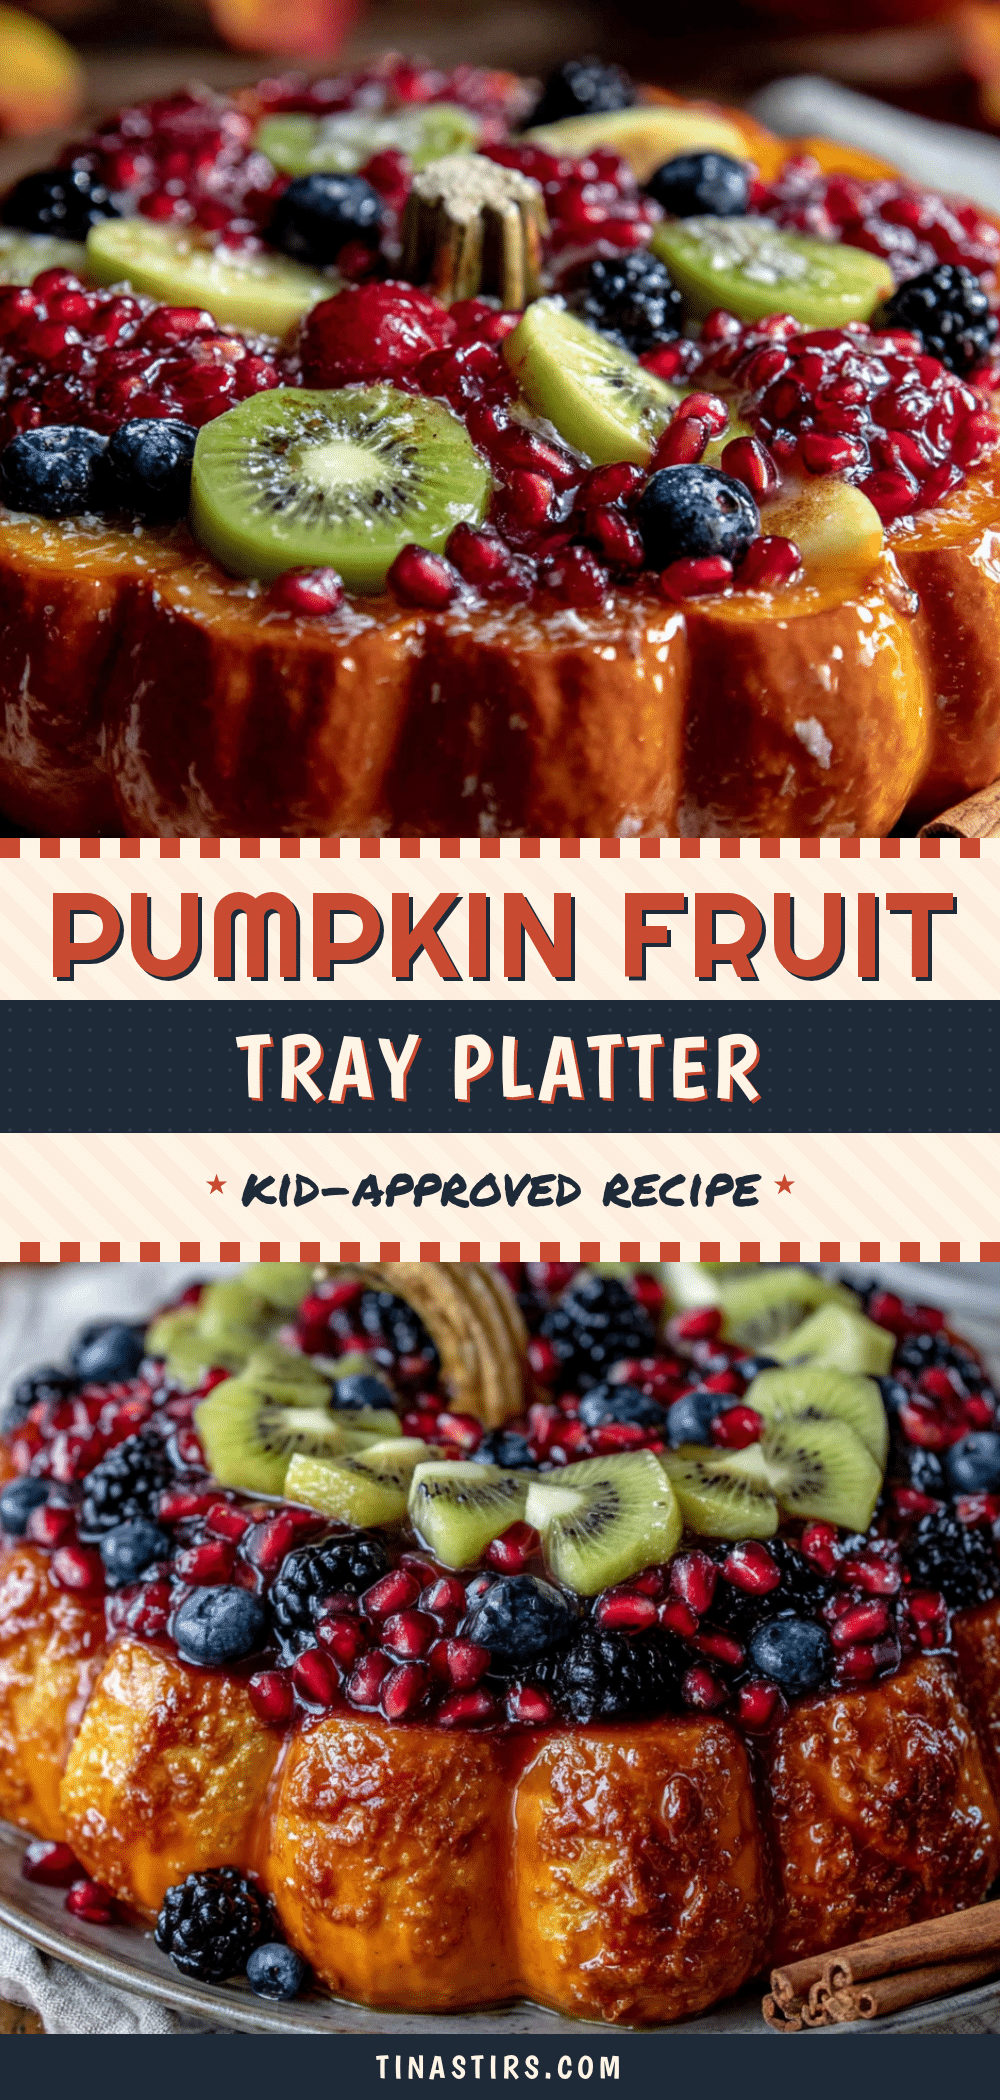
Kid-Approved Pumpkin-Shaped Fruit Tray: Easy Fall Platter
A fun and festive fruit platter shaped like a pumpkin, made with simple, affordable ingredients. Perfect for fall gatherings, this healthy snack is a kid-pleaser that turns fruit into a treat.
- Prep Time: 20 minutes
- Cook Time: 0 minutes
- Total Time: 20 minutes
- Yield: 8 servings 1x
- Category: Appetizer
- Cuisine: American
Ingredients
- 1 medium cantaloupe or orange-fleshed melon
- 1 small honeydew melon or green apple (optional)
- 1 piece of celery stick (about 3 inches long)
- 1 small cucumber or green bell pepper
- 2 cups red and green seedless grapes
- 2 large oranges or 1 small grapefruit
- 1 cup fresh blueberries or blackberries (optional)
- 1 apple, sliced thin
- Fresh mint leaves (optional, for garnish)
Instructions
- Prepare the cantaloupe base: Cut the cantaloupe in half and scoop out the seeds. Use a melon baller to create small, round balls of orange flesh. If you don’t have a melon baller, cut the cantaloupe into 1-inch cubes or thin wedges. Set aside about 2 cups of melon balls for the pumpkin body.
- Create the pumpkin shape on the platter: Place a large platter on a flat surface. Arrange the cantaloupe balls in a large circle in the center of the platter—this is the outline of your pumpkin. Fill in the circle completely with more melon balls, creating a solid, round shape about 8 inches in diameter.
- Add the pumpkin stem: Take the piece of celery and cut a small slit at the top of the melon circle. Insert the celery piece so it stands upright, looking like a pumpkin stem. Trim to about 2-3 inches if needed.
- Create pumpkin ridges: Slice the cucumber into thin rounds or half-moons. Arrange these in curved lines radiating outward from the center of the pumpkin, like natural ridges. Use about 5-7 ridges total, spaced evenly.
- Fill in the background: Arrange the red and green grapes around the edges of the platter, creating a border. Place the orange segments and apple slices in the spaces between the grapes. Scatter the blueberries or blackberries for pops of dark color. Fill the entire platter so no empty space shows.
- Add final details: Tuck mint leaves around the base of the celery stem to look like pumpkin leaves. Optionally, add thin slices of green apple or cucumber cut into leaf shapes around the edges.
- Finish and serve: Give the platter a final look and adjust any fruit that has shifted. Serve immediately, or cover with plastic wrap and refrigerate for up to 2 hours before serving.
Notes
Don’t overthink the shape—pumpkins are naturally uneven. Dry fruit thoroughly to prevent sliding. Use ripe cantaloupe for best sweetness. Assemble no more than 2 hours before serving for best appearance. Get kids involved in arranging the fruit.
Nutrition
- Serving Size: 1 cup of mixed fruit
- Calories: 80100
- Sugar: 1518
- Sodium: 10
- Carbohydrates: 2025
- Fiber: 23
- Protein: 12
Keywords: pumpkin-shaped fruit tray, fall fruit platter, kid-friendly snack, healthy Halloween treat, easy fruit arrangement


