Love this? Save it for later!
Share the inspiration with your friends
This was supposed to be a classic pumpkin pie. The kind my grandmother made, the one with the flaky butter crust that took forever to roll out and always made me nervous. I had the canned pumpkin ready, the evaporated milk measured, and a whole lot of confidence that I didn’t actually deserve. But then, I realized I was out of butter for the crust. Completely out. And the store was a twenty-minute drive away, and honestly, I was already in my sweatpants and not about to change. So I grabbed the box of gingersnaps I’d bought for snacking, crushed them up in a bag with a rolling pin—which, let me tell you, is not a graceful moment—and mixed them with some melted butter I had stashed in the freezer. I figured it would be a disaster. A sad, crumbly crust holding back a perfectly good filling. But then the brown butter happened. I’d been browning butter for another recipe earlier that week and had a little left over. I figured, why not? What’s the worst that could happen? I stirred it into the pumpkin filling, poured it into the gingersnap crust, and held my breath. When it came out of the oven, the smell was something else. Toasty, warm, almost nutty, with that hint of spice from the cookies. That first slice? Honestly, I almost cried. It was better than the original. Way better. And it was lighter, too—less butter, less sugar, but somehow more flavor. I’ve been making it ever since, and now I can’t go back. Maybe you’ve been there, standing in your kitchen, realizing you don’t have the right ingredients and feeling that little panic rise. Trust me, this is the happy accident you didn’t know you needed.
Why You’ll Love This Recipe
This Lighter Brown Butter Pumpkin Pie with Gingersnap Crust isn’t just another pumpkin pie recipe. It’s the one that solves the biggest problem with traditional pumpkin pie: it can be heavy, overly sweet, and a little boring. This version flips the script. The brown butter adds a deep, nutty richness that makes you wonder why you haven’t been doing this all along. The gingersnap crust is crisp, spicy, and takes about five minutes to throw together—no rolling pin required. And the best part? It’s lighter. Less butter, less sugar, but not less flavor. Here’s why this recipe is a keeper:
- Quick & Easy: The crust comes together in under 10 minutes, no chilling required. The filling is a one-bowl situation. You’ll have this pie in the oven faster than you can say “Thanksgiving.”
- Simple Ingredients: No fancy grocery trips. You probably have gingersnaps in your pantry, and the rest is standard fall baking fare. The brown butter is the only “extra” step, and it’s worth it.
- Perfect for Fall Gatherings: Whether it’s Thanksgiving, a Friendsgiving potluck, or just a cozy Sunday dinner, this pie fits right in. It’s impressive without being stressful.
- Crowd-Pleaser: Even the traditionalists in your family will ask for seconds. The combination of the spicy crust and the silky, nutty filling is hard to resist.
- Unbelievably Delicious: The texture is smooth and creamy, the flavor is complex without being fussy, and that first bite—with the crunch of the gingersnap and the melt-in-your-mouth filling—is pure comfort.
What makes this recipe different? It’s not just a healthier swap or a shortcut. It’s a reimagining. The brown butter brings a toasty depth that pumpkin loves, and the gingersnap crust adds a peppery kick that cuts through the sweetness. It’s the kind of pie that makes you close your eyes after the first bite. It’s comfort food reimagined—lighter, faster, but with the same soul-soothing satisfaction. Perfect for impressing guests without stress, or turning a simple fall meal into something memorable.
What Ingredients You Will Need
This recipe uses simple, wholesome ingredients to deliver a pie that tastes indulgent without the heaviness. Most of these are pantry staples, and the substitutions are easy if you need them.
For the Gingersnap Crust
- Gingersnap cookies: 1 ½ cups (about 180g) finely crushed. I recommend Nabisco or a store-brand version. Look for cookies that are crispy, not soft. You want that snap.
- Unsalted butter: 5 tablespoons (70g), melted. This is enough to bind the crumbs without making the crust greasy. If you use salted butter, skip the added salt below.
- Granulated sugar: 2 tablespoons (25g). Just a touch to balance the spice. You can reduce this to 1 tablespoon if your gingersnaps are very sweet.
- Salt: A pinch (about ⅛ teaspoon). It enhances the flavor of the spices.
For the Pumpkin Filling
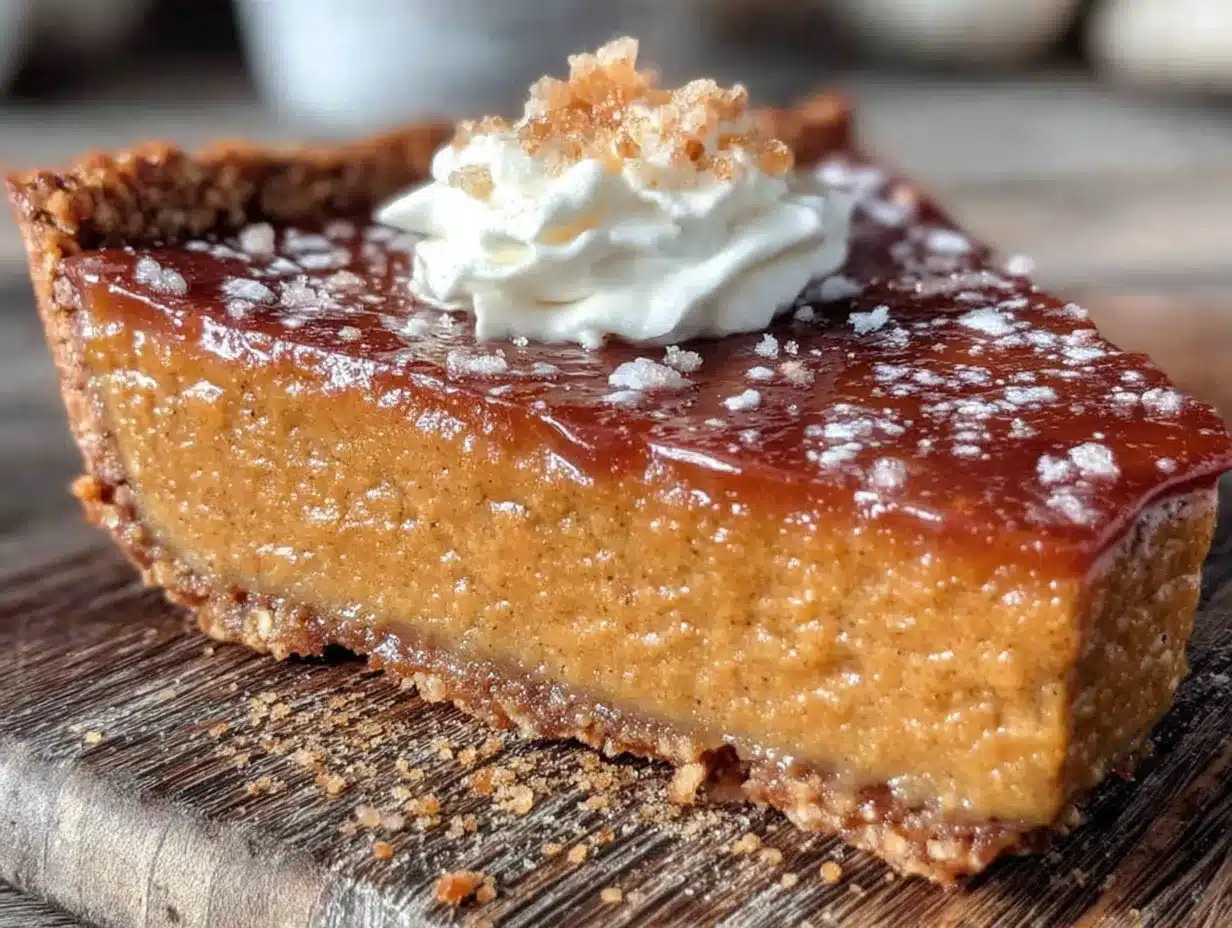
- Canned pumpkin puree: 1 can (15 ounces or 425g). Make sure it’s 100% pumpkin, not pumpkin pie filling. Libby’s is my go-to for consistent texture.
- Brown butter: 4 tablespoons (55g). Made from unsalted butter. This is the star of the show. The nutty flavor is irreplaceable, but if you’re in a pinch, you can use regular melted butter (though it won’t be the same).
- Large eggs: 2, at room temperature. Room temperature eggs blend more smoothly into the filling, preventing lumps.
- Evaporated milk: 1 cup (240ml). This gives the pie its classic silky texture without the extra fat of heavy cream. You can use canned coconut milk for a dairy-free option.
- Light brown sugar: ½ cup (100g), packed. It adds a molasses note that pairs beautifully with the brown butter. Dark brown sugar works too, for a deeper flavor.
- Granulated sugar: ¼ cup (50g). For sweetness without the molasses flavor. You can adjust the ratio based on your sweetness preference.
- Pumpkin pie spice: 1 ½ teaspoons. I use McCormick, but you can make your own with cinnamon, ginger, nutmeg, and cloves. If you only have cinnamon, add ¼ teaspoon of ground ginger and a pinch of nutmeg.
- Vanilla extract: 1 teaspoon. Pure vanilla is best, but imitation works in a pinch.
- Salt: ¼ teaspoon. To balance the sweetness and bring out the pumpkin flavor.
Ingredient Selection Tips
For the best texture, use firm, small-curd gingersnaps—they crush more evenly. If your gingersnaps are very large, pulse them in a food processor instead of crushing by hand. For the pumpkin puree, avoid the “pumpkin pie mix” which has added sugar and spices. You want pure pumpkin so you can control the flavor. And for the brown butter, don’t skip the browning step. It only takes a few minutes, and it transforms the entire pie.
Substitution Guidance
- Gluten-free: Use gluten-free gingersnaps for the crust. Everything else is naturally gluten-free.
- Dairy-free: Use a dairy-free butter alternative for both the crust and the brown butter. Coconut oil works well for the crust, but the flavor will be different.
- Lower sugar: Reduce the granulated sugar in the filling to 2 tablespoons. The pie will be less sweet but still delicious.
Equipment Needed
- 9-inch pie dish: A standard glass or ceramic pie dish works perfectly. I prefer glass because you can see when the crust is golden.
- Rolling pin or food processor: For crushing the gingersnaps. A rolling pin and a zip-top bag are the low-tech option. A food processor is faster and gives a more even crumb.
- Medium mixing bowl: For the crust ingredients.
- Large mixing bowl: For the filling.
- Whisk: For combining the filling ingredients. A balloon whisk is ideal.
- Small saucepan: For browning the butter. A light-colored pan helps you see the color change.
- Measuring cups and spoons: For accurate measurements.
- Rubber spatula: For scraping every last bit of filling into the pie dish.
- Cooling rack: For cooling the pie evenly.
If you don’t have a food processor, no worries. A rolling pin and some elbow grease work just fine. I’ve crushed gingersnaps with a wine bottle before—whatever gets the job done. For the pie dish, avoid dark metal pans, as they can brown the crust too quickly. A glass or ceramic dish gives you more control.
Preparation Method
Step 1: Make the Brown Butter (5 minutes)
Place 4 tablespoons of unsalted butter in a small saucepan over medium heat. Let it melt, then swirl the pan occasionally. After about 3-4 minutes, the butter will start to foam and turn golden. Watch closely—it can go from brown to burnt in seconds. When you see brown specks forming at the bottom and it smells nutty, remove it from the heat immediately. Pour it into a heat-safe bowl to stop the cooking. Set aside to cool slightly while you make the crust.
Step 2: Make the Gingersnap Crust (10 minutes)
Preheat your oven to 350°F (175°C). In a medium bowl, combine 1 ½ cups of finely crushed gingersnap crumbs, 2 tablespoons of granulated sugar, and a pinch of salt. Pour in 5 tablespoons of melted butter and stir until the mixture looks like wet sand. Press the mixture firmly into the bottom and up the sides of a 9-inch pie dish. Use the bottom of a measuring cup to press it down evenly. Bake for 8-10 minutes, until the crust is fragrant and slightly darker. Set aside to cool while you make the filling.
Step 3: Make the Pumpkin Filling (10 minutes)
In a large bowl, whisk together 1 can of pumpkin puree, ½ cup packed light brown sugar, ¼ cup granulated sugar, 1 ½ teaspoons of pumpkin pie spice, ¼ teaspoon of salt, and 1 teaspoon of vanilla extract. Whisk until smooth. Add 2 room-temperature eggs, one at a time, whisking well after each addition. Slowly pour in 1 cup of evaporated milk, whisking constantly. Finally, drizzle in the cooled brown butter and whisk until fully combined. The mixture should be smooth and slightly thick.
Step 4: Assemble and Bake (50-55 minutes)
Pour the filling into the pre-baked crust. Place the pie dish on a baking sheet to catch any potential spills. Bake at 350°F (175°C) for 50-55 minutes. The pie is done when the edges are set and slightly puffed, but the center still jiggles slightly when gently shaken. A knife inserted about 1 inch from the edge should come out clean. The center will continue to set as it cools.
Step 5: Cool and Serve (2 hours minimum)
Place the pie on a cooling rack and let it cool completely at room temperature. This takes about 2 hours. Do not refrigerate it while it’s still warm, or condensation will make the crust soggy. Once completely cool, you can serve it immediately or refrigerate it for up to 3 days. For clean slices, chill the pie for at least 4 hours before cutting.
Cooking Tips & Techniques
- Brown butter watch: The most common mistake is burning the butter. Keep the heat at medium, not high, and watch for the color change. When you see golden brown specks, pull it off the heat. I’ve definitely burned a batch before—the smell goes from nutty to acrid in seconds. Learn from my mistake.
- Crust pressing: Use a flat-bottomed measuring cup or glass to press the crust firmly into the dish. If the crust is too loose, it will crumble when you cut the pie. I like to press the sides first, then the bottom.
- Filling temperature: Make sure your eggs and evaporated milk are at room temperature. Cold ingredients can cause the brown butter to seize up, leaving you with a lumpy filling. If you forgot to take them out, place the eggs in a bowl of warm water for 5 minutes.
- Don’t overbake: The center should still jiggle when you take it out. Overbaking leads to a cracked, dry pie. Trust the jiggle test. I always set a timer for 50 minutes and check it. If it needs more time, I add 5-minute increments.
- Cooling patience: I know it’s hard to wait, but cooling the pie completely is non-negotiable. Cutting into a warm pie will result in a runny mess. Let it rest on the counter for 2 hours, then refrigerate if you want cleaner slices.
Variations & Adaptations
- Gluten-Free Version: Use gluten-free gingersnaps for the crust. The filling is naturally gluten-free, so this is an easy swap. I’ve tried it with Kinnikinnick brand cookies, and it worked beautifully.
- Dairy-Free Version: Use a dairy-free butter alternative for both the crust and the brown butter. Coconut oil works for the crust, but for the brown butter, use a plant-based butter that browns well. Miyoko’s is my favorite for this.
- Spice It Up: Add ¼ teaspoon of cayenne pepper or a pinch of black pepper to the filling for a subtle heat that cuts through the sweetness. It’s unexpected and delicious.
- Pecan Topping: Sprinkle ½ cup of chopped pecans over the top of the pie before baking. The nuts toast in the oven and add a lovely crunch. This is my personal favorite variation.
- Maple Twist: Replace the granulated sugar with ¼ cup of maple syrup and reduce the evaporated milk by 2 tablespoons. The maple flavor pairs beautifully with the brown butter and gingersnap.
Serving & Storage Suggestions
Serve this pie slightly warm or at room temperature. A dollop of lightly sweetened whipped cream or a scoop of vanilla ice cream is the perfect companion. For a dairy-free option, try coconut whipped cream. The pie also pairs beautifully with a cup of hot coffee or a spiced chai latte.
To store, cover the pie loosely with plastic wrap or foil and refrigerate for up to 3 days. The flavors actually deepen after a day in the fridge—the brown butter becomes even more pronounced. For longer storage, you can freeze the baked, cooled pie for up to 2 months. Wrap it tightly in plastic wrap, then foil, and thaw overnight in the refrigerator before serving.
Reheating: If you prefer warm pie, place individual slices in a 300°F (150°C) oven for 10-15 minutes. Avoid microwaving, as it can make the crust soggy. The pie is also delicious straight from the fridge—cold and creamy, like a pumpkin cheesecake.
Nutritional Information & Benefits
Per slice (based on 8 servings): Approximately 310 calories, 14g fat, 42g carbohydrates, 5g protein, 2g fiber, 22g sugar. This is a lighter version of traditional pumpkin pie, with about 30% less butter and sugar. The gingersnap crust adds a little extra fiber and spice, while the pumpkin provides a healthy dose of vitamin A and antioxidants. The brown butter, while still butter, is used sparingly, and the evaporated milk keeps the filling creamy without the extra fat of heavy cream.
This pie is a great option for those watching their sugar intake—you can easily reduce the sugar by a third without sacrificing flavor. It’s also naturally gluten-free if you use gluten-free gingersnaps. The main allergens are dairy (butter, evaporated milk) and gluten (gingersnaps). For a dairy-free version, use the substitutions listed above.
Conclusion
This Lighter Brown Butter Pumpkin Pie with Gingersnap Crust is proof that sometimes the best recipes come from happy accidents. It’s lighter, faster, and more flavorful than the classic version, and it’s become my go-to for fall gatherings. The brown butter adds a nutty depth that pumpkin loves, and the gingersnap crust is so much easier than a traditional pastry crust. I hope you give it a try and make it your own. Maybe add a little extra spice, or top it with pecans, or serve it with a big dollop of whipped cream. Whatever you do, let me know how it turns out! Leave a comment below, share your photos, or tag me on social media. I love seeing your creations.
Frequently Asked Questions
Can I use fresh pumpkin instead of canned?
Yes, you can! Roast a small sugar pumpkin until tender, then puree the flesh. Make sure to drain off any excess liquid, as fresh pumpkin can be more watery than canned. You’ll need about 1 ½ cups of puree for this recipe.
Why did my crust crumble when I cut the pie?
This usually happens if the crust wasn’t pressed firmly enough into the dish, or if it wasn’t baked long enough. Make sure to pack the crumbs down tightly with a measuring cup, and bake until the crust is fragrant and slightly darker. A fully baked crust holds together much better.
Can I make this pie ahead of time?
Absolutely! This pie is perfect for making a day ahead. Bake it, cool it completely, then refrigerate it covered. The flavors actually improve overnight. Just bring it to room temperature before serving, or serve it chilled.
How do I know when the pie is done?
The edges should be set and slightly puffed, but the center should still jiggle slightly when you gently shake the pan. A knife inserted about 1 inch from the edge should come out clean. The center will continue to set as it cools.
Can I freeze this pie?
Yes! Bake and cool the pie completely, then wrap it tightly in plastic wrap and foil. Freeze for up to 2 months. Thaw overnight in the refrigerator before serving. The texture remains excellent after freezing.
Pin This Recipe!
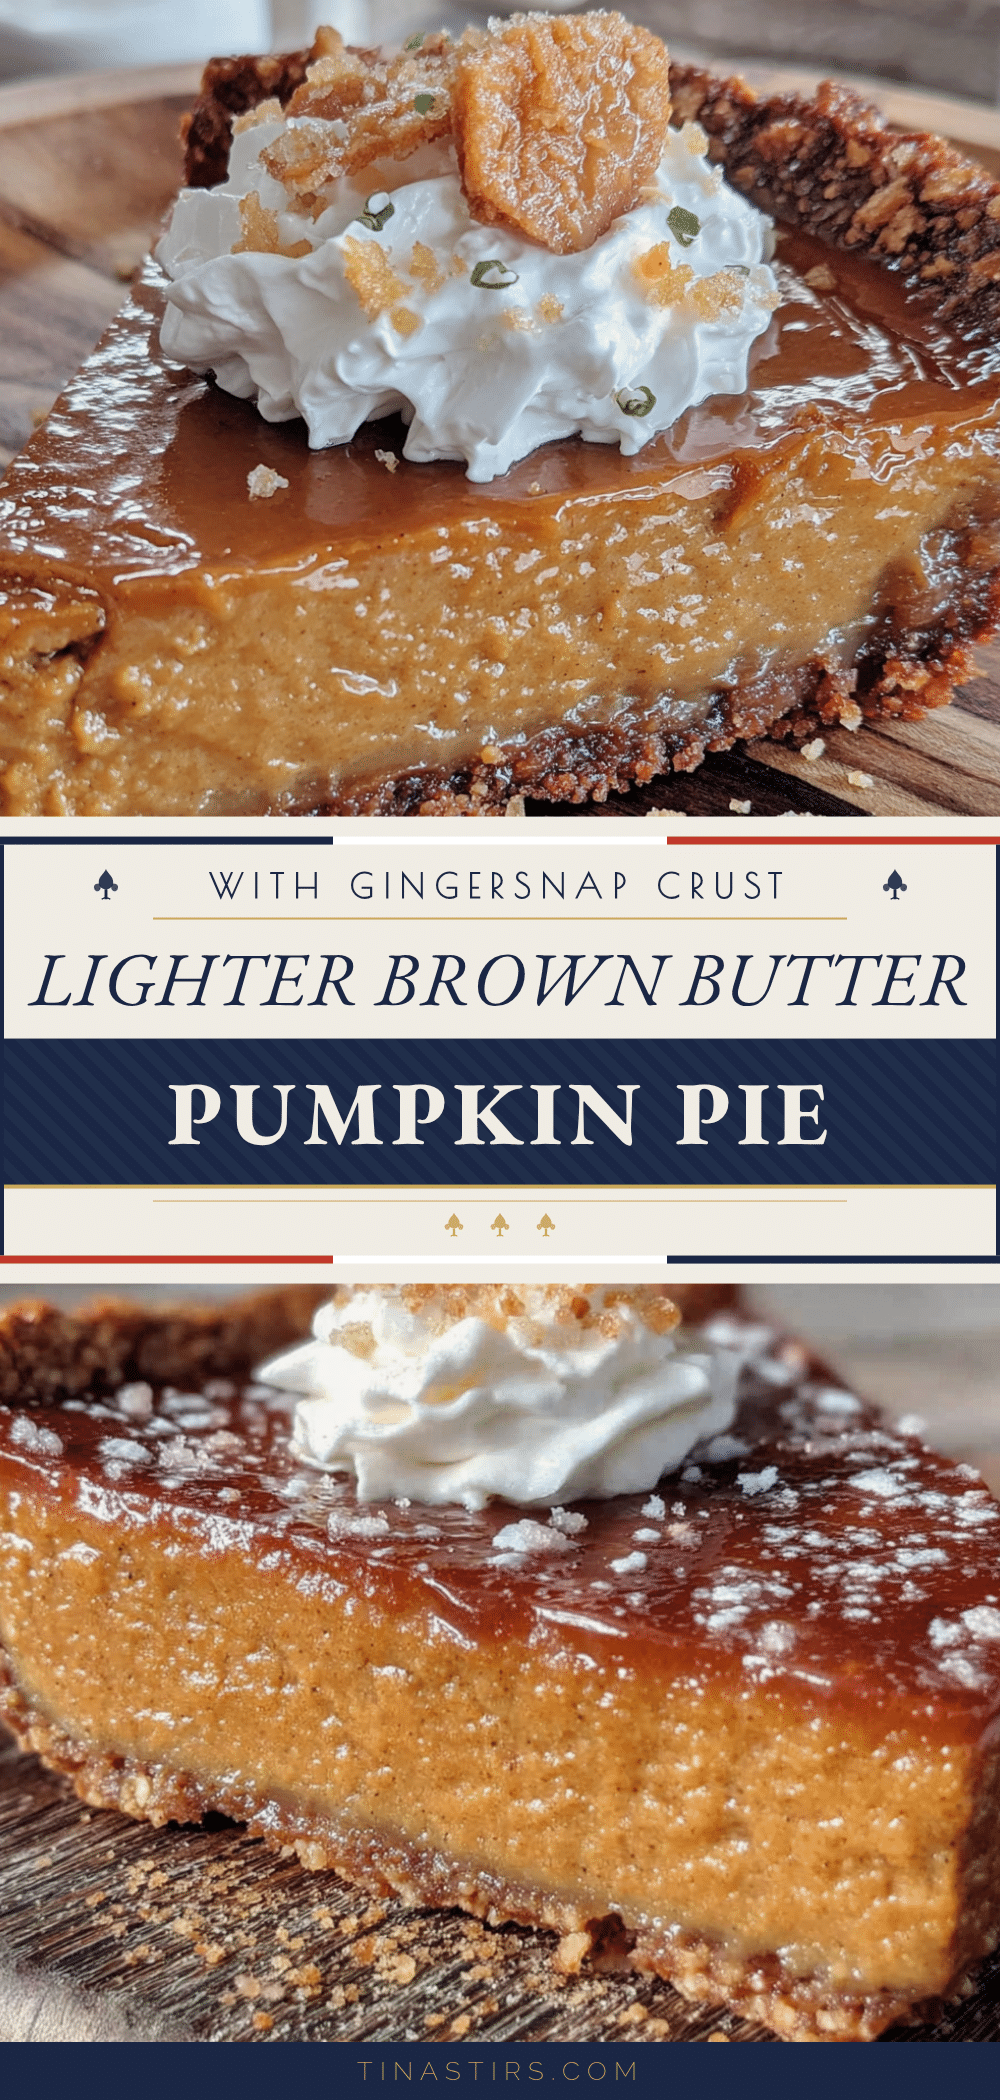
Lighter Brown Butter Pumpkin Pie with Gingersnap Crust
A lighter, faster, and more flavorful pumpkin pie with a nutty brown butter filling and a spicy gingersnap crust that comes together in minutes. Perfect for fall gatherings and Thanksgiving.
- Prep Time: 20 minutes
- Cook Time: 55 minutes
- Total Time: 2 hours 15 minutes (plus cooling)
- Yield: 8 servings 1x
- Category: Dessert
- Cuisine: American
Ingredients
- 1 ½ cups (180g) finely crushed gingersnap cookies
- 5 tablespoons (70g) unsalted butter, melted
- 2 tablespoons (25g) granulated sugar
- ⅛ teaspoon salt
- 1 can (15 ounces or 425g) canned pumpkin puree
- 4 tablespoons (55g) brown butter
- 2 large eggs, at room temperature
- 1 cup (240ml) evaporated milk
- ½ cup (100g) packed light brown sugar
- ¼ cup (50g) granulated sugar
- 1 ½ teaspoons pumpkin pie spice
- 1 teaspoon vanilla extract
- ¼ teaspoon salt
Instructions
- Make the brown butter: Place 4 tablespoons of unsalted butter in a small saucepan over medium heat. Let it melt, then swirl the pan occasionally. After about 3-4 minutes, the butter will start to foam and turn golden. When you see brown specks forming at the bottom and it smells nutty, remove it from the heat immediately. Pour it into a heat-safe bowl to stop the cooking. Set aside to cool slightly.
- Make the gingersnap crust: Preheat your oven to 350°F (175°C). In a medium bowl, combine 1 ½ cups of finely crushed gingersnap crumbs, 2 tablespoons of granulated sugar, and a pinch of salt. Pour in 5 tablespoons of melted butter and stir until the mixture looks like wet sand. Press the mixture firmly into the bottom and up the sides of a 9-inch pie dish. Use the bottom of a measuring cup to press it down evenly. Bake for 8-10 minutes, until the crust is fragrant and slightly darker. Set aside t…
- Make the pumpkin filling: In a large bowl, whisk together 1 can of pumpkin puree, ½ cup packed light brown sugar, ¼ cup granulated sugar, 1 ½ teaspoons of pumpkin pie spice, ¼ teaspoon of salt, and 1 teaspoon of vanilla extract. Whisk until smooth. Add 2 room-temperature eggs, one at a time, whisking well after each addition. Slowly pour in 1 cup of evaporated milk, whisking constantly. Finally, drizzle in the cooled brown butter and whisk until fully combined.
- Assemble and bake: Pour the filling into the pre-baked crust. Place the pie dish on a baking sheet. Bake at 350°F (175°C) for 50-55 minutes. The pie is done when the edges are set and slightly puffed, but the center still jiggles slightly when gently shaken. A knife inserted about 1 inch from the edge should come out clean.
- Cool and serve: Place the pie on a cooling rack and let it cool completely at room temperature, about 2 hours. Do not refrigerate while still warm. Once completely cool, serve immediately or refrigerate for up to 3 days. For clean slices, chill for at least 4 hours before cutting.
Notes
For the best texture, use firm, small-curd gingersnaps. Avoid pumpkin pie mix; use 100% pumpkin puree. Don’t skip browning the butter—it transforms the pie. Cool the pie completely before cutting to avoid a runny mess. The pie can be made a day ahead; flavors improve overnight.
Nutrition
- Serving Size: 1 slice
- Calories: 310
- Sugar: 22
- Sodium: 280
- Fat: 14
- Saturated Fat: 8
- Carbohydrates: 42
- Fiber: 2
- Protein: 5
Keywords: pumpkin pie, brown butter, gingersnap crust, fall dessert, Thanksgiving, easy pumpkin pie, lighter pumpkin pie


