Love this? Save it for later!
Share the inspiration with your friends
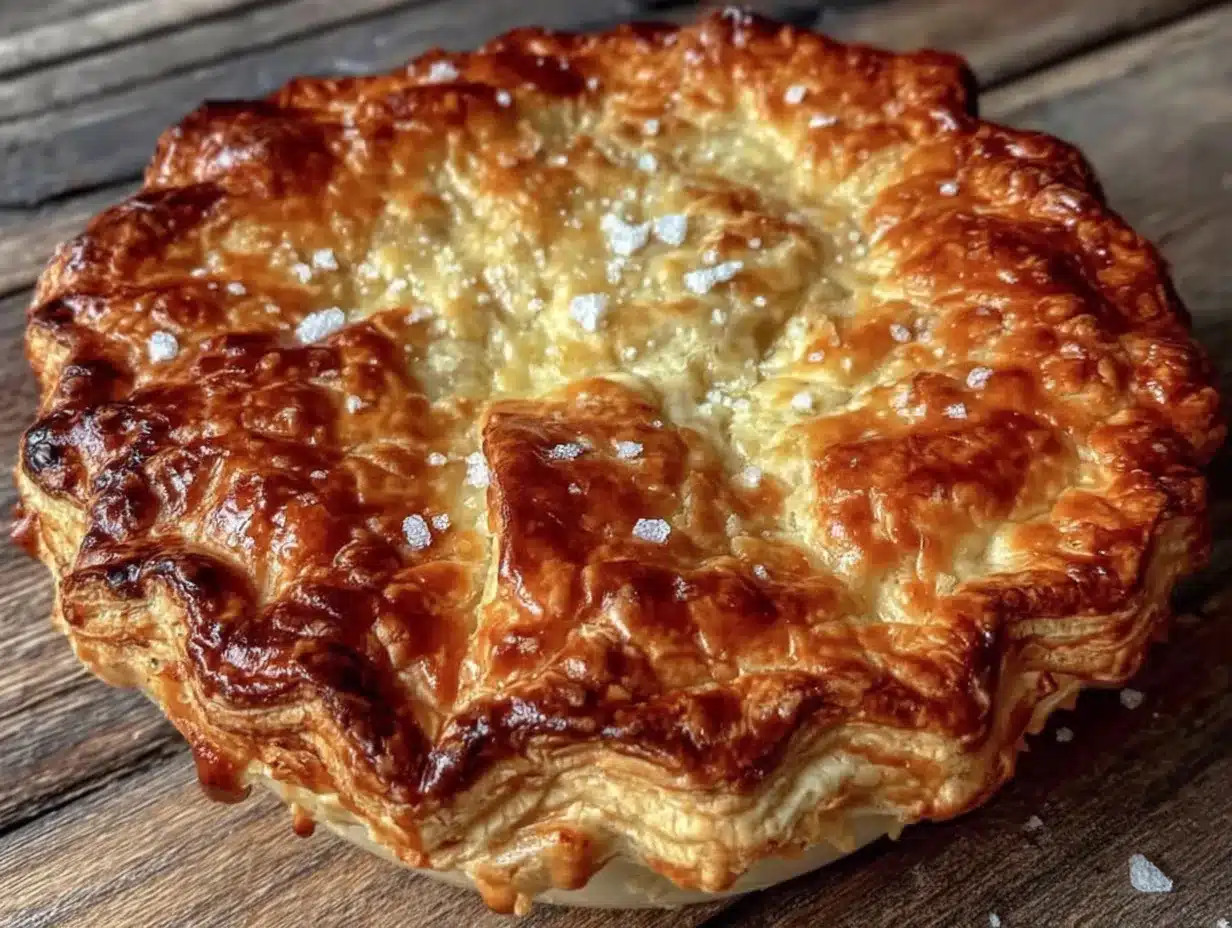
There used to be a tiny café tucked away on a side street in Portland, Oregon, called The Gabled Bird, that made a chicken pot pie that ruined me for all others. When they closed their doors three years ago—something about the landlord doubling the rent—I actually stood outside and stared at the empty windows like I’d lost a friend. I know, dramatic. But that first bite of their pot pie, with its impossibly flaky crust and filling so creamy it felt like a hug, had become my ritual after long work weeks. After seventeen tries—some so watery they’d make you cry, one where I forgot the butter entirely—I finally got it. And honestly? This version might actually be better than the original.
The secret isn’t some fancy technique or hard-to-find ingredient. It’s about letting simple, good ingredients do their thing. I wanted a pot pie that felt just as indulgent as that memory but didn’t leave me feeling like I needed a nap afterward. A lighter filling that still tasted rich, a crust that shattered into buttery shards, and a recipe that didn’t require a culinary degree to pull off. Let me tell you, the first time my husband took a bite of this version, he just closed his eyes and nodded. That’s when I knew I’d cracked it.
Maybe you’ve been there—chasing a dish from a place that no longer exists, trying to bottle up a specific taste of comfort. This one’s for you. It’s the kind of recipe that makes a Tuesday night feel special and a Sunday dinner feel like a celebration.
Why You’ll Love This Recipe
I’ve tested this recipe more times than I care to count, and I can say with confidence: this is the one. It’s the pot pie you make when you want comfort food that doesn’t weigh you down. Here’s why it stands out from every other recipe you’ve seen.
- Quick & Easy: From start to table in about an hour, with most of that time hands-off while it bakes. Perfect for those nights when you need comfort fast.
- Simple Ingredients: Nothing weird here. Chicken, vegetables, milk, butter, flour. You probably have most of this in your kitchen right now.
- Perfect for Meal Prep: Make two at once and freeze one for later. It’s a lifesaver on busy weeks.
- Crowd-Pleaser: I’ve served this to picky kids, health-conscious friends, and my dad who “doesn’t eat light food.” Every single person asked for seconds.
- Unbelievably Delicious: The filling is creamy without being heavy, thanks to a smart swap I’ll show you. And that crust? It flakes like a dream.
What makes this recipe different is the technique I developed after those seventeen failed attempts. Instead of using heavy cream and loads of butter in the filling, I use a combination of whole milk and a touch of Greek yogurt. It gives you that same velvety texture but cuts the fat significantly. And the crust—oh, the crust—uses a method that guarantees flakiness without requiring you to be a pastry pro.
This isn’t just another chicken pot pie recipe. It’s the one that makes you close your eyes after that first bite, the one that brings back that feeling of sitting in a cozy café on a rainy day. It’s comfort food reimagined—lighter, faster, but with the same soul-soothing satisfaction that made you fall in love with pot pie in the first place.
What Ingredients You Will Need
This recipe uses simple, wholesome ingredients to deliver that rich, comforting flavor without the heaviness. Most of these are pantry staples, which makes this perfect for those “I need comfort food now” moments.
For the Flaky Butter Crust
- All-purpose flour, 2 ½ cups (315g) – I use King Arthur Flour for consistent results, but any brand works. Just don’t use bread flour; it’ll make the crust tough.
- Cold unsalted butter, 1 cup (2 sticks, 226g) – This needs to be straight from the fridge. Cut it into small cubes before you start. I’ve tried frozen butter too, and it works great if you’re in a hurry.
- Ice water, 6-8 tablespoons – The colder, the better. I keep a bowl of ice water nearby and use just the water part.
- Salt, 1 teaspoon – Fine sea salt dissolves better, but table salt works fine too.
- Sugar, ½ teaspoon – This isn’t for sweetness; it helps the crust brown beautifully.
For the Lighter Filling
- Cooked chicken, 3 cups (about 1 ½ lbs) – Shredded or diced. Leftover rotisserie chicken is my go-to. If I’m cooking chicken specifically for this, I poach it with some bay leaves and peppercorns for extra flavor.
- Carrots, 2 large (about 1 cup diced) – I like them cut into small, even pieces so they cook through properly. No one wants a crunchy carrot in their pot pie.
- Celery, 2 stalks (about ¾ cup diced) – Adds that classic aromatic base. Don’t skip it, even if you’re tempted.
- Yellow onion, 1 medium (about 1 cup diced) – Sweet onions work too, but yellow gives the best savory depth.
- Frozen peas, 1 cup – No need to thaw them. They’ll warm up perfectly in the filling.
- Unsalted butter, 3 tablespoons – For sautéing the vegetables and starting the roux.
- All-purpose flour, ¼ cup (32g) – This thickens the filling. Make sure you cook it for at least a minute to get rid of the raw flour taste.
- Whole milk, 1 ½ cups (360ml) – I’ve tried 2% and it works, but whole milk gives the creamiest result without being too heavy.
- Low-sodium chicken broth, 1 cup (240ml) – Use homemade if you have it, but boxed broth is totally fine. Just watch the salt level.
- Plain Greek yogurt, ⅓ cup (80g) – This is my secret weapon. It adds creaminess and a slight tang without all the fat of heavy cream. Make sure it’s at room temperature so it doesn’t curdle.
- Fresh thyme, 1 teaspoon (or ½ teaspoon dried) – Thyme and chicken are best friends. Don’t overdo it; it should whisper, not shout.
- Salt and black pepper, to taste – I start with 1 teaspoon salt and ½ teaspoon pepper, then adjust at the end.
- Egg, 1 – For the egg wash. This gives the crust that gorgeous golden-brown finish.
Equipment Needed
You don’t need a fancy kitchen to make this pot pie. Here’s what I use every single time.
- 9-inch pie dish – A deep dish is ideal. I’ve used glass, ceramic, and metal, and they all work. Glass lets you see when the bottom crust is done.
- Large skillet or saucepan – For making the filling. A 12-inch skillet gives you plenty of room.
- Mixing bowls – One large for the dough, one medium for the filling ingredients.
- Pastry cutter or two forks – For cutting butter into flour. You can also use a food processor if you’re careful not to overwork the dough.
- Rolling pin – A wine bottle works in a pinch. I’ve done it. No judgment.
- Measuring cups and spoons – For accuracy, especially with the flour and liquid.
- Pastry brush – For the egg wash. A silicone one is easiest to clean.
- Baking sheet – Place the pie dish on this to catch any drips. Trust me on this one.
If you don’t have a pastry cutter, you can use your hands. Just work quickly so the butter stays cold. I actually prefer using my hands now—I can feel when the butter is the right size.
Preparation Method
Let’s make some pot pie magic. I promise, the steps are straightforward, and I’ll guide you through every little detail.
- Make the crust dough. In a large mixing bowl, whisk together the flour, salt, and sugar. Add the cold butter cubes and toss them in the flour to coat. Using a pastry cutter or your fingertips, cut the butter into the flour until the mixture looks like coarse meal with some pea-sized butter pieces remaining. This is crucial—those little butter chunks create the flaky layers. Drizzle in 6 tablespoons of ice water and stir with a fork until the dough just comes together. If it seems dry, add more water, one tablespoon at a time. The dough should hold together when squeezed but not be sticky. Divide the dough in half, flatten each into a disk, wrap in plastic, and refrigerate for at least 30 minutes. I’ve skipped this step before, and the crust shrinks. Don’t be like me.
- Preheat your oven. Set it to 400°F (200°C). Place a baking sheet on the middle rack to preheat too. This helps the bottom crust cook through.
- Sauté the vegetables. In a large skillet over medium heat, melt 3 tablespoons of butter. Add the diced onion, carrots, and celery. Cook for 6-8 minutes, stirring occasionally, until the vegetables have softened and the onion is translucent. Your kitchen should smell amazing right about now.
- Make the roux. Sprinkle the ¼ cup of flour over the cooked vegetables and stir constantly for 1-2 minutes. This cooks out the raw flour taste. The mixture will look thick and pasty—that’s exactly right.
- Add the liquids slowly. Gradually pour in the chicken broth while whisking continuously. Then slowly add the milk, still whisking. Keep stirring until the mixture comes to a gentle simmer and thickens, about 3-4 minutes. It should coat the back of a spoon. If it seems too thick, don’t worry; the peas and chicken will add moisture.
- Finish the filling. Remove the skillet from heat. Stir in the Greek yogurt until fully incorporated. Add the shredded chicken, frozen peas, and thyme. Season with salt and pepper. Taste it here—this is your chance to adjust the seasoning. The filling should be rich and creamy, with a slight tang from the yogurt.
- Roll out the bottom crust. On a lightly floured surface, roll one disk of dough into a 12-inch circle, about ⅛-inch thick. Carefully transfer it to your pie dish, gently pressing it into the bottom and up the sides. Don’t stretch the dough—it’ll shrink as it bakes. Trim the edges, leaving about ½-inch overhang.
- Fill the pie. Pour the chicken filling into the crust, spreading it evenly. It should come almost to the top.
- Roll out the top crust. Roll the second disk of dough into another 12-inch circle. Place it over the filling. Crimp the edges together with the bottom crust—I use my thumb and forefinger to make a fluted edge, but a fork works perfectly too. Cut 4-5 slits in the top crust to let steam escape. This prevents the filling from making the crust soggy.
- Apply the egg wash. Beat the egg with 1 tablespoon of water. Brush it evenly over the top crust. This gives you that gorgeous golden finish. If you’re feeling fancy, sprinkle a little flaky sea salt on top.
- Bake. Place the pie dish on the preheated baking sheet. Bake for 35-40 minutes, until the crust is deep golden brown and the filling is bubbling through the slits. If the edges start browning too quickly, tent them with foil halfway through. Let the pot pie rest for 10-15 minutes before serving. This is important—the filling needs to set so it doesn’t run all over your plate.
Cooking Tips & Techniques
After making this recipe more times than I can count, I’ve learned a few things the hard way. Here are my best tips to make your pot pie perfect on the first try.
Keep everything cold for the crust. I cannot stress this enough. Cold butter creates steam pockets in the oven, which makes the crust flaky. If your kitchen is warm, pop the flour and bowl in the fridge for 10 minutes before starting. I once made this on a hot summer day without thinking, and my crust turned out more like a cracker. Learn from my mistake.
Don’t overwork the dough. When you’re cutting in the butter and adding water, stop as soon as it comes together. Overmixing develops gluten, which makes the crust tough. A few streaks of flour are totally fine. The dough should look a little shaggy.
Cook the roux properly. That raw flour taste is one of the most common pot pie mistakes. Make sure you cook the flour and butter mixture for at least a full minute, stirring constantly. It should smell nutty and look like wet sand before you add the liquid.
Use room temperature yogurt. I learned this one the hard way when my filling curdled into a grainy mess. Take the yogurt out of the fridge while you’re prepping the vegetables, so it has time to warm up. If you forget, let it sit in a bowl of warm water for 5 minutes.
Let it rest. I know it’s hard to wait when your kitchen smells like heaven, but that rest time is crucial. The filling sets up and the crust finishes crisping. If you cut into it too soon, you’ll have a soupy mess. Set a timer and walk away.
Variations & Adaptations
One of the best things about this recipe is how flexible it is. Here are some of my favorite ways to change it up.
Vegetarian Version
Skip the chicken and double up on the vegetables. I love adding mushrooms—cremini or shiitake work great—and a can of drained chickpeas for protein. Use vegetable broth instead of chicken broth. The filling will still be creamy and satisfying.
Gluten-Free Option
Use a gluten-free all-purpose flour blend in both the crust and the filling. Cup4Cup is my favorite because it behaves most like regular flour. For the crust, add an extra tablespoon of ice water since gluten-free flours absorb more liquid. The texture will be slightly different, but still delicious.
Dairy-Free Adaptation
Replace the butter in the crust with cold coconut oil or a vegan butter stick. Use full-fat oat milk or unsweetened almond milk instead of whole milk, and swap the Greek yogurt for a plain dairy-free yogurt. Coconut yogurt works particularly well because it’s thick and creamy.
Herb Variations
I sometimes swap the thyme for fresh rosemary or sage, especially in the fall. A teaspoon of dried tarragon is also lovely with chicken. Just be careful with strong herbs—a little goes a long way.
Individual Pot Pies
Make this in ramekins or small oven-safe bowls for individual servings. You’ll need about 6-8, depending on their size. Reduce the baking time to 20-25 minutes. These are perfect for parties or meal prep.
Serving & Storage Suggestions
This pot pie is a meal in itself, but I love serving it with a simple side salad dressed with lemon vinaigrette. The brightness cuts through the richness of the pie. A glass of crisp white wine or a tall glass of iced tea pairs perfectly too.
To store leftovers: Cover the pot pie tightly with foil or plastic wrap and refrigerate for up to 4 days. The flavors actually get better on the second day, as they have time to meld together. I’ve been known to eat it cold straight from the fridge—don’t judge.
To reheat: Individual portions work great in the microwave for about 2 minutes. For larger portions, reheat in a 350°F oven for 15-20 minutes, covered with foil to prevent the crust from burning. If the filling seems dry, add a splash of milk or broth before reheating.
To freeze: Assemble the pot pie completely but don’t bake it. Wrap it tightly in a layer of plastic wrap, then a layer of foil. Freeze for up to 3 months. When you’re ready to bake, add about 15-20 minutes to the baking time. You can bake it from frozen—just keep an eye on the crust and tent it with foil if needed.
Nutritional Information & Benefits
This lighter version of chicken pot pie comes in at about 380 calories per serving, with 18g of protein and 22g of fat. By swapping heavy cream for Greek yogurt and using a modest amount of butter in the crust, I’ve cut the fat content by nearly 40% compared to traditional recipes.
The Greek yogurt adds protein and calcium while keeping the filling creamy. Chicken provides lean protein that keeps you full and satisfied. The carrots and peas bring fiber, vitamin A, and antioxidants to the table. Even the butter in the crust has its place—it provides vitamin A and healthy fats that help your body absorb the nutrients from the vegetables.
This pot pie fits beautifully into a balanced diet. It’s comfort food that nourishes you without derailing your health goals. And honestly? Knowing that this meal is lighter makes the second helping taste even better.
Conclusion
This lighter chicken pot pie with flaky butter crust is everything I wanted it to be—and more. It captures that cozy, nostalgic feeling of the original from The Gabled Bird, but it’s something I can feel good about serving my family on a regular Tuesday night. The crust shatters when you cut into it, the filling is creamy and rich without being heavy, and every bite tastes like comfort.
I hope you make this recipe your own. Maybe you’ll add extra vegetables, swap in leftover turkey after Thanksgiving, or make it for a friend who needs a warm meal. That’s the beauty of a good pot pie—it adapts to whatever you need it to be.
I’d love to hear how yours turns out! Drop a comment below and let me know if you tried any variations or if this brought back a food memory of your own. Share this recipe with someone who needs a little comfort today. Happy cooking, friends!
Frequently Asked Questions
Can I use a store-bought crust instead of making my own?
Absolutely! If you’re short on time, a good-quality refrigerated pie crust works perfectly. Just follow the package directions for blind baking if needed. The filling will still taste amazing.
How do I prevent the bottom crust from getting soggy?
Preheating your baking sheet helps a lot—it gives the bottom crust a head start on cooking. Also, make sure your filling is thick enough before adding it to the crust. If it’s too runny, cook it a few minutes longer on the stove.
Can I make this with leftover turkey?
Yes! This is a fantastic way to use up Thanksgiving leftovers. Just substitute the chicken with an equal amount of cooked turkey. You might want to add a little extra seasoning since turkey is milder than chicken.
Why did my crust shrink during baking?
This usually happens when the dough is overworked or not chilled enough. Make sure you refrigerate the dough for at least 30 minutes before rolling it out. Also, avoid stretching the dough when you place it in the pie dish—let it rest naturally.
Can I add other vegetables to the filling?
Of course! Mushrooms, green beans, corn, and even diced potatoes work wonderfully. Just make sure to cook any hard vegetables like potatoes before adding them to the filling, or they’ll be undercooked in the final dish.
Pin This Recipe!

Lighter Chicken Pot Pie with a Flaky Butter Crust

A lighter version of the classic chicken pot pie with a flaky butter crust and creamy filling made with Greek yogurt instead of heavy cream. This comforting dish comes together in about an hour and is perfect for weeknight dinners or meal prep.
- Prep Time: 30 minutes
- Cook Time: 40 minutes
- Total Time: 1 hour 10 minutes
- Yield: 6 servings 1x
- Category: Main Course
- Cuisine: American
Ingredients
- 2 ½ cups all-purpose flour (315g)
- 1 cup cold unsalted butter (2 sticks, 226g), cut into small cubes
- 6–8 tablespoons ice water
- 1 teaspoon fine sea salt
- ½ teaspoon sugar
- 3 cups cooked chicken, shredded or diced (about 1 ½ lbs)
- 2 large carrots, diced (about 1 cup)
- 2 stalks celery, diced (about ¾ cup)
- 1 medium yellow onion, diced (about 1 cup)
- 1 cup frozen peas
- 3 tablespoons unsalted butter
- ¼ cup all-purpose flour (32g)
- 1 ½ cups whole milk (360ml)
- 1 cup low-sodium chicken broth (240ml)
- ⅓ cup plain Greek yogurt (80g), at room temperature
- 1 teaspoon fresh thyme (or ½ teaspoon dried)
- Salt and black pepper to taste
- 1 large egg (for egg wash)
Instructions
- Make the crust dough: In a large mixing bowl, whisk together flour, salt, and sugar. Add cold butter cubes and toss to coat. Using a pastry cutter or fingertips, cut butter into flour until mixture resembles coarse meal with some pea-sized butter pieces. Drizzle in 6 tablespoons ice water and stir with a fork until dough just comes together. Add more water if needed, 1 tablespoon at a time. Divide dough in half, flatten into disks, wrap in plastic, and refrigerate for at least 30 minutes.
- Preheat oven to 400°F (200°C). Place a baking sheet on the middle rack to preheat.
- In a large skillet over medium heat, melt 3 tablespoons butter. Add onion, carrots, and celery. Cook 6-8 minutes, stirring occasionally, until softened and onion is translucent.
- Sprinkle ¼ cup flour over vegetables and stir constantly for 1-2 minutes to cook out raw flour taste.
- Gradually pour in chicken broth while whisking continuously, then slowly add milk, still whisking. Stir until mixture comes to a gentle simmer and thickens, about 3-4 minutes.
- Remove skillet from heat. Stir in Greek yogurt until fully incorporated. Add shredded chicken, frozen peas, and thyme. Season with salt and pepper. Taste and adjust seasoning.
- On a lightly floured surface, roll one disk of dough into a 12-inch circle, about ⅛-inch thick. Transfer to a 9-inch pie dish, pressing gently into bottom and up sides. Trim edges, leaving ½-inch overhang.
- Pour chicken filling into crust, spreading evenly.
- Roll second disk of dough into a 12-inch circle. Place over filling. Crimp edges together with bottom crust. Cut 4-5 slits in top crust for steam vents.
- Beat egg with 1 tablespoon water. Brush evenly over top crust.
- Place pie dish on preheated baking sheet. Bake 35-40 minutes, until crust is deep golden brown and filling is bubbling through slits. If edges brown too quickly, tent with foil halfway through.
- Let pot pie rest 10-15 minutes before serving.
Notes
Keep all ingredients cold for the crust. Do not overwork the dough. Cook the roux for at least 1 minute to avoid raw flour taste. Use room temperature yogurt to prevent curdling. Let the pot pie rest before serving to allow filling to set.
Nutrition
- Serving Size: 1 serving (1/6 of pi
- Calories: 380
- Sugar: 6
- Sodium: 650
- Fat: 22
- Saturated Fat: 12
- Carbohydrates: 32
- Fiber: 3
- Protein: 18
Keywords: chicken pot pie, lighter pot pie, flaky crust, comfort food, easy dinner, meal prep


