Love this? Save it for later!
Share the inspiration with your friends
There used to be a tiny bakery tucked between a dry cleaner and a vintage shop on Main Street that made the most incredible Rice Krispies Treats you could imagine. When they closed their doors three years ago, I honestly felt a little lost. They weren’t fancy pastries or artisanal breads—they were glorified cereal bars, but somehow, they were perfect. After twelve tries—some too sticky, some rock hard, one that I accidentally burned so badly I had to air out the kitchen for two days—I finally got it. These Lighter Christmas Rice Krispie Treats with M&Ms are my love letter to that little bakery.
The original version used way too much butter and marshmallows that practically glued your teeth together. Delicious? Sure. But let’s face it, after a handful, you felt like you needed a nap. I wanted something I could feel good about eating while watching Elf for the fifth time that season. Something that still tasted indulgent but didn’t leave me regretting my life choices. Maybe you’ve been there—standing in the kitchen at 10 PM, craving something sweet but not wanting to undo all your good habits from the week.
This version uses a few smart swaps that make all the difference. The texture is still that perfect combination of chewy and crispy, but it’s lighter, brighter, and somehow more festive. The M&Ms add little pops of color and chocolate that make these feel special without being over the top. Honestly, I think the original bakery would approve. I keep making these because they remind me that you don’t need a ton of butter and sugar to create something worth remembering. Sometimes the best recipes are the ones you tweak until they feel just right.
Why You’ll Love This Recipe
Let me tell you why these Lighter Christmas Rice Krispie Treats with M&Ms have become my go-to holiday treat. I’ve tested this recipe more times than I care to admit, and each batch taught me something new about getting that perfect balance between indulgence and feeling good.
- Quick & Easy: Comes together in under 15 minutes, perfect for those last-minute holiday cravings or when you need a dessert for a cookie exchange and forgot until the night before. I’ve been there, trust me.
- Simple Ingredients: No fancy grocery trips needed. You likely already have everything in your kitchen except maybe the festive M&Ms. Even those are easy to find during the holiday season.
- Perfect for Holiday Gatherings: Great for Christmas parties, classroom treats, or just a cozy night in with the family. The red and green M&Ms make them look like you put in way more effort than you actually did.
- Crowd-Pleaser: Always gets rave reviews from kids and adults alike. I brought these to a neighborhood potluck and watched them disappear faster than the fancy cookies someone spent all day making.
- Unbelievably Delicious: The texture and flavor combo is next-level comfort food. You get that classic Rice Krispies Treat chewiness, but it’s lighter and doesn’t weigh you down.
What makes this recipe different from the rest? It’s the ratio. I spent way too long figuring out the perfect balance of marshmallows to cereal, and the secret is using a bit less butter and a touch more marshmallow than you’d expect. The result is a treat that holds together beautifully without being greasy or overly sweet. Plus, the M&Ms add a nice crunch that contrasts with the soft marshmallow base. This isn’t just another version—it’s my best version after countless trials and a few spectacular failures.
This recipe is the kind that makes you close your eyes after the first bite. It’s comfort food reimagined—healthier, faster, but with the same soul-soothing satisfaction. Perfect for impressing guests without stress, or turning a simple Tuesday night into something a little more magical.
What Ingredients You Will Need
This recipe uses simple, wholesome ingredients to deliver that classic Rice Krispies Treat experience without the heavy feeling. Most of these are pantry staples, especially during the holiday season when you’re likely already stocked up on baking supplies.
- Unsalted butter, 3 tablespoons (42g) – I prefer using unsalted so I can control the salt level. If you only have salted, just skip the extra pinch of salt later. (adds richness without overwhelming)
- Mini marshmallows, 10 ounces (about 5 cups) – The mini ones melt faster and more evenly than the big ones. I’ve tried both, and mini is definitely the way to go for that smooth, even coating.
- Brown rice cereal, 6 cups (about 180g) – This is the secret to making these lighter. Brown rice cereal has a nuttier flavor and more fiber than the regular version. I recommend the One Degree Organic Brown Rice Crisps for the best texture.
- Vanilla extract, 1 teaspoon – Pure vanilla makes a difference here. The imitation stuff has a weird aftertaste that you’ll notice in such a simple recipe.
- Salt, ¼ teaspoon – Just a pinch to balance the sweetness. Don’t skip this—it makes the flavors pop.
- Christmas M&Ms, ½ cup (about 100g) – The red and green ones are perfect for the season. You can also use Holiday M&M Minis if you want smaller pieces distributed throughout.
- Coconut oil, 1 teaspoon (optional) – For greasing your spatula and pan. It works better than butter and doesn’t add extra flavor.
Ingredient Selection Tips: Look for marshmallows that are fresh and soft. Stale marshmallows won’t melt as smoothly and can leave you with lumpy treats. For the cereal, I’ve found that store-brand versions work fine, but they tend to be more fragile and can crush easier when you’re mixing. If you want that perfect texture, go with a trusted brand.
Substitution Guidance: For a gluten-free option, make sure your brown rice cereal is certified gluten-free (most are). You can swap the butter with vegan butter or coconut oil for a dairy-free version. If you can’t find Christmas M&Ms, regular M&Ms work fine, or try chopped dark chocolate for a less sweet option.
Equipment Needed
Nothing fancy here—just basic kitchen tools you probably already have. Here’s what you’ll need:
- Large pot (4-quart or larger) – You need room to stir everything together without spilling. I use my Dutch oven for this because it distributes heat evenly.
- Rubber spatula – A silicone one is best because it won’t melt when you’re stirring the hot marshmallow mixture. Trust me, I learned this the hard way.
- 9×13 inch baking dish – This gives you the perfect thickness. If you want thicker treats, use an 8×8 inch dish.
- Parchment paper – Makes cleanup a breeze and helps you lift the treats out of the pan. Don’t use wax paper—it’ll melt.
- Measuring cups and spoons – For accuracy. I’ve eyeballed it before and ended up with a mess.
- Sharp knife – For cutting clean squares. A dull knife will squish the treats.
Budget-Friendly Options: If you don’t have a 9×13 dish, you can use a rimmed baking sheet. The treats will be thinner, but they’ll still taste great. A wooden spoon works fine if you don’t have a rubber spatula, just be careful not to crush the cereal.
Preparation Method
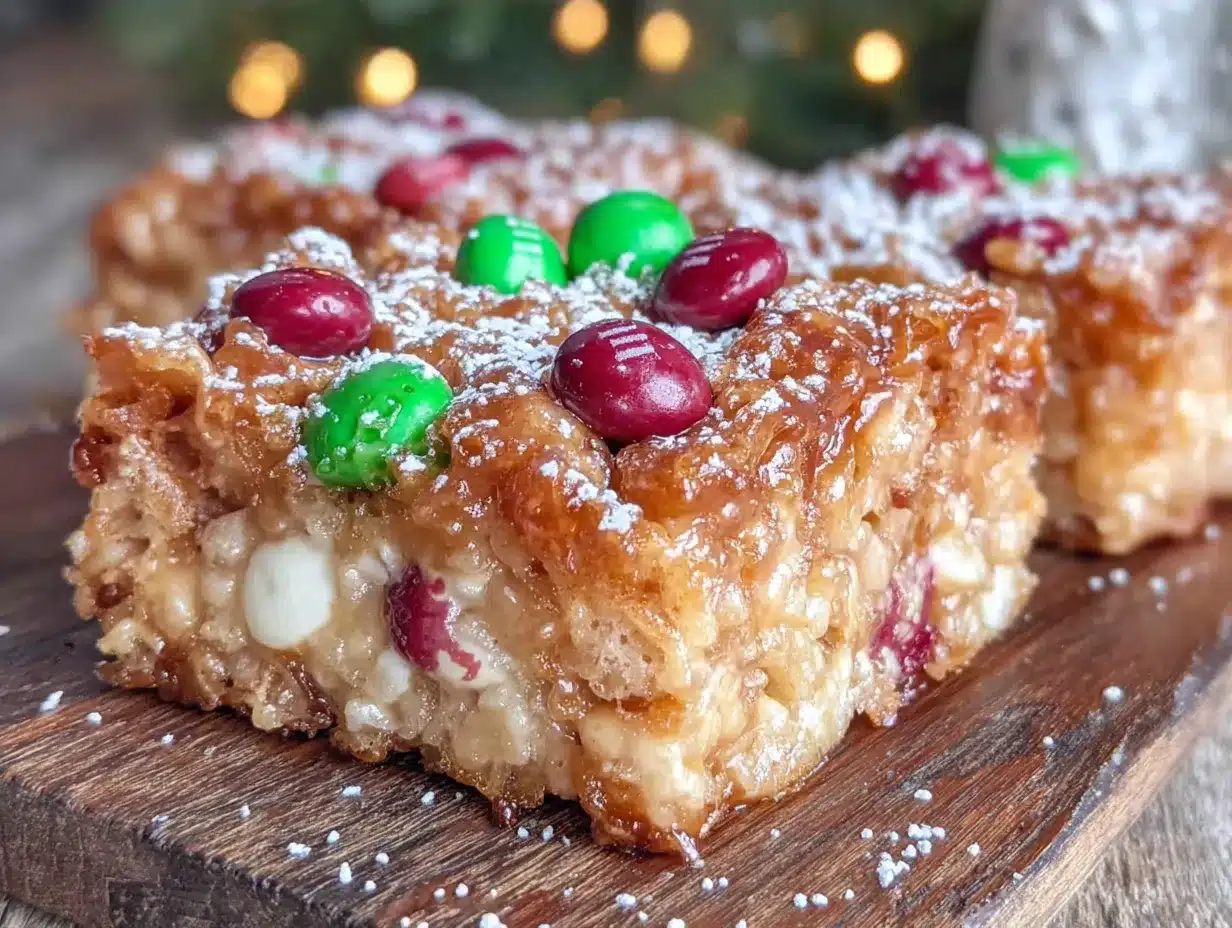
- Prep your pan (2 minutes). Line your 9×13 inch baking dish with parchment paper, leaving some overhang on two sides. This creates handles for lifting the treats out later. Lightly grease the parchment with a tiny bit of coconut oil or butter.
- Melt the butter (3 minutes). Place your large pot over medium-low heat and add the 3 tablespoons of butter. Let it melt slowly, stirring occasionally. You want it just melted, not bubbling or browning. If it starts to brown, your heat is too high. I’ve burned butter more times than I want to admit, so keep an eye on it.
- Add the marshmallows (4-5 minutes). Once the butter is melted, dump in all 10 ounces of mini marshmallows. Stir constantly with your rubber spatula until they’re completely melted and smooth. This takes about 4-5 minutes. The mixture should look glossy and uniform. Don’t walk away—marshmallows can go from melted to burnt in seconds.
- Season the mixture (30 seconds). Remove the pot from the heat. Stir in the 1 teaspoon of vanilla extract and ¼ teaspoon of salt. The mixture will bubble up a bit—that’s normal. Give it a good stir to combine everything.
- Add the cereal (2 minutes). Pour in the 6 cups of brown rice cereal. Fold it into the marshmallow mixture gently but thoroughly. Use a cutting motion with your spatula to make sure every piece of cereal gets coated. Don’t stir too aggressively or you’ll crush the cereal and end up with dense treats.
- Add the M&Ms (1 minute). Once the cereal is mostly coated, add ½ cup of Christmas M&Ms. Fold them in gently, reserving a handful to press on top later. The heat from the mixture will soften the M&Ms slightly, so work quickly.
- Press into the pan (5 minutes). Scrape the mixture into your prepared pan. Lightly grease your spatula or your hands with coconut oil, then press the mixture evenly into the pan. Don’t press too hard—you want them compact but not dense. Press the reserved M&Ms into the top for a pretty presentation.
- Let them set (30 minutes). Let the treats cool completely at room temperature. Don’t put them in the fridge—they’ll get too hard. Once cool, use the parchment handles to lift them out of the pan and cut into squares with a sharp knife.
Sensory Cue: When you’re pressing the mixture, it should feel warm but not hot. The marshmallow should stretch slightly as you press, and you’ll see little flecks of color from the M&Ms peeking through. The smell is incredible—like melted marshmallows and vanilla with a hint of toasty cereal.
Cooking Tips & Techniques
Here are some things I’ve learned from my many attempts at making these Lighter Christmas Rice Krispie Treats with M&Ms. Some of these came from spectacular failures, so take notes.
Low and slow is the way to go. When melting the butter and marshmallows, keep the heat on medium-low. High heat will scorch the marshmallows and give you a bitter, brown mess. I ruined an entire batch this way and had to start over. The gentle heat gives you a smoother, more even melt.
Work quickly but carefully. Once you add the cereal, you have about 2-3 minutes before the marshmallow mixture starts to set. If it gets too stiff, you can microwave the whole pot for 10-15 seconds to loosen it up. But honestly, it’s better to just move fast and press it into the pan while it’s still warm.
Don’t overmix. I know it’s tempting to keep stirring to make sure everything is coated, but overmixing crushes the cereal and makes the treats dense and tough. Fold just until you don’t see any dry cereal, then stop. A few uneven spots are totally fine.
Grease everything. Your spatula, your hands, the parchment paper—grease it all with a little coconut oil. This prevents sticking and makes cleanup so much easier. I learned this after spending 20 minutes scrubbing marshmallow residue off my spatula.
Cut with confidence. Use a sharp knife and cut in one smooth motion. Don’t saw back and forth—that’ll squish the treats and mess up the edges. Wipe the knife clean between cuts for neat squares.
Variations & Adaptations
One of the best things about this recipe is how easy it is to change up. Here are some variations I’ve tried and loved:
- Vegan Version: Swap the butter for vegan butter or coconut oil, and use vegan marshmallows (Dandies are my favorite). The texture is slightly different—a bit chewier—but still delicious. I made this for a friend who’s vegan and she asked for the recipe immediately.
- Peppermint Twist: Add ½ teaspoon of peppermint extract along with the vanilla, and crush up some candy canes to sprinkle on top. The mint and chocolate combo is so festive. Just be careful—peppermint extract is strong, so don’t overdo it.
- Dark Chocolate Lover’s Version: Use dark chocolate M&Ms instead of milk chocolate, and add 2 tablespoons of cocoa powder to the marshmallow mixture. This gives you a richer, more sophisticated treat that adults will love.
- Nutty Addition: Fold in ¼ cup of toasted chopped almonds or pecans along with the M&Ms. The crunch is amazing, and it adds a little protein to make these feel more substantial.
- White Chocolate Dream: Swap the regular M&Ms for white chocolate M&Ms, and add ¼ cup of white chocolate chips to the marshmallow mixture. The creamy sweetness is perfect for those who prefer white chocolate.
I personally love the peppermint twist version during the holidays. It feels extra special and the red and white colors are so pretty against the golden treats.
Serving & Storage Suggestions
These Lighter Christmas Rice Krispie Treats with M&Ms are best served at room temperature. The texture is perfect—chewy but not sticky, with a slight crunch from the cereal and M&Ms. I like to arrange them on a festive platter with a few extra M&Ms scattered around for color.
Complementary Dishes: These pair beautifully with a warm cup of hot cocoa or a peppermint mocha. If you’re serving them at a party, they go great with other no-bake treats like chocolate truffles or peanut butter balls. For a more balanced dessert spread, serve them alongside fresh fruit or a light angel food cake.
Storage Instructions: Store the treats in an airtight container at room temperature for up to 5 days. Layer them with parchment paper between each layer to prevent sticking. Do not refrigerate them—the cold will make them hard and chewy in a bad way.
Freezer Tips: You can freeze these for up to 3 months. Wrap each square individually in plastic wrap, then place them in a freezer-safe bag. To thaw, just leave them at room temperature for about 30 minutes. The texture stays surprisingly good, though they’re best fresh.
Flavor Development: These treats actually get a little better after a day or two. The marshmallow softens slightly and the flavors meld together. Just make sure they’re stored properly so they don’t dry out.
Nutritional Information & Benefits
Here’s the estimated nutritional information for one treat (based on 16 servings):
| Nutrient | Amount per Serving |
|---|---|
| Calories | 145 |
| Total Fat | 5g |
| Saturated Fat | 3g |
| Cholesterol | 10mg |
| Sodium | 95mg |
| Total Carbohydrates | 25g |
| Dietary Fiber | 1g |
| Sugars | 14g |
| Protein | 1g |
Health Benefits: Using brown rice cereal adds a bit more fiber and nutrients compared to regular Rice Krispies. Brown rice is a whole grain that provides magnesium, selenium, and B vitamins. The M&Ms are mostly for fun, but dark chocolate does contain antioxidants. This version has about 30% less butter than traditional recipes, which cuts down on saturated fat without sacrificing flavor.
Dietary Considerations: This recipe is naturally gluten-free if you use certified gluten-free cereal. It’s also nut-free (unless you add nuts), making it safe for school parties. For a lower-sugar option, you can reduce the M&Ms or use sugar-free chocolate chips instead. Just note that the texture and taste will be slightly different.
Conclusion
These Lighter Christmas Rice Krispie Treats with M&Ms are proof that you don’t need a ton of butter and sugar to create something truly special. They’re quick enough for a last-minute craving, festive enough for holiday gatherings, and light enough that you won’t feel guilty reaching for a second one. Honestly, after all those failed attempts in my kitchen, these are the treats I’m proud to share.
I’d love to hear how yours turn out! Did you try any of the variations? Did you add your own twist? Drop a comment below and let me know. And if you’re looking for more holiday treats that won’t weigh you down, check out my healthy chocolate crinkle cookies or these flourless peppermint brownies. Happy holidays, and happy snacking!
Frequently Asked Questions
Can I use regular Rice Krispies instead of brown rice cereal?
Absolutely. Regular Rice Krispies work perfectly fine. The brown rice version just adds a bit more fiber and a nuttier flavor. If you’re using regular, the measurements stay the same.
Why did my treats turn out hard?
This usually happens if you overcook the marshmallow mixture or press the treats too firmly into the pan. Keep the heat low when melting, and press gently—just enough to spread them evenly. Also, make sure you’re not using stale marshmallows, which can make the mixture stiff.
Can I make these ahead of time for a party?
Yes! These are actually great for making a day or two in advance. Store them in an airtight container at room temperature, and they’ll stay fresh for up to 5 days. Just wait to add any extra toppings until right before serving.
How do I cut clean squares without everything sticking?
Grease your knife with a little butter or coconut oil before cutting. Wipe the blade clean between cuts. A sharp knife also helps—dull blades tend to squish the treats rather than slice through them cleanly.
Can I freeze these treats?
Yes, they freeze well for up to 3 months. Wrap each square individually in plastic wrap, then place them in a freezer-safe bag. Thaw at room temperature for about 30 minutes before serving. The texture will be slightly softer than fresh, but still delicious.
Pin This Recipe!
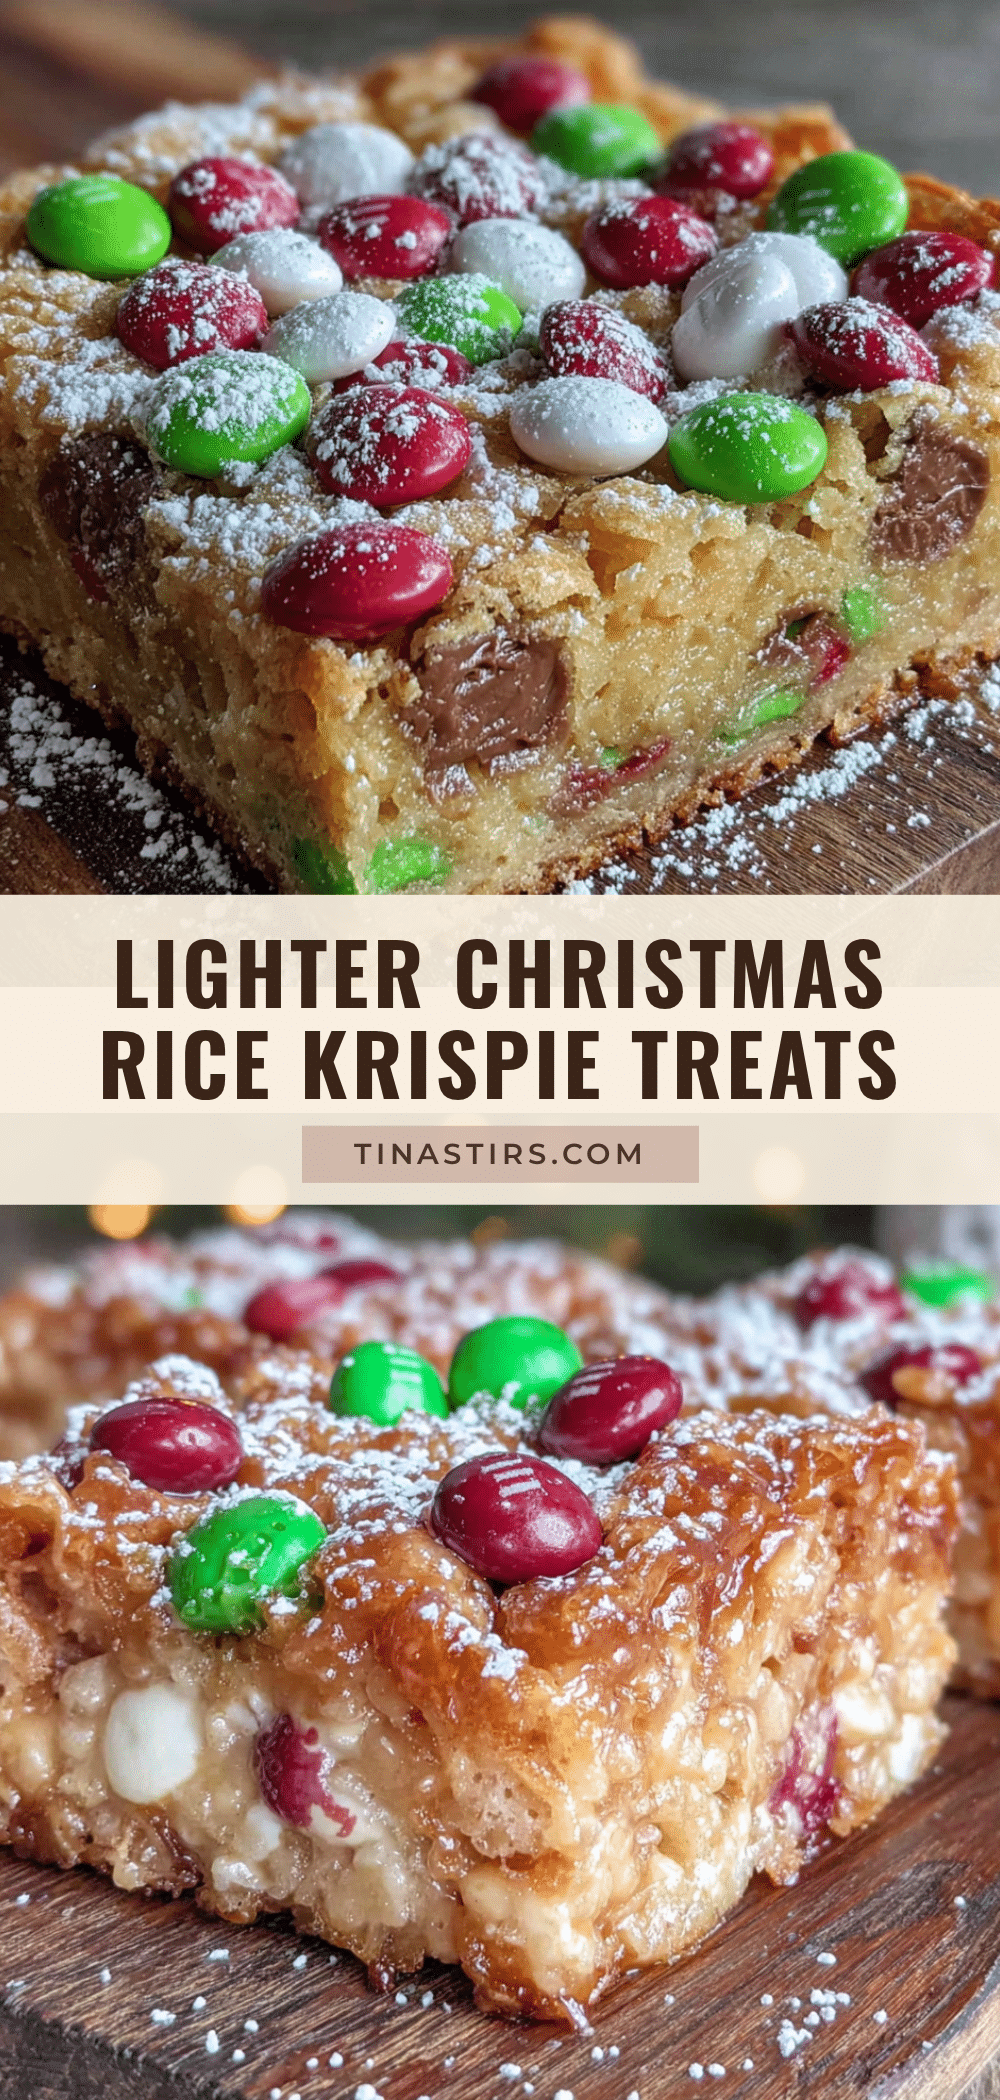
Lighter Christmas Rice Krispie Treats with M&Ms
These Lighter Christmas Rice Krispie Treats with M&Ms are a festive, healthier twist on the classic. Made with brown rice cereal and less butter, they’re quick, easy, and perfect for holiday gatherings.
- Prep Time: 10 minutes
- Cook Time: 10 minutes
- Total Time: 20 minutes
- Yield: 16 servings 1x
- Category: Dessert
- Cuisine: American
Ingredients
- 3 tablespoons unsalted butter (42g)
- 10 ounces mini marshmallows (about 5 cups)
- 6 cups brown rice cereal (about 180g)
- 1 teaspoon vanilla extract
- ¼ teaspoon salt
- ½ cup Christmas M&Ms (about 100g)
- 1 teaspoon coconut oil (optional, for greasing)
Instructions
- Line a 9×13 inch baking dish with parchment paper, leaving overhang on two sides. Lightly grease the parchment with coconut oil or butter.
- Place a large pot over medium-low heat and melt 3 tablespoons of butter, stirring occasionally, until just melted (not bubbling or browning).
- Add 10 ounces of mini marshmallows to the pot. Stir constantly with a rubber spatula until completely melted and smooth, about 4-5 minutes.
- Remove the pot from heat. Stir in 1 teaspoon vanilla extract and ¼ teaspoon salt. The mixture will bubble slightly.
- Pour in 6 cups of brown rice cereal. Fold gently with a cutting motion until every piece is coated. Do not overmix.
- Add ½ cup of Christmas M&Ms, reserving a handful for the top. Fold gently.
- Scrape the mixture into the prepared pan. Lightly grease your spatula or hands with coconut oil, then press the mixture evenly into the pan. Press reserved M&Ms into the top.
- Let the treats cool completely at room temperature (about 30 minutes). Use the parchment handles to lift out, then cut into squares with a sharp knife.
Notes
Use fresh, soft marshmallows for best melting. Keep heat low when melting to avoid scorching. Work quickly once cereal is added. Grease spatula and hands to prevent sticking. Do not refrigerate; store at room temperature.
Nutrition
- Serving Size: 1 square
- Calories: 145
- Sugar: 14
- Sodium: 95
- Fat: 5
- Saturated Fat: 3
- Carbohydrates: 25
- Fiber: 1
- Protein: 1
Keywords: Christmas Rice Krispie Treats, lighter Rice Krispie treats, M&M treats, holiday dessert, no-bake dessert, easy Christmas treat


