Love this? Save it for later!
Share the inspiration with your friends
My nephew Leo asked why I couldn’t just dump everything into one bowl and skip the double boiler. I started to explain why that wouldn’t work — then stopped. Honestly? I had no good reason. I was just used to doing it the hard way.
It was a Tuesday afternoon, and Leo was “helping” me test holiday cookie recipes. He’s twelve and has exactly zero patience for what he calls “extra steps that don’t change the flavor.” I was about to launch into a lecture about texture and proper chocolate tempering when I realized I was being ridiculous. These were no-bake cookies. The whole point was simplicity.
So I handed him the bowl. “Fine. Show me your way.”
He dumped the peanut butter, white chocolate chips, and butter into a microwave-safe bowl, zapped it for thirty seconds, stirred, and repeated. Three minutes later, he was folding in the crispy rice cereal and mini marshmallows. I stood there with my double boiler setup, feeling genuinely humbled. The mixture was smooth, the texture was perfect, and the whole process took maybe ten minutes.
That’s how these crowd-pleasing no-bake avalanche cookies became my go-to recipe for every gathering. I was trying to teach him something, and instead, he taught me that sometimes the best method is the simplest one. I mean, let’s face it — when you’re hosting a dinner party or bringing something to a potluck, you don’t need a complicated production. You need something that looks impressive, tastes incredible, and doesn’t stress you out.
These cookies have that magic combination. They’re buttery, crunchy, chewy, and completely irresistible. And the best part? You don’t even turn on the oven. Maybe you’ve been there — frantically searching for a dessert that won’t heat up your kitchen or require hours of cleanup. These avalanche cookies are your answer.
Why You’ll Love This Recipe
Listen, I’ve tested a lot of no-bake cookie recipes over the years. Some turn out too crumbly, others are a sticky mess, and plenty just don’t have that wow factor. These avalanche cookies are different. They’re the ones people ask for by name at every party.
- Ready in 10 Minutes : From start to finish, you’re looking at about ten minutes of active work. That’s faster than driving to the store for a store-bought dessert.
- Simple Ingredients : You need peanut butter, white chocolate chips, butter, crispy rice cereal, mini marshmallows, and a pinch of salt. That’s it. No weird specialty items.
- Perfect for Gatherings : These cookies were practically designed for dinner parties, potlucks, and holiday cookie exchanges. They travel well, they look gorgeous on a platter, and everyone loves them.
- Crowd-Pleaser : I’ve brought these to family reunions, work parties, and neighborhood gatherings. Kids and adults alike go crazy for them. They disappear faster than almost anything else on the table.
- Unbelievably Delicious : The combination of creamy white chocolate, salty peanut butter, crunchy cereal, and soft marshmallows is pure comfort food magic. You’ll catch yourself sneaking extras all day.
What makes these different from other no-bake cookies? It’s the texture. The ratio of crispy cereal to marshmallows is carefully balanced so every bite has that perfect crunch-meets-chew moment. Plus, using high-quality white chocolate chips makes a real difference in flavor. Trust me on this one — it’s worth splurging on the good stuff.
This recipe is the kind that makes you close your eyes after the first bite. It’s comfort food reimagined — faster, simpler, but with the same soul-soothing satisfaction. Perfect for impressing guests without stress, or turning a simple dessert into something memorable.
What Ingredients You Will Need
This recipe uses simple, pantry-friendly ingredients to create something truly special. Most of these items you probably already have on hand, which makes these cookies perfect for last-minute entertaining.
- White Chocolate Chips : 2 cups (12 ounces). Use a high-quality brand like Ghirardelli or Guittard for the smoothest melt and richest flavor. Avoid white baking chips that contain added oils — they don’t melt as smoothly.
- Creamy Peanut Butter : 1 cup (260 grams). Go with a standard creamy peanut butter like Jif or Skippy. Natural peanut butter that separates can cause the mixture to be oily and grainy.
- Unsalted Butter : 2 tablespoons (28 grams). This helps the mixture come together smoothly and adds richness. If you only have salted butter, reduce the added salt.
- Crispy Rice Cereal : 3 cups (90 grams). Regular Rice Krispies work perfectly. Avoid generic brands that can be more dense and less crispy.
- Mini Marshmallows : 2 cups (120 grams). Mini marshmallows distribute more evenly than large ones. They add that signature chewy texture.
- Vanilla Extract : 1 teaspoon. Pure vanilla extract adds warmth and depth. Imitation vanilla works in a pinch but won’t have the same complexity.
- Salt : ¼ teaspoon. This balances the sweetness and enhances the peanut butter flavor. Flaky sea salt for sprinkling on top is optional but highly recommended.
Ingredient Tips from My Kitchen : I’ve made these cookies more times than I can count, and I’ve learned a few things. First, don’t substitute crunchy peanut butter unless you want extra texture — the cereal already provides plenty of crunch. Second, if you’re using a natural peanut butter that’s been sitting in your pantry for months, it might be too dry. Fresh peanut butter melts much better. And finally, for the best results, let your white chocolate chips and peanut butter come to room temperature before melting. It just makes everything come together more smoothly.
Substitution Guidance : Need a nut-free version? SunButter works beautifully here, though the color will be a bit darker. For a dairy-free option, use dairy-free white chocolate chips and vegan butter. Just keep in mind that dairy-free white chocolate can be a bit trickier to melt — go slowly and stir constantly.
Equipment Needed
One of the best things about this recipe is how little equipment you need. No stand mixer, no baking sheets, no complicated gadgets.
- Large Microwave-Safe Bowl : A 2-quart glass or ceramic bowl works perfectly. Avoid metal bowls in the microwave.
- Spatula or Wooden Spoon : For stirring the mixture. A silicone spatula is ideal for scraping every last bit.
- Baking Sheet or Large Plate : For setting the cookies. Line it with parchment paper or wax paper for easy removal.
- Cookie Scoop or Two Spoons : For portioning the cookies evenly. A 1.5-tablespoon scoop gives you the perfect size.
- Measuring Cups and Spoons : Standard set for accurate measurements.
Budget-Friendly Options : Don’t have a cookie scoop? Just use two regular spoons to drop the mixture onto the baking sheet. No microwave? Use a double boiler on the stovetop — just be careful not to overheat the white chocolate. And if you don’t have parchment paper, wax paper or even aluminum foil lightly greased with butter will work.
I’ve made these cookies in a tiny apartment kitchen with nothing but a microwave and a cereal bowl. They turned out perfect. That’s the beauty of this recipe — it’s forgiving and flexible.
Preparation Method
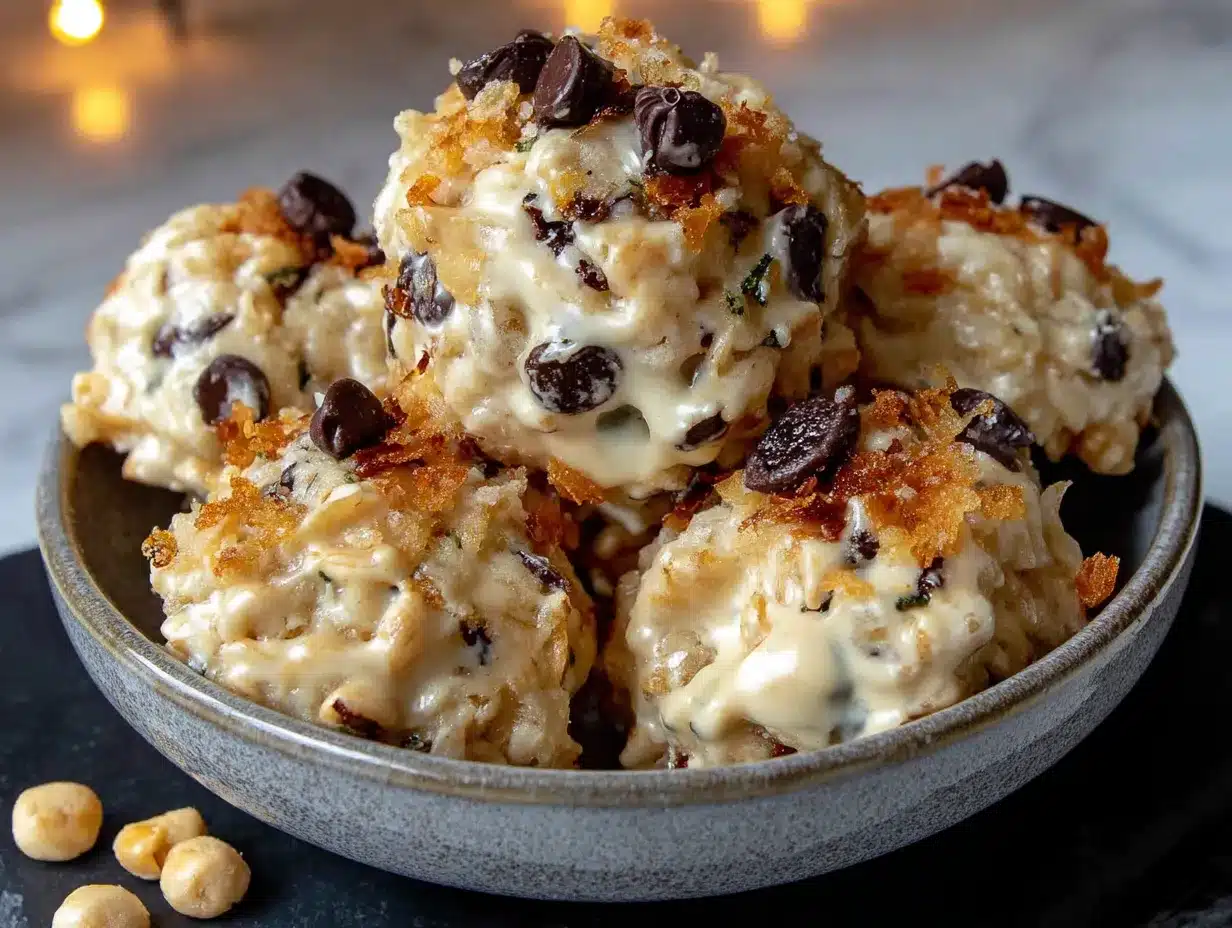
Let me walk you through this step by step. Once you see how easy it is, you’ll wonder why you ever bothered with complicated cookie recipes.
- Prepare your workspace. Line a large baking sheet with parchment paper or wax paper. Set it aside where it won’t be disturbed. Having this ready before you start melting is crucial — the mixture sets quickly.
- Melt the white chocolate mixture. In a large microwave-safe bowl, combine 2 cups white chocolate chips, 1 cup creamy peanut butter, and 2 tablespoons unsalted butter. Microwave in 30-second intervals, stirring thoroughly after each interval. It usually takes about 90 seconds total. The mixture should be smooth and glossy when you’re done. Don’t overheat or the white chocolate can seize up.
- Add flavorings. Stir in 1 teaspoon vanilla extract and ¼ teaspoon salt. The mixture will look a bit thinner and smell incredible. Give it a taste — you want that perfect balance of sweet and salty.
- Fold in the dry ingredients. Add 3 cups crispy rice cereal and 2 cups mini marshmallows. Gently fold everything together with your spatula. Work quickly but carefully — you want the marshmallows to stay mostly intact. The cereal should be evenly coated with the white chocolate mixture.
- Portion the cookies. Using a 1.5-tablespoon cookie scoop or two spoons, drop mounds of the mixture onto your prepared baking sheet. Space them about 2 inches apart — they won’t spread, but you want room to work. If the mixture starts to get too stiff, pop it in the microwave for 10 seconds to soften it up.
- Shape the cookies. If you want perfectly round cookies, lightly wet your hands and gently press each mound into a round shape. This step is optional but makes them look more polished for serving at a party.
- Set the cookies. Let the cookies sit at room temperature for about 20-30 minutes until fully set. If you’re in a hurry, pop them in the refrigerator for 10-15 minutes. They should be firm to the touch but still slightly soft inside.
- Add finishing touches. If you’re using flaky sea salt, sprinkle a tiny pinch on top of each cookie while they’re still slightly warm. This little detail makes them look bakery-level fancy.
Visual Cues : When melting the white chocolate, you’re looking for a smooth, pourable consistency — think warm honey. When folding in the cereal and marshmallows, every piece should be lightly coated but not swimming in chocolate. The finished cookies should hold their shape when picked up but have a slight give when you bite into them.
Personal Efficiency Tip : I like to measure everything into bowls before I start melting. That way, when the white chocolate mixture is ready, I can dump and fold without scrambling to find the cereal. It makes the whole process feel effortless.
Cooking Tips & Techniques
After making these avalanche cookies for every occasion imaginable, I’ve collected some hard-won wisdom. Let me save you from my early mistakes.
The Biggest Mistake I Made : The first time I made these, I microwaved the white chocolate chips for a full minute without stirring. Big mistake. The chips on the edges scorched while the center was still solid. Now I know — 30-second intervals with stirring is non-negotiable. White chocolate is more delicate than dark or milk chocolate and burns easily.
Temperature Matters : If your kitchen is warm and humid, the cookies might take longer to set. On a hot summer day, I sometimes pop them in the fridge for 15 minutes. In winter, room temperature setting works perfectly. Trust the texture, not the clock.
Timing Strategy for Hosting : Here’s my secret for dinner parties — make these the morning of your event. They need about 30 minutes to set, then you can arrange them on a platter and cover with plastic wrap. They’ll stay perfect for hours. Your guests will think you spent all afternoon baking, but really, you had the whole day free.
Consistency Troubleshooting : If your mixture seems too dry and crumbly, you might have overheated the white chocolate. Try adding a teaspoon of coconut oil or vegetable oil and stirring vigorously. If the mixture is too wet and greasy, you probably used natural peanut butter. Add a few extra tablespoons of crispy rice cereal to absorb the excess oil.
Multitasking Pro Tip : While the white chocolate is melting, have someone else measure the cereal and marshmallows. Or, if you’re flying solo, measure everything before you start. This recipe moves fast once you begin melting — you don’t want to be hunting for ingredients mid-step.
Variations & Adaptations
One of the reasons I love this recipe is how customizable it is. I’ve experimented with all sorts of variations, and here are my favorites.
Chocolate Avalanche Cookies : Swap the white chocolate chips for milk chocolate or semi-sweet chocolate chips. The flavor profile becomes richer and more traditional. I made these for a Super Bowl party and they were gone in minutes.
Peanut Butter-Free Version : Use sunflower seed butter or cookie butter instead of peanut butter. For a completely nut-free version, SunButter works beautifully. Just be aware that the color will be a bit greenish (that’s a natural reaction with sunflower seeds) but the taste is fantastic.
Holiday Edition : Add ½ cup of dried cranberries and ½ cup of chopped pecans for a festive twist. Or stir in ¼ cup of crushed candy canes for a peppermint version that’s perfect for Christmas cookie exchanges.
Extra Crunchy Version : Swap half the crispy rice cereal for chopped pretzels or crushed graham crackers. The salty-sweet combination is absolutely addictive. I made this version for a potluck and three people asked for the recipe.
Vegan Adaptation : Use dairy-free white chocolate chips, vegan butter, and vegan marshmallows. Dandies brand marshmallows work perfectly. The texture is slightly different — a bit more chewy — but just as delicious.
My Personal Favorite Variation : I add ¼ cup of toasted coconut flakes and ¼ cup of chopped macadamia nuts. It turns these into tropical avalanche cookies that taste like a fancy vacation. My sister-in-law requests this version for every family gathering.
Serving & Storage Suggestions
These cookies are incredibly versatile when it comes to serving. Here’s how I handle them for different occasions.
Serving Temperature : Room temperature is ideal. The cookies should be firm but not hard, with a slight chewiness from the marshmallows. If you’ve refrigerated them, let them sit out for 10-15 minutes before serving.
Presentation Tips for Hosting : Arrange the cookies on a white platter or cake stand for maximum visual impact. Sprinkle a few extra mini marshmallows and a dusting of powdered sugar around the edges. For a dinner party, I sometimes drizzle melted dark chocolate over the top — it looks stunning and adds another layer of flavor.
What to Serve Alongside : These cookies pair beautifully with a glass of cold milk, a hot cup of coffee, or a scoop of vanilla ice cream. For a dessert board, arrange them alongside fresh berries, chocolate truffles, and shortbread cookies. They’re also fantastic crumbled over vanilla yogurt or ice cream sundaes.
Storage Instructions : Store the cookies in an airtight container at room temperature for up to 5 days. Layer them between sheets of parchment paper to prevent sticking. If your kitchen is warm, refrigerate them — they’ll last up to 2 weeks in the fridge.
Freezer Tips : These cookies freeze beautifully! Place them in a single layer on a baking sheet and freeze until solid, then transfer to a freezer-safe bag or container. They’ll keep for up to 3 months. Thaw at room temperature for about 15 minutes before serving. I always keep a batch in the freezer for unexpected guests.
Flavor Development : Honestly, these cookies taste even better the next day. The flavors meld together and the texture becomes perfectly balanced. If you can resist eating them all immediately, you’re in for a treat.
Nutritional Information & Benefits
Let’s be real — these are cookies, not a health food. But they do have some redeeming qualities worth mentioning.
Estimated Nutritional Values (per cookie, based on 24 cookies) :
- Calories: 185
- Total Fat: 11g
- Saturated Fat: 5g
- Carbohydrates: 20g
- Fiber: 1g
- Sugar: 14g
- Protein: 4g
- Sodium: 95mg
Health Benefits of Key Ingredients : Peanut butter provides protein and healthy fats that help keep you satisfied. The crispy rice cereal adds a bit of iron and B vitamins. And while white chocolate isn’t exactly a superfood, it does contain calcium from the milk solids.
Dietary Considerations : This recipe is naturally egg-free and can be made vegan with simple substitutions. For gluten-free eaters, most crispy rice cereals are gluten-free, but always check the label. The recipe is not low-carb or keto-friendly due to the sugar content.
Potential Allergens : Contains peanuts, dairy, and possibly gluten (depending on cereal choice). Always inform guests about allergens when serving at gatherings.
My personal philosophy? Food is about joy and connection. These cookies bring people together, and that’s a kind of nourishment too. Everything in moderation — including moderation.
Conclusion
These crowd-pleasing no-bake avalanche cookies have become my signature recipe for a reason. They’re quick, they’re delicious, and they make me look like a hero at every gathering without any of the stress. Honestly, what more could you ask for from a dessert?
I love that this recipe came from a moment of being wrong. My nephew taught me that sometimes the simplest approach is the best one, and these cookies prove it every single time. They’ve saved me more times than I can count — from last-minute potluck emergencies to surprise dinner guests to holiday cookie exchanges where I completely lost track of time.
Now I want to hear from you! Have you tried making avalanche cookies before? What variations did you experiment with? Drop a comment below and tell me about your version. And if you loved this recipe, please share it with your friends and family — I guarantee they’ll thank you.
Go ahead, give these cookies a try. Your oven stays cold, your kitchen stays clean, and your guests leave happy. That’s a win-win-win in my book.
Frequently Asked Questions
Can I use crunchy peanut butter instead of creamy?
You can, but I don’t recommend it. The crispy rice cereal already provides plenty of crunch, and crunchy peanut butter can make the texture feel overwhelming. Stick with creamy for the best balance.
Why did my white chocolate seize up?
White chocolate is sensitive to heat and moisture. If it seizes (becomes grainy and stiff), you likely overheated it or got a drop of water in the bowl. Always microwave in short intervals and make sure your bowl is completely dry. If it seizes, try stirring in a teaspoon of coconut oil to smooth it out.
How long do these cookies last?
Stored in an airtight container at room temperature, they’ll stay fresh for up to 5 days. In the refrigerator, they’ll last up to 2 weeks. In the freezer, they’re good for up to 3 months — if you can resist eating them that long.
Can I make these cookies vegan?
Absolutely! Use dairy-free white chocolate chips, vegan butter, and vegan marshmallows (Dandies brand works great). The texture will be slightly different — a bit more chewy — but they’re just as delicious.
My cookies turned out too crumbly. What went wrong?
This usually happens when the white chocolate mixture wasn’t melted enough to coat everything properly. Next time, make sure your mixture is completely smooth before adding the dry ingredients. If your cookies are already made, try drizzling a little melted white chocolate over them to help them hold together.
Pin This Recipe!

No-Bake Avalanche Cookies: Easy 10-Minute Recipe

These crowd-pleasing no-bake avalanche cookies are buttery, crunchy, chewy, and completely irresistible. Ready in just 10 minutes with simple ingredients, they’re perfect for gatherings and require no oven.
- Prep Time: 10 minutes
- Cook Time: 0 minutes
- Total Time: 30 minutes
- Yield: 24 servings 1x
- Category: Dessert
- Cuisine: American
Ingredients
- 2 cups (12 ounces) white chocolate chips
- 1 cup (260 grams) creamy peanut butter
- 2 tablespoons (28 grams) unsalted butter
- 3 cups (90 grams) crispy rice cereal
- 2 cups (120 grams) mini marshmallows
- 1 teaspoon vanilla extract
- ¼ teaspoon salt
- Flaky sea salt for sprinkling (optional)
Instructions
- Line a large baking sheet with parchment paper or wax paper and set aside.
- In a large microwave-safe bowl, combine white chocolate chips, creamy peanut butter, and unsalted butter. Microwave in 30-second intervals, stirring thoroughly after each interval, until smooth and glossy (about 90 seconds total).
- Stir in vanilla extract and salt until well combined.
- Add crispy rice cereal and mini marshmallows. Gently fold together until the cereal is evenly coated with the white chocolate mixture, keeping marshmallows mostly intact.
- Using a 1.5-tablespoon cookie scoop or two spoons, drop mounds of the mixture onto the prepared baking sheet, spacing them about 2 inches apart.
- If desired, lightly wet your hands and gently press each mound into a round shape for a more polished look.
- Let the cookies sit at room temperature for 20-30 minutes until fully set, or refrigerate for 10-15 minutes if in a hurry.
- If using flaky sea salt, sprinkle a tiny pinch on top of each cookie while still slightly warm.
Notes
Use high-quality white chocolate chips for best results. Avoid natural peanut butter that separates. If mixture becomes too stiff, microwave for 10 seconds to soften. Cookies taste even better the next day. Store in an airtight container at room temperature for up to 5 days, refrigerate for up to 2 weeks, or freeze for up to 3 months.
Nutrition
- Serving Size: 1 cookie
- Calories: 185
- Sugar: 14
- Sodium: 95
- Fat: 11
- Saturated Fat: 5
- Carbohydrates: 20
- Fiber: 1
- Protein: 4
Keywords: no-bake cookies, avalanche cookies, easy dessert, peanut butter cookies, white chocolate cookies, no-bake dessert, quick cookies, holiday cookies


