Love this? Save it for later!
Share the inspiration with your friends
The neighborhood bake sale was in less than three hours and I’d completely blanked on bringing anything homemade. Everyone else would be showing up with fancy layered cakes or pastries that took days to perfect. Meanwhile, I had only a handful of pantry staples and a cracked mixing bowl that nearly slipped off the counter when I pulled it out. Honestly, the pressure was on, and I was this accidental overachiever staring at a blank slate.
So, I grabbed what I could: basic flour, sugar, butter, eggs, and some powdered sugar leftover from a Christmas cookie binge. The idea of whipping up something simple but charming struck me—alphabet sugar cookies with glossy royal icing. The funny part? I wasn’t even sure if my royal icing skills would hold up under the ticking clock and a curious toddler tugging at my sleeve.
Let me tell you, there’s something oddly calming about piping each letter, one by one, as the kitchen filled with the warm scent of vanilla and butter. Maybe you’ve been there: that last-minute scramble where you somehow pull off a miracle. These cookies, with their crisp edges and shiny icing, ended up stealing the show. They weren’t just sweet treats; they became the unexpected star that day, a little reminder that sometimes the simplest recipes have the biggest heart.
Since then, I keep coming back to this perfect alphabet sugar cookies recipe with glossy royal icing, not just because it’s quick or pretty, but because it’s a slice of that chaotic afternoon turned sweet victory. If you’re juggling time and craving a fun project that feels personal and playful, this one’s for you.
Why You’ll Love This Recipe
Honestly, after testing dozens of sugar cookie recipes and royal icing variations, this one stands out for a bunch of reasons. I’ve made these cookies for birthday parties, school events, and spontaneous tea times, and they never disappoint. Here’s why they might just become your go-to:
- Quick & Easy: The dough comes together in under 20 minutes, and the royal icing sets beautifully within a couple of hours—perfect for last-minute baking sessions.
- Simple Ingredients: No need for fancy or hard-to-find items. Most are pantry staples, and you probably already have them on hand.
- Perfect for Personalization: The alphabet shapes let you spell out names, messages, or fun phrases, making these cookies great for holidays, kids’ parties, or just creative snacking.
- Crowd-Pleaser: Kids love decorating them, and adults appreciate the nostalgic, buttery flavor paired with the smooth, glossy icing.
- Unbelievably Delicious: The cookie texture strikes a perfect balance—crispy edges with a tender center—while the royal icing adds that signature sweet snap and shine.
What sets this recipe apart is the icing technique I’ve perfected over time. By mixing just the right amount of meringue powder and powdered sugar, the royal icing dries with a glossy, professional finish that you’d expect from a bakery. Plus, it’s sturdy enough to pipe fine details but soft enough to flood the cookie surface smoothly.
At its heart, this recipe isn’t just about baking—it’s about turning simple ingredients and a pinch of time pressure into something that feels special. I mean, who doesn’t love cookies that look as good as they taste, without hours of fuss?
What Ingredients You Will Need
This recipe uses simple, wholesome ingredients to deliver bold flavor and a satisfying texture without the fuss. Most of these are pantry staples, and you can swap a few items to suit your needs or preferences.
- For the Sugar Cookies:
- 2 ¾ cups (345g) all-purpose flour, sifted
- 1 tsp baking powder
- ½ tsp salt
- 1 cup (226g) unsalted butter, softened (I recommend Kerrygold for the best buttery flavor)
- 1 ½ cups (300g) granulated sugar
- 1 large egg, room temperature
- 1 ½ tsp pure vanilla extract (quality vanilla makes a big difference)
- 2 tbsp whole milk or cream (adds tenderness)
- For the Royal Icing:
- 3 cups (360g) powdered sugar, sifted
- 2 tbsp meringue powder (I use Wilton brand for consistent results)
- 5-6 tbsp warm water (adjust for desired consistency)
- 1 tsp vanilla extract or lemon juice (optional, for subtle flavor)
- Gel food coloring (optional, for colorful designs)
Ingredient Tips & Substitutions: You can swap all-purpose flour for gluten-free flour blends if needed, though texture may vary slightly. For dairy-free options, use a plant-based butter substitute and almond or oat milk in place of cream. If you want a natural sweetener twist, try superfine coconut sugar, but expect a slightly deeper flavor and darker cookie color.
In summer, I love swapping vanilla for almond extract for a subtle nutty twist. And if you want to make these cookies festive, adding a pinch of cinnamon or cardamom to the dough gives a lovely aromatic note.
Equipment Needed
Here’s the kitchen gear that’ll make crafting these perfect alphabet sugar cookies a breeze:
- Mixing bowls: A large bowl for the dough and a medium one for the icing.
- Electric mixer: Stand or handheld, for creaming butter and beating the icing smoothly.
- Measuring cups and spoons: Accurate measurements are key, especially for baking powder and salt.
- Rolling pin: A smooth, even roller to get consistent cookie thickness.
- Alphabet cookie cutters: Essential for shaping those playful letters. If you don’t have a full set, you can improvise with small shapes or freehand cut with a knife.
- Baking sheets lined with parchment paper or silicone mats: Prevent sticking and make cleanup easier.
- Parchment paper or plastic wrap: For chilling the dough before cutting.
- Piping bags and small round tips (size #1 or #2): For detailed royal icing application.
- Toothpicks or scribe tools: Perfect for fixing tiny icing mistakes and spreading flood icing evenly.
If you don’t own piping bags, disposable ones or even small zip-top bags with a tiny corner snipped off work just fine. For budget-friendly rolling pins, a clean glass bottle can do the trick in a pinch. I’ve also found silicone mats to be a lifesaver—they keep cookies from sliding around and help with even baking.
Preparation Method
- Mix Dry Ingredients: In a medium bowl, whisk together 2 ¾ cups (345g) sifted all-purpose flour, 1 tsp baking powder, and ½ tsp salt. Set aside. This helps distribute the leavening and salt evenly.
- Cream Butter and Sugar: In a large bowl, use an electric mixer on medium speed to beat 1 cup (226g) softened unsalted butter and 1 ½ cups (300g) granulated sugar until light and fluffy—about 3-4 minutes. The mixture should look pale and airy, which creates that tender texture.
- Add Egg and Flavor: Beat in 1 large room temperature egg and 1 ½ tsp pure vanilla extract until combined. This step binds the dough and adds moisture.
- Combine Wet and Dry: Slowly add the flour mixture in two batches, alternating with 2 tbsp whole milk or cream. Mix on low speed just until the dough comes together. Be careful not to overmix; otherwise, the cookies can turn tough.
- Chill the Dough: Divide dough into two discs, wrap in plastic wrap, and refrigerate for at least 1 hour (or up to overnight). Chilling firms the dough, making it easier to roll and cut clean shapes without spreading.
- Roll Out the Dough: On a lightly floured surface, roll each disc to about ¼ inch (6 mm) thickness. Keep the dough cool—if it softens too much, pop it back in the fridge for 10-15 minutes.
- Cut Alphabet Shapes: Use your alphabet cookie cutters to press out letters, placing them about 1 inch (2.5 cm) apart on parchment-lined baking sheets.
- Bake: Preheat oven to 350°F (175°C). Bake cookies for 8-10 minutes, or until edges are just starting to turn golden. Keep a close eye—overbaking dries them out. Let cookies cool completely on wire racks before icing.
- Prepare Royal Icing: In a medium bowl, mix 3 cups (360g) powdered sugar and 2 tbsp meringue powder. Add 5 tbsp warm water and 1 tsp vanilla extract. Beat with an electric mixer on high for 5-7 minutes until stiff, glossy peaks form. Adjust water by a teaspoon at a time for icing consistency—thicker for piping outlines, thinner for flooding.
- Color and Pipe: Divide icing into separate bowls for colors if desired. Use piping bags fitted with small round tips to outline each cookie letter first, then flood the interior with thinner icing. Use a toothpick to spread evenly and pop air bubbles.
- Dry and Store: Let the icing dry at room temperature for 4-6 hours or overnight for best results. Store cookies in an airtight container at room temperature for up to a week.
Tip: If your royal icing cracks or looks dull, it might be too thick or drying too fast—adding a tiny bit more water and mixing again can rescue it. Also, don’t skip chilling the dough; it’s the secret to those crisp, perfect edges.
Cooking Tips & Techniques
When it comes to perfect alphabet sugar cookies with royal icing, timing and texture are everything. Here are a few things I’ve learned the hard way:
- Don’t Overwork the Dough: Mixing or rolling too much develops gluten, making cookies tough instead of tender. Keep your hands cool and work quickly.
- Chill, Chill, Chill: Refrigerating the dough is a must. I’ve tried skipping this, and the cookies spread too much and lose their shape. A cold dough also makes cutting clean letters way easier.
- Roll Evenly: Aim for consistent thickness so cookies bake uniformly. Uneven dough leads to some burning while others stay doughy.
- Master the Icing Consistency: Royal icing can be tricky. Use thicker icing (like toothpaste consistency) for outlining, and thinner (like honey) for flooding. Let outlines crust slightly before flooding to avoid colors bleeding.
- Practice Piping: If you’re new to royal icing, practice on parchment paper first. Steady hands come with time, and toothpicks are your best friends for corrections.
- Humidity Matters: On humid days, icing takes longer to dry. Be patient and keep cookies in a dry area to prevent smudging.
I once tried rushing the icing drying time by stacking cookies too soon—big mistake. The colors smeared, and the glossy finish dulled. Lesson learned: slow and steady wins the cookie race.
Variations & Adaptations
Want to switch things up or tailor this recipe to different needs? Here are some ideas I’ve tried and loved:
- Gluten-Free Version: Use a 1:1 gluten-free baking flour blend. The texture is slightly softer but still delicious. Add an extra ½ tsp xanthan gum if your blend doesn’t contain it.
- Flavored Royal Icing: Swap vanilla for almond, lemon, or peppermint extract to match holiday themes or personal preference.
- Colorful Fun: Add gel food coloring to the royal icing for vibrant letters. You can even mix pastel shades for baby showers or bold tones for birthdays.
- Vegan Adaptation: Use vegan butter and substitute the egg in the dough with flaxseed meal (1 tbsp flaxseed + 3 tbsp water = 1 egg). For royal icing, replace meringue powder with aquafaba (chickpea water) whipped to stiff peaks.
- Alternate Shapes: If alphabet cutters aren’t handy, try numbers, hearts, or stars alongside the letters for a festive touch.
Personally, I once made a batch with lavender-infused royal icing for a garden party. The subtle floral note paired beautifully with the buttery cookie base and impressed guests without being overpowering.
Serving & Storage Suggestions
These perfect alphabet sugar cookies shine best served at room temperature, allowing the royal icing to display its glossy finish and snap just right when bitten. Arrange them on a pretty platter, spelling out names or festive messages—kids especially adore this personalized touch.
Pair your cookies with a warm cup of tea, fresh lemonade, or even a creamy hot chocolate for cozy afternoons. They also make delightful edible gifts wrapped in cellophane with a ribbon.
To store, keep cookies in an airtight container layered with parchment paper at room temperature for up to a week. Avoid refrigeration as it can cause the icing to sweat and soften. For longer storage, freeze baked and iced cookies in a single layer inside a sealed container. Thaw at room temperature before serving.
Over time, the flavors mellow and the icing hardens further, giving a lovely contrast between crisp cookie and firm icing. Just don’t expect them to last long—these tend to disappear fast!
Nutritional Information & Benefits
Per serving (1 cookie, approx. 35g):
| Calories | 140 |
|---|---|
| Fat | 7g |
| Carbohydrates | 20g |
| Protein | 1g |
| Sugar | 12g |
The main ingredients provide a quick energy boost with straightforward carbs and fat. Butter brings in fat-soluble vitamins A and E, while eggs add a touch of protein. Using real vanilla extract offers antioxidants and natural flavor without additives.
For those mindful of allergies, this recipe contains gluten, dairy, and eggs but can be adapted as noted earlier. The royal icing uses meringue powder which is egg white-based; vegan alternatives with aquafaba work well too.
While these cookies are a treat, I find baking them at home lets me control the quality and avoid preservatives or artificial colors often found in store-bought versions.
Conclusion
If you’re looking for a recipe that’s approachable, fun, and just a little bit special, these perfect alphabet sugar cookies with glossy royal icing fit the bill. They bring a playful element to baking, letting you spell out messages or names that make every bite feel meaningful.
Whether you’re a novice or a home baking pro, this recipe is forgiving but rewarding, giving you beautiful results without complicated steps. I love how it turns a rushed afternoon into a moment of creativity and sweetness—something I hope you’ll experience too.
Give it a try, tweak the colors or flavors to your liking, and don’t hesitate to share your cookie creations! I’d love to hear what words you spell out and any fun twists you add.
Happy baking, and may your kitchen be filled with laughter, icing, and perfectly shaped letters!
FAQs
Can I make the dough ahead of time?
Yes! The dough can be refrigerated for up to 3 days or frozen for up to a month. Just thaw and roll out when ready.
How do I prevent royal icing from cracking?
Make sure your icing isn’t too thick or drying too quickly. Add a bit more water if needed and avoid exposing cookies to drafts while drying.
What’s the best way to store decorated cookies?
Store them in an airtight container at room temperature with parchment paper between layers. Avoid refrigeration to keep icing glossy.
Can I use powdered egg whites instead of meringue powder?
Yes, powdered egg whites work similarly for royal icing but follow package instructions for quantities.
What if I don’t have alphabet cookie cutters?
You can cut shapes freehand with a knife or use other themed cutters like stars or hearts. Piping letters on plain cookies is also a fun alternative.
For more fun cookie projects, you might enjoy my classic sugar cookies recipe or the homemade gingersnaps that pair wonderfully with tea time.
Pin This Recipe!
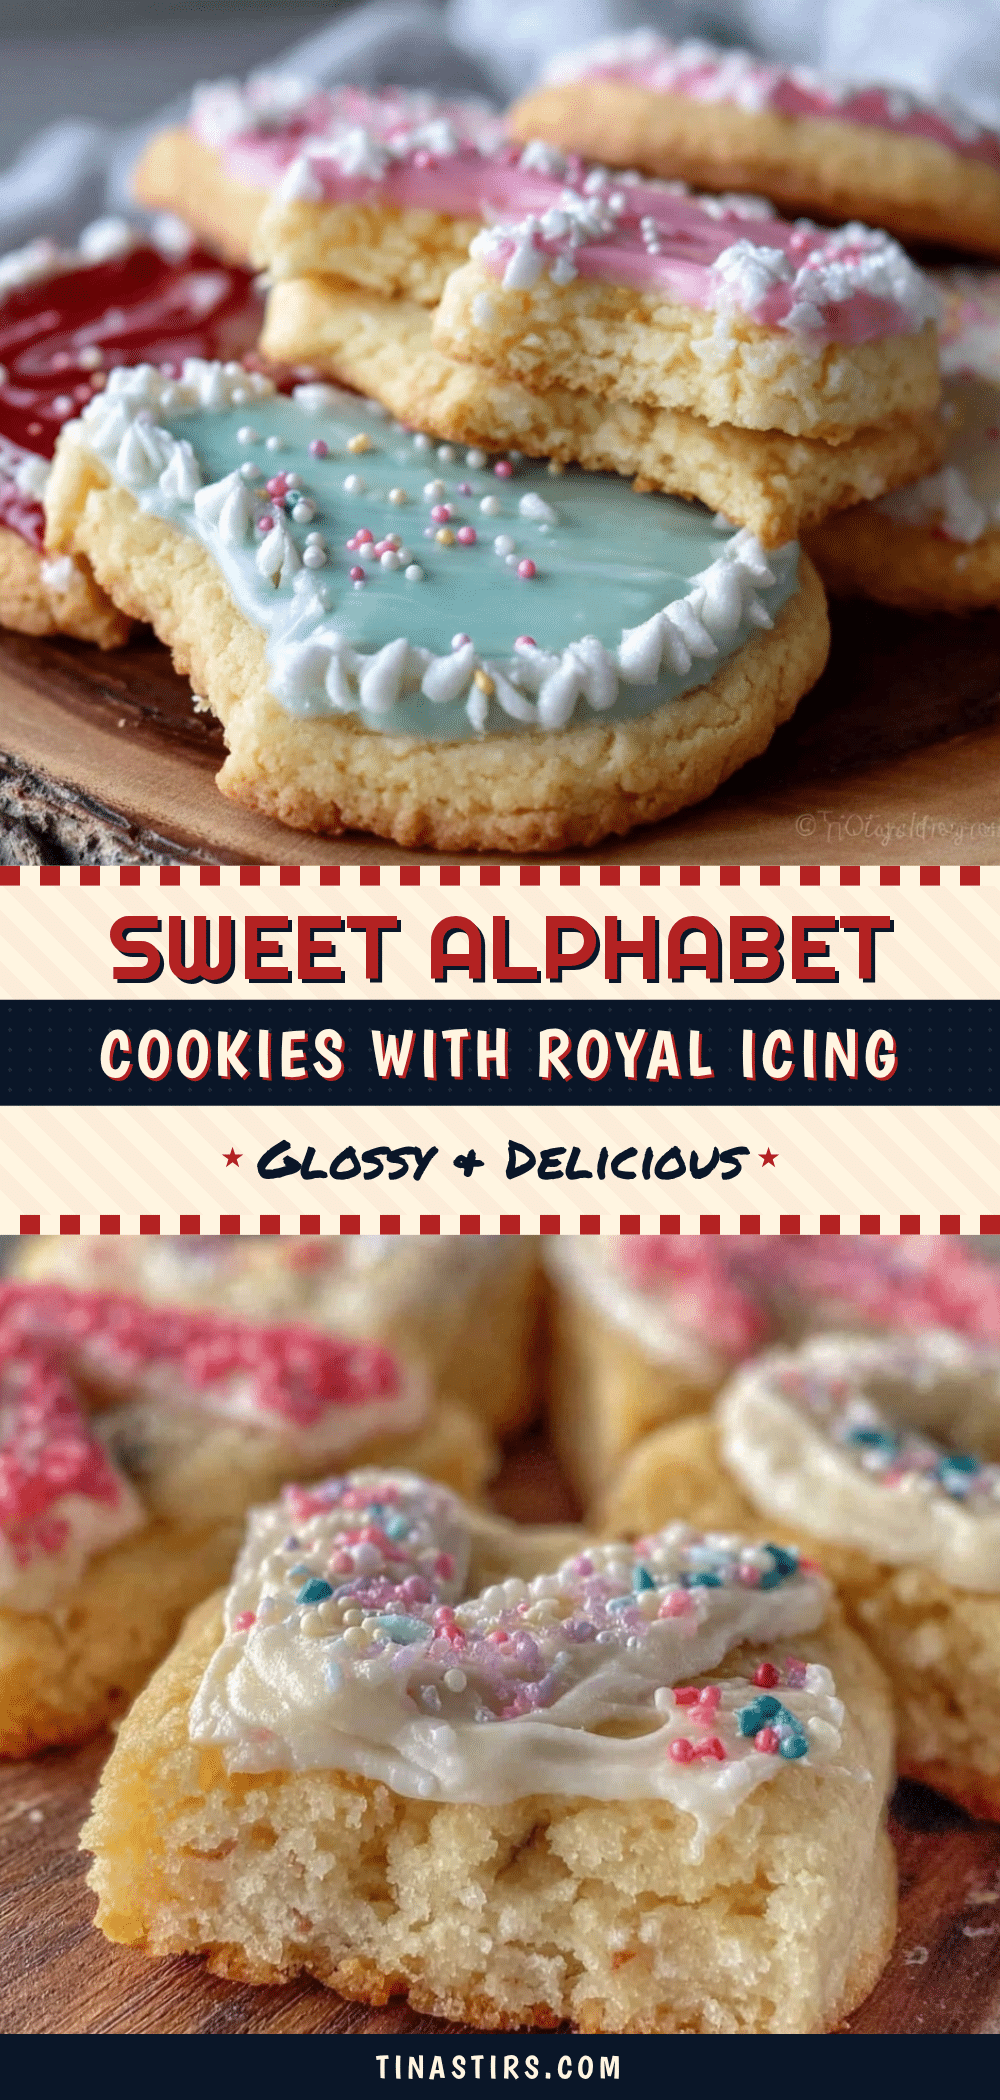
Perfect Alphabet Sugar Cookies Recipe Easy Homemade Royal Icing Tutorial

A quick and easy recipe for alphabet sugar cookies with glossy royal icing, perfect for personalized messages and festive occasions. These cookies have crisp edges, a tender center, and a smooth, shiny icing finish.
- Prep Time: 20 minutes
- Cook Time: 10 minutes
- Total Time: 1 hour 30 minutes
- Yield: About 24 cookies 1x
- Category: Dessert
- Cuisine: American
Ingredients
- 2 ¾ cups (345g) all-purpose flour, sifted
- 1 tsp baking powder
- ½ tsp salt
- 1 cup (226g) unsalted butter, softened
- 1 ½ cups (300g) granulated sugar
- 1 large egg, room temperature
- 1 ½ tsp pure vanilla extract
- 2 tbsp whole milk or cream
- 3 cups (360g) powdered sugar, sifted
- 2 tbsp meringue powder
- 5–6 tbsp warm water
- 1 tsp vanilla extract or lemon juice (optional)
- Gel food coloring (optional)
Instructions
- Mix Dry Ingredients: In a medium bowl, whisk together 2 ¾ cups sifted all-purpose flour, 1 tsp baking powder, and ½ tsp salt. Set aside.
- Cream Butter and Sugar: In a large bowl, use an electric mixer on medium speed to beat 1 cup softened unsalted butter and 1 ½ cups granulated sugar until light and fluffy, about 3-4 minutes.
- Add Egg and Flavor: Beat in 1 large room temperature egg and 1 ½ tsp pure vanilla extract until combined.
- Combine Wet and Dry: Slowly add the flour mixture in two batches, alternating with 2 tbsp whole milk or cream. Mix on low speed just until the dough comes together. Avoid overmixing.
- Chill the Dough: Divide dough into two discs, wrap in plastic wrap, and refrigerate for at least 1 hour or up to overnight.
- Roll Out the Dough: On a lightly floured surface, roll each disc to about ¼ inch (6 mm) thickness. Keep dough cool; chill if it softens too much.
- Cut Alphabet Shapes: Use alphabet cookie cutters to press out letters, placing them about 1 inch apart on parchment-lined baking sheets.
- Bake: Preheat oven to 350°F (175°C). Bake cookies for 8-10 minutes until edges start to turn golden. Cool completely on wire racks before icing.
- Prepare Royal Icing: In a medium bowl, mix 3 cups powdered sugar and 2 tbsp meringue powder. Add 5 tbsp warm water and 1 tsp vanilla extract. Beat on high for 5-7 minutes until stiff, glossy peaks form. Adjust water for desired consistency.
- Color and Pipe: Divide icing into bowls for colors if desired. Use piping bags with small round tips to outline each cookie letter, then flood the interior with thinner icing. Use a toothpick to spread evenly and pop air bubbles.
- Dry and Store: Let icing dry at room temperature for 4-6 hours or overnight. Store cookies in an airtight container at room temperature for up to a week.
Notes
Chilling the dough is essential to prevent spreading and to maintain crisp edges. Adjust royal icing consistency for outlining (thicker) and flooding (thinner). Practice piping on parchment paper if new to royal icing. Store cookies in airtight containers at room temperature; avoid refrigeration to keep icing glossy. Dough can be refrigerated up to 3 days or frozen for up to a month.
Nutrition
- Serving Size: 1 cookie (approx. 35
- Calories: 140
- Sugar: 12
- Fat: 7
- Carbohydrates: 20
- Protein: 1
Keywords: alphabet sugar cookies, royal icing, sugar cookies, homemade cookies, easy cookie recipe, personalized cookies, baking with kids