Love this? Save it for later!
Share the inspiration with your friends
I used to think that Halloween dinner required a theme so elaborate it would require a permit and a full-time staff. I bought a inflatable witch three years ago that got tangled in the power lines. It was a disaster. That year, I tried to make a “cursed cauldron” stew that looked like swamp water and tasted like regret. My kids pushed their plates away with the enthusiasm of people being asked to eat dirt. I was standing there, holding a ladle, realizing I had failed again. I was tired of the pressure to make everything magical. I just wanted them to eat something green and not complain.
Then, last Tuesday, I was chopping bell peppers. The orange ones are always slippery and stubborn. I decided to carve them instead of just cutting the tops off. It was supposed to be a quick prep step. But then I got distracted by a phone call from my mother. I forgot about the oven timer. I also forgot to add the salt to the rice filling. When I finally remembered, the peppers were already softening. I panicked. I threw them in the oven anyway, hoping they wouldn’t collapse.
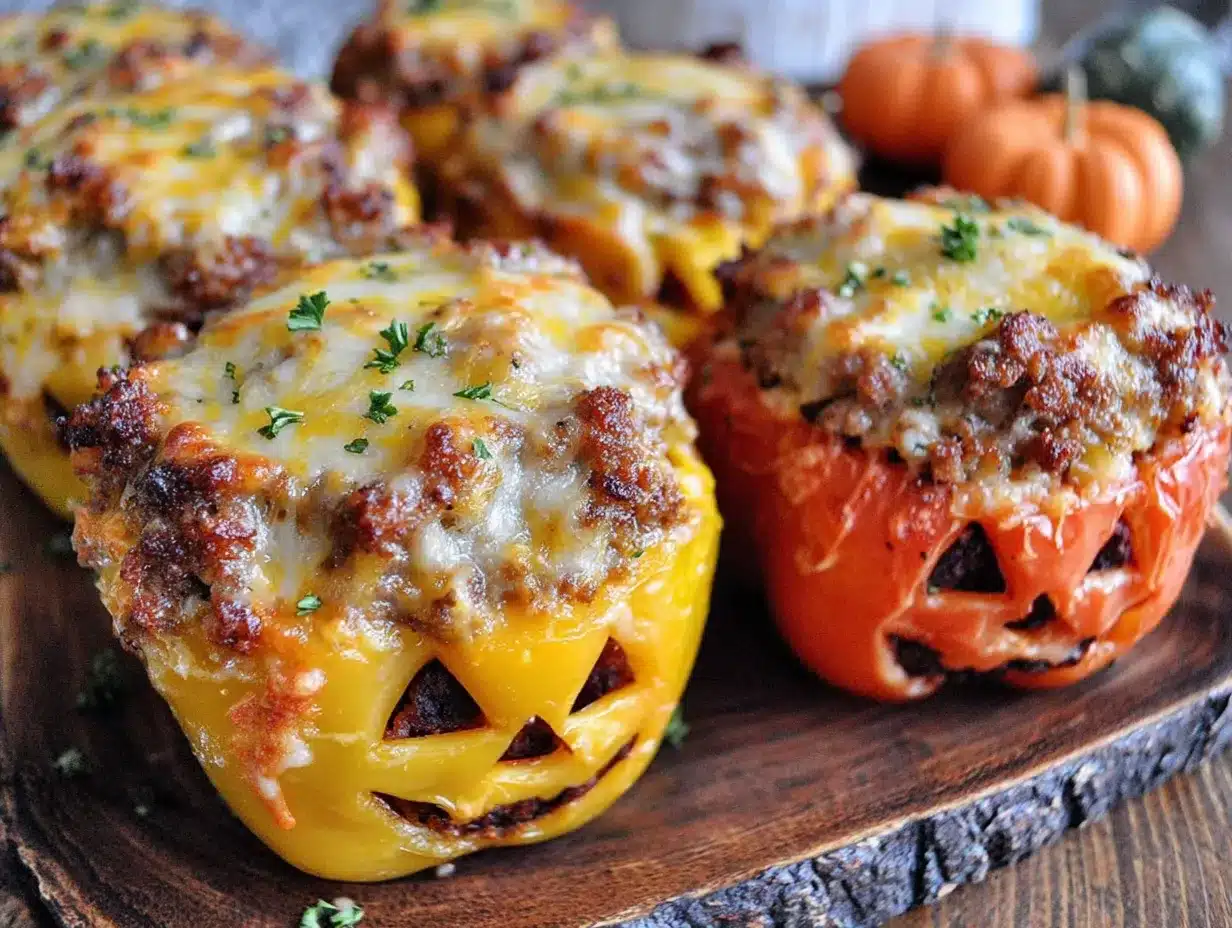
What came out was nothing like the plan — and better. They held their shape. The faces looked mischievous, not scary. The cheese melted into the eyes like glowing embers. My kids didn’t just eat them; they hunted for the “best” piece of pepper. It was quiet vindication. I mean, honestly, who knew a simple bell pepper could turn into such a hit? You know that feeling when you stop trying to be perfect and just let things happen? This is that feeling. The Perfect Jack-o-Lantern Stuffed Bell Peppers became a staple because they are forgiving. They don’t care if you burn your fingers carving the nose. They don’t care if the rice is slightly undercooked. They just taste good.
I keep making them because they remind me that dinner doesn’t have to be a production. It can be a little messy, a little silly, and still delicious. The kids love the novelty. I love that I didn’t have to spend hours on it. It’s comfort food with a side of fun. And let me tell you, there is nothing quite like watching a room full of teenagers stop scrolling on their phones to dig into a stuffed pepper. It’s a small victory, but it feels huge.
Why You’ll Love This Recipe
Let’s be real for a second. Cooking for kids during October is a battlefield. You want them to eat vegetables, but they only want pizza. This recipe bridges that gap in a way that feels like a treat, not a chore. I’ve tested this version over three Halloweens now, and it’s the only one that consistently gets cleaned plates. The secret isn’t just the carving; it’s the balance of flavors and textures that makes it feel special.
Here is why this recipe works so well for your kitchen:
- Quick & Easy: You can have this on the table in under 45 minutes. The prep is simple, and the cooking time is straightforward. It is perfect for busy weeknights when you are exhausted but still need to feed a hungry house.
- Simple Ingredients: You likely already have everything in your kitchen. Bell peppers, ground beef or turkey, rice, cheese, and basic spices. No fancy grocery trips needed. You don’t need to hunt down obscure ingredients for a one-night-only meal.
- Perfect for Halloween Parties: Great for potlucks, school parties, or cozy family dinners. They are portable, easy to hold, and visually striking. They look like they took hours, but they take minutes.
- Crowd-Pleaser: Always gets rave reviews from kids and adults alike. The savory filling inside the sweet pepper creates a flavor profile that is familiar yet exciting. Even picky eaters usually give these a try because of the “cool” factor.
- Unbelievably Delicious: The texture and flavor combo is next-level comfort food. The pepper softens into a tender bite, while the filling remains juicy and flavorful. It’s not dry, and it’s not soggy. It hits that sweet spot.
What makes this recipe different from the rest is the structural integrity of the pepper. Many stuffed pepper recipes result in a mushy mess. This method ensures the pepper holds its shape while becoming tender. Whether it is the specific carving technique that prevents leakage, or the perfectly balanced seasoning profile with a hint of cumin and paprika, this isn’t just another version. It’s your best version.
It isn’t just good—it is the kind that makes you close your eyes after the first bite. It’s comfort food reimagined. Healthier, faster, but with the same soul-soothing satisfaction. It is perfect for impressing guests without stress, or turning a simple meal into something memorable. You can serve these alongside a simple green salad or some crusty bread, and it feels like a complete, festive feast.
What Ingredients You Will Need
This recipe uses simple, wholesome ingredients to deliver bold flavor and satisfying texture without the fuss. The beauty of this dish lies in its accessibility. You don’t need specialty items that sit in your pantry for years. Most of these are staples you probably already have, or can grab on your way home.
Here is what you need to gather:
- Bell Peppers (4 large): I recommend using orange or yellow peppers for the best color contrast, but red works too. Green peppers can be bitter, so avoid them if you want a sweeter taste. Look for firm peppers that stand up straight. They should feel heavy for their size.
- Ground Beef or Turkey (1 lb): I prefer lean ground beef for richer flavor, but turkey is a lighter option. If you are watching your fat intake, 93% lean beef is a good middle ground. Ensure it is fresh and not too close to the expiration date.
- Cooked White Rice (1.5 cups): Use long-grain white rice for the best texture. Brown rice can be too chewy and might not cook evenly inside the pepper. Leftover rice works perfectly here. In fact, it is better because it is already cooked and cooled.
- Onion (1 medium): Yellow onion is the standard choice. Dice it finely so it cooks down and blends with the meat. It adds a necessary aromatic base to the filling.
- Garlic (2 cloves): Fresh garlic is non-negotiable. Pre-minced garlic in a jar just doesn’t have the same punch. Mince it finely to avoid large chunks in the final bite.
- Tomato Sauce (1 cup): I recommend using a good quality marinara or crushed tomatoes. A brand like Rao’s or Prego works well if you want convenience. For a richer taste, use crushed tomatoes with herbs added.
- Mozzarella Cheese (1.5 cups): Shredded mozzarella melts beautifully. Pre-shredded cheese contains anti-caking agents that can affect melt quality, so grate it yourself if you have time. It adds that gooey, stretchy element.
- Cheddar Cheese (0.5 cup): Sharp cheddar adds a tangy depth that mozzarella lacks. It balances the sweetness of the pepper. Use a block and grate it for best results.
- Seasonings: Salt, black pepper, cumin, and paprika. These are pantry staples. The cumin adds a warm, earthy note that pairs well with the beef. Paprika adds color and a mild smokiness.
- Optional Add-ins: Diced bell peppers, corn, or black beans. If you want to stretch the meal, add a cup of black beans. It adds protein and fiber without changing the flavor profile much.
For the best results, make sure your ingredients are at room temperature before you start mixing. Cold meat can seize up when it hits the pan. Also, if you are using leftover rice, make sure it is not clumpy. Break it up with a fork before mixing it with the meat. This ensures an even distribution of flavor in every bite.
Equipment Needed
You don’t need a fancy kitchen to make this recipe work. In fact, the simpler the tools, the easier the cleanup. Here is what you will need to get started.
- Large Skillet or Dutch Oven: A 12-inch skillet is ideal for browning the meat and sautéing the vegetables. Cast iron is my go-to because it retains heat well and gives a nice sear on the meat. If you don’t have cast iron, a non-stick skillet works fine.
- Baking Dish: A 9×13 inch baking dish is perfect for holding the peppers. Make sure it is deep enough to hold the peppers upright without them tipping over. If your dish is too shallow, the peppers might fall over and leak filling.
- Sharp Chef’s Knife: You need a sharp knife for carving the faces. A dull knife is dangerous and can slip. I use my Wüsthof for this. It makes clean cuts and is easy to control.
- Small Spoon or Melon Baller: To remove the seeds and membranes from inside the peppers, a small spoon works well. A melon baller is great for getting into the corners, but a regular teaspoon is fine too.
- Mixing Bowl: Use a large bowl to mix the filling. This ensures everything is evenly distributed before you stuff the peppers.
If you don’t have a baking dish that fits your peppers, you can use individual ramekins or muffin tins, but the presentation won’t be as impressive. For budget-friendly options, a basic ceramic baking dish from a thrift store works just as well as a new one. Just make sure it is oven-safe. Avoid glass dishes if your oven runs hot, as they can crack. Metal or ceramic is safer.
Preparation Method
Let’s get into the nitty-gritty. This process is straightforward, but there are a few tricks to make it smooth. Follow these steps closely for the best results.
- Preheat the Oven: Set your oven to 375°F (190°C). This temperature is crucial. It is hot enough to cook the peppers through but not so hot that the cheese burns before the filling is heated. Allow the oven to fully preheat. This takes about 10-15 minutes.
- Prepare the Peppers: Wash the bell peppers thoroughly. Place them on a cutting board. Using a sharp knife, slice off the top of each pepper, about an inch from the stem. Be careful not to cut too deep. Set the tops aside. Use a spoon to scoop out the seeds and white membranes. Scrape the inside until it is clean. This step takes about 5 minutes. Pat the inside dry with a paper towel. This helps prevent sogginess.
- Sauté the Aromatics: Heat a tablespoon of olive oil in a large skillet over medium heat. Add the diced onion and cook until translucent, about 3-4 minutes. Add the minced garlic and cook for another minute until fragrant. Do not let the garlic burn. It turns bitter quickly. Remove from heat.
- Cook the Meat: In the same skillet, add the ground beef or turkey. Break it up with a wooden spoon. Cook until browned and no pink remains. This takes about 6-8 minutes. Drain any excess fat. If you are using very lean meat, you might not need to drain anything.
- Mix the Filling: Return the skillet to low heat. Add the cooked rice, tomato sauce, and seasonings (salt, pepper, cumin, paprika). Stir everything together. Let it simmer for 2 minutes to let the flavors meld. Remove from heat. Stir in half of the mozzarella cheese. This binds the filling together.
- Stuff the Peppers: Place the hollowed peppers in the baking dish. Stand them upright. If they wobble, slice a tiny bit off the bottom to create a flat base. Stuff each pepper generously with the filling. Do not pack it too tight; the rice will expand slightly. Top each pepper with the remaining mozzarella and the cheddar cheese.
- Bake: Cover the baking dish with aluminum foil. This traps steam and helps the peppers soften. Bake for 25 minutes. Then, remove the foil and bake for another 10-15 minutes. The cheese should be bubbly and golden brown. The peppers should be tender when pierced with a fork.
- Cool and Serve: Let the peppers rest for 5 minutes before serving. This allows the filling to set slightly. It makes them easier to handle. Garnish with fresh parsley if you like. Enjoy immediately.
The total time for this process is about 40-45 minutes. It is efficient and doesn’t require constant attention. Just let the oven do the work while you clean up the prep area.
Cooking Tips & Techniques
I learned these tips through trial and error. Some mistakes were costly, but they taught me what works. Here is how to avoid common pitfalls.
- Don’t Overstuff: If you pack the peppers too full, the filling will spill out during baking. It creates a mess in your oven. Leave a little space at the top. The rice expands when heated.
- Pre-Cook the Rice: Always use cooked rice. Uncooked rice inside the pepper will not have enough moisture to cook through properly. It will end up crunchy and hard. If you must use uncooked rice, add more liquid to the filling and increase baking time.
- Check for Doneness: The peppers are done when they are tender but still hold their shape. If they are too soft, they will collapse. Pierce the side with a knife. It should go in easily but not through the pepper entirely.
- Use a Water Bath: If your peppers are leaning, add a little water to the bottom of the baking dish. This creates steam and helps them stand upright. It also adds moisture to the oven environment.
- Carve Before or After? You can carve faces before baking for a spooky look, or after for a cleaner presentation. I prefer carving before because the cheese melts into the holes, creating a glowing effect. But be careful not to carve too deep into the walls.
These tips ensure consistency. Every time you make this, it will turn out great. It’s about attention to detail, not complexity.
Variations & Adaptations
This recipe is versatile. You can adapt it to suit different dietary needs or taste preferences. Here are a few ideas.
- Vegetarian Option: Swap the ground beef for lentils or a plant-based meat alternative. Add extra veggies like mushrooms or zucchini to the filling. It adds bulk and flavor.
- Gluten-Free: This recipe is naturally gluten-free. Just ensure your tomato sauce and spices are certified gluten-free. Some sauces contain hidden gluten.
- Dairy-Free: Use dairy-free cheese alternatives. Nutritional yeast can add a cheesy flavor without the dairy. It works surprisingly well in this filling.
- Spicy Kick: Add chopped jalapeños or a dash of cayenne pepper to the filling. It adds heat that balances the sweetness of the pepper.
- International Twist: Use Mexican spices like chili powder and cilantro. Top with sour cream and salsa. It turns the dish into a fiesta-style meal.
I tried the vegetarian version last year with lentils. It was a hit. The lentils absorb the flavors well and provide a nice texture. It’s a great way to include more plant-based meals in your rotation.
Serving & Storage Suggestions
These peppers are best served warm. They taste great at room temperature too, which is perfect for picnics or potlucks. Here is how to store and reheat them.
- Refrigerator: Store leftovers in an airtight container for up to 3 days. The flavors actually improve after a day as they meld together.
- Freezer: You can freeze unbaked stuffed peppers. Wrap them tightly in plastic wrap and foil. They can be frozen for up to 3 months. Thaw in the fridge before baking.
- Reheating: Reheat in the oven at 350°F for 15-20 minutes. This restores the texture better than the microwave. The microwave can make the peppers rubbery.
- Serving Ideas: Serve with a side of garlic bread or a crisp green salad. A glass of red wine pairs well with the savory filling. For kids, apple slices are a good sweet contrast.
The key is to enjoy them fresh. They don’t hold up as well after being frozen and reheated, but the unbaked option works well. Plan your meal accordingly.
Nutritional Information & Benefits
This recipe is a balanced meal. It provides protein from the meat, carbs from the rice, and vitamins from the peppers. Here is a rough estimate per serving (one pepper):
- Calories: Approximately 350-400 calories.
- Protein: 20-25 grams.
- Carbohydrates: 30-35 grams.
- Fat: 15-20 grams.
- Fiber: 4-5 grams.
Bell peppers are high in Vitamin C, which supports immune health. Ground beef is a good source of iron and B12. Rice provides energy. It’s a wholesome meal that fuels your body. If you are watching your weight, use turkey and less cheese. It reduces the calorie count significantly.
Conclusion
The Perfect Jack-o-Lantern Stuffed Bell Peppers are more than just a Halloween treat. They are a testament to the joy of cooking without stress. They remind us that food can be fun, festive, and flavorful. I love making them because they bring smiles to faces, both young and old. They are a tradition I look forward to every year.
I encourage you to try this recipe. Customize it to your liking. Add your favorite spices or veggies. Make it your own. And please, share your results. I love seeing how others adapt this recipe. Leave a comment below with your thoughts. Did your kids love it? Did it turn out as expected? I read every comment.
Thank you for joining me in the kitchen. Happy Halloween, and happy cooking!
Frequently Asked Questions
Can I use different colored peppers?
Yes, you can use any color of bell pepper. Orange and yellow are sweeter, while red is also sweet. Green peppers are more bitter. Choose based on your taste preference.
Can I make this recipe ahead of time?
Yes, you can assemble the peppers and refrigerate them overnight. Bake them the next day. You may need to add 5-10 minutes to the baking time if they are cold from the fridge.
What if I don’t have ground beef?
You can use ground turkey, chicken, or even lentils for a vegetarian version. The cooking time may vary slightly depending on the protein used.
How do I prevent the peppers from falling over?
Slice a small piece off the bottom of each pepper to create a flat base. This helps them stand upright in the baking dish.
Can I freeze the cooked peppers?
It is better to freeze the unbaked peppers. Cooked peppers can become mushy when frozen and reheated. If you must freeze cooked ones, reheat them gently in the oven.
Pin This Recipe!
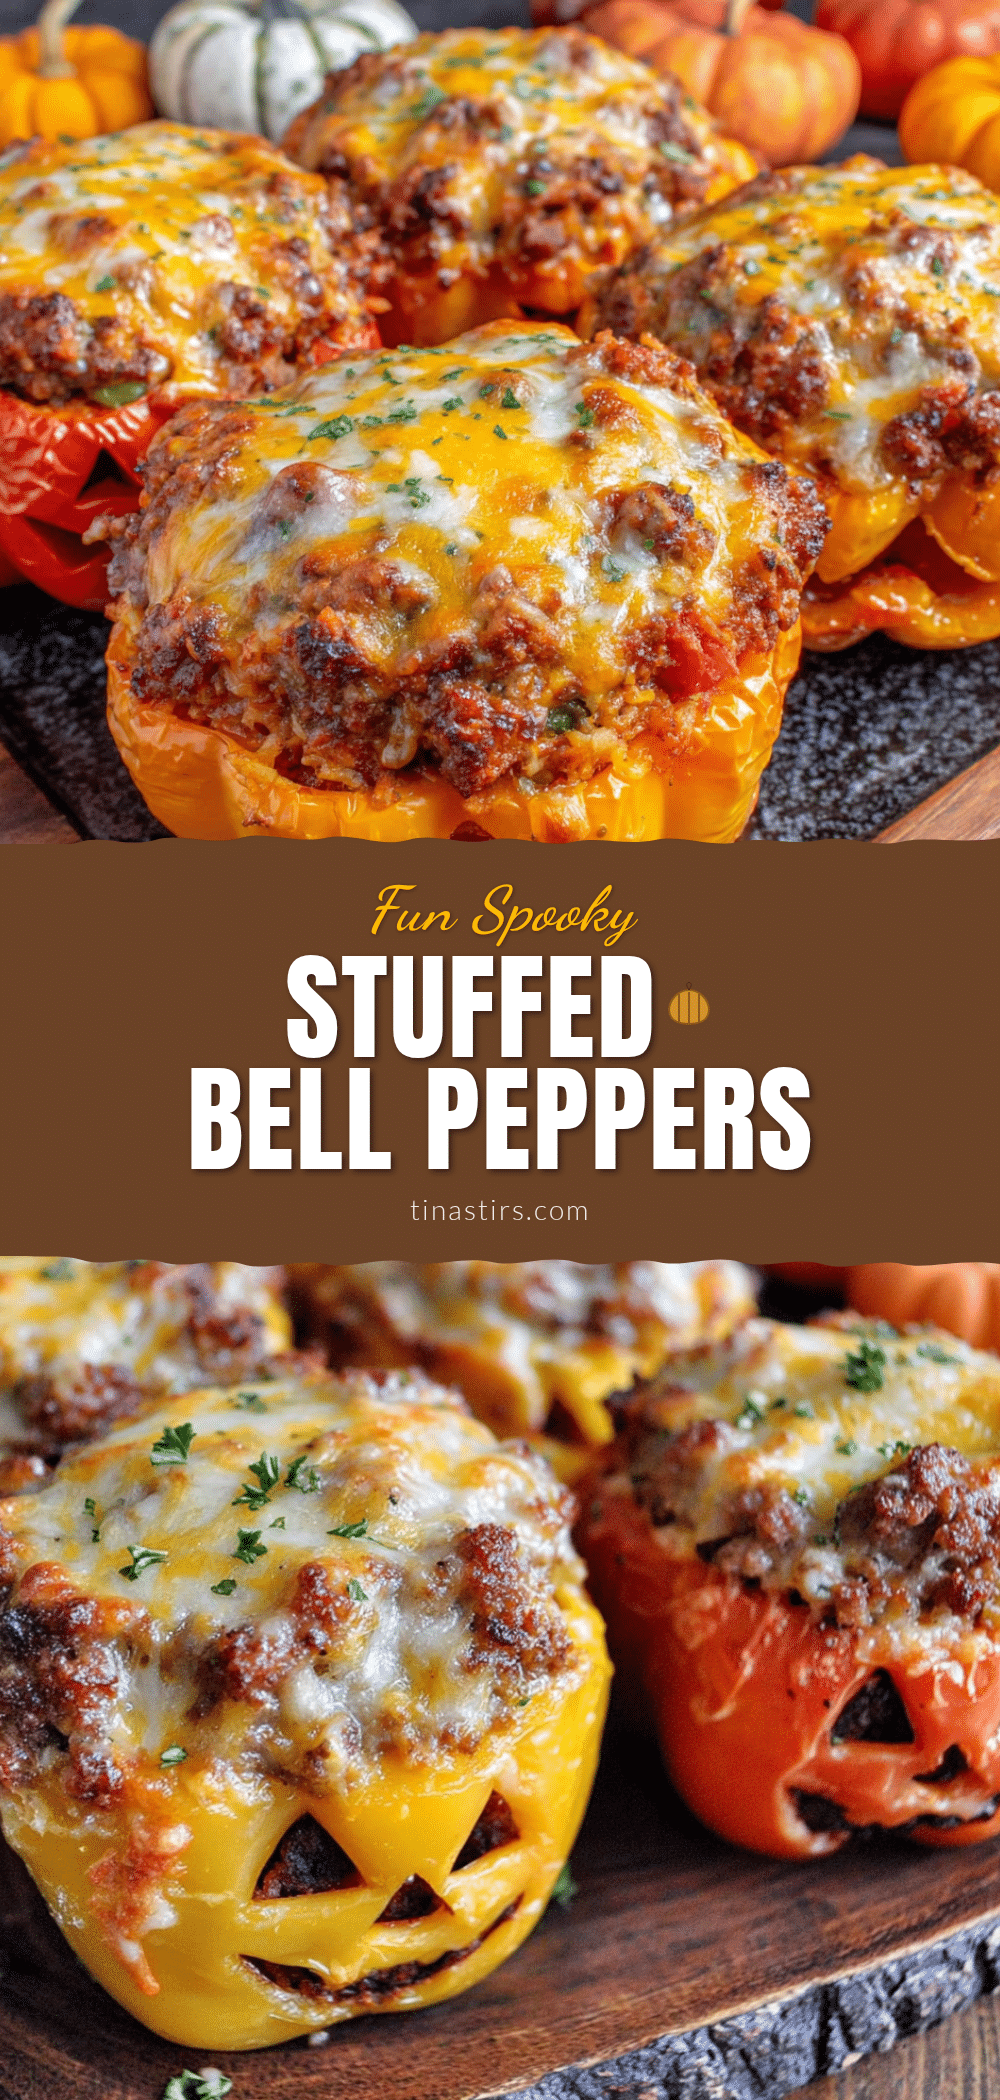
Perfect Jack-o-Lantern Stuffed Bell Peppers

A festive and forgiving Halloween dinner recipe featuring bell peppers carved into jack-o-lanterns and stuffed with a savory mixture of ground beef, rice, and cheese. Quick, easy, and kid-approved.
- Prep Time: 15 minutes
- Cook Time: 30 minutes
- Total Time: 45 minutes
- Yield: 4 servings 1x
- Category: Main Course
- Cuisine: American
Ingredients
- 4 large bell peppers (orange, yellow, or red recommended)
- 1 lb ground beef or turkey
- 1.5 cups cooked white rice
- 1 medium yellow onion, diced
- 2 cloves garlic, minced
- 1 cup tomato sauce or crushed tomatoes
- 1.5 cups shredded mozzarella cheese
- 0.5 cup shredded sharp cheddar cheese
- 1 tbsp olive oil
- Salt and black pepper to taste
- 1 tsp cumin
- 1 tsp paprika
- Optional: Diced bell peppers, corn, or black beans
Instructions
- Preheat oven to 375°F (190°C).
- Wash bell peppers and slice off the top about an inch from the stem. Set tops aside.
- Scoop out seeds and white membranes from inside the peppers using a spoon. Pat the inside dry with a paper towel.
- Heat olive oil in a large skillet over medium heat. Add diced onion and cook until translucent (3-4 minutes).
- Add minced garlic and cook for 1 minute until fragrant.
- Add ground beef or turkey to the skillet. Break up with a wooden spoon and cook until browned (6-8 minutes). Drain excess fat.
- Return skillet to low heat. Add cooked rice, tomato sauce, salt, pepper, cumin, and paprika. Simmer for 2 minutes.
- Remove from heat and stir in half of the mozzarella cheese.
- Place hollowed peppers in a 9×13 inch baking dish. If they wobble, slice a tiny bit off the bottom to create a flat base.
- Stuff each pepper generously with the filling. Do not pack too tight.
- Top each pepper with remaining mozzarella and cheddar cheese.
- Cover baking dish with aluminum foil and bake for 25 minutes.
- Remove foil and bake for another 10-15 minutes until cheese is bubbly and golden, and peppers are tender.
- Let rest for 5 minutes before serving.
Notes
Ensure rice is cooked and cooled before mixing. If using leftover rice, break up clumps. For a vegetarian option, swap beef for lentils or plant-based meat. Carving faces before baking creates a glowing effect as cheese melts into holes. Do not overstuff to prevent spilling.
Nutrition
- Serving Size: 1 stuffed pepper
- Calories: 375
- Sugar: 6
- Sodium: 600
- Fat: 17.5
- Saturated Fat: 8
- Carbohydrates: 32.5
- Fiber: 4.5
- Protein: 22.5
Keywords: Halloween dinner, stuffed peppers, jack-o-lantern recipe, easy family meals, ground beef recipes, kid-friendly dinner, festive cooking


