Love this? Save it for later!
Share the inspiration with your friends
There used to be a tiny bakery tucked behind a vintage bookstore in Portland that made the most incredible Halloween cakes. When they closed their doors three years ago—just a handwritten sign saying “Off to new spells”—I honestly felt a little lost. That bakery had this purple ombre layer cake with black buttercream that showed up every October first, and I’d been buying it for years. After twelve tries—some ending in lopsided disasters and one memorable frosting catastrophe that involved my cat walking through it—I finally figured out how to make it myself. This Perfect Purple Ombre Halloween Layer Cake is my love letter to that little bakery, and let me tell you, it’s even better than I remember.
You know that feeling when you take a bite of something and it just transports you? That’s what this cake does. The purple ombre effect isn’t just pretty—it’s surprisingly simple to pull off, and the flavor is this tender vanilla cake that somehow feels both fancy and familiar. I mean, I spent an entire weekend testing different purple shades before I got the gradient just right. My kitchen looked like a unicorn exploded in it, but honestly, it was worth every speck of purple food coloring.
This cake has become my go-to for Halloween parties, and people always ask if I bought it somewhere. Nope—just a lot of trial and error, a few messy mistakes, and one very patient husband who ate all the failed attempts. Maybe you’ve been there, staring at a bakery display wishing you could recreate that magic at home. Well, grab your mixing bowls—we’re making this happen.
Why You’ll Love This Recipe
Let me tell you why this cake is worth every minute in the kitchen. I’ve tested this recipe more times than I care to count, and I’ve worked out all the kinks so you don’t have to. Here’s what makes it special:
- Stunning Visuals, Simple Process : The purple ombre effect looks like you spent hours, but it’s just dividing your batter and adding different amounts of food coloring. No fancy techniques required.
- Perfectly Moist Layers : This cake uses buttermilk and oil, which means it stays tender for days. No dry, crumbly nonsense here.
- Halloween-Ready Without Being Tacky : The deep purple gradient with black buttercream is spooky but elegant. It fits right in at a costume party or a fancy dinner.
- Make-Ahead Friendly : The layers freeze beautifully, and the frosting keeps well. You can spread the work over a few days.
- Crowd-Pleasing Flavor : It’s vanilla cake at its core—familiar, comforting, and loved by kids and adults alike. The purple color is just a bonus.
What makes this recipe different from all the other purple cakes out there? I’ve perfected the color gradient so you get five distinct shades that blend into each other without looking muddy. Plus, I figured out the exact amount of black cocoa powder for that dark, dramatic buttercream that doesn’t taste artificial. This isn’t just another Halloween cake—it’s the one that’ll have people asking for the recipe before the party’s over.
Honestly, this cake makes me close my eyes after the first bite every single time. It’s comfort food with a spooky twist—familiar vanilla flavor in a showstopping package that’s perfect for impressing guests without stressing yourself out.
What Ingredients You Will Need
This recipe uses simple, pantry-friendly ingredients to create something that looks incredibly complex. The magic is in the technique, not exotic ingredients. Here’s what you’ll need:
For the Cake Layers
- 3 cups all-purpose flour (375g) — spoon and level for accuracy; don’t scoop directly from the bag
- 2 cups granulated sugar (400g)
- 1 tablespoon baking powder
- 1 teaspoon salt
- 1 cup buttermilk (240ml), room temperature — adds tenderness and helps the color develop
- 1 cup vegetable oil (240ml) — I prefer canola or avocado oil for neutral flavor
- 4 large eggs, room temperature
- 2 teaspoons vanilla extract — use pure vanilla, not imitation, for the best flavor
- Purple gel food coloring — I recommend Americolor or Wilton brands for vibrant colors without altering taste. Liquid food coloring won’t give you that deep, rich purple.
For the Black Buttercream
- 2 cups unsalted butter (4 sticks), softened — let it sit out for at least an hour
- 6 cups powdered sugar (720g), sifted
- 1/4 cup black cocoa powder (20g) — this is key for that dark, Oreo-like flavor
- 1/4 cup heavy cream (60ml), plus more as needed
- 2 teaspoons vanilla extract
- Pinch of salt
- Black gel food coloring — optional, for deeper color if needed
For the Purple Ombre Effect
- Purple gel food coloring in varying amounts — you’ll divide your batter into five bowls and add different amounts to each
- White gel food coloring — optional, but helps create a lighter base shade if your batter looks yellow
Ingredient Tips: I’ve tried this recipe with both generic and name-brand food colorings, and honestly, the gel kind makes a huge difference. The liquid stuff just won’t get you that deep, dramatic purple—you’ll end up with a sad lavender. Also, if you can’t find black cocoa powder, you can use regular unsweetened cocoa powder and add more black food coloring, but the flavor won’t be quite as rich. I buy mine from King Arthur Flour or specialty baking shops.
For substitutions, you can use a dairy-free butter alternative and coconut cream instead of heavy cream for the frosting. The cake itself works well with a plant-based buttermilk (just add a tablespoon of vinegar to plant milk and let it sit for five minutes).
Equipment Needed
You don’t need a professional bakery setup for this cake, but a few specific tools make the process much smoother:
- Three 8-inch round cake pans — I use Fat Daddio’s anodized aluminum pans; they conduct heat evenly and release cakes beautifully
- Stand mixer or hand mixer — either works, but a stand mixer makes the buttercream much easier
- Mixing bowls — you’ll need at least five small bowls for the colored batter portions
- Kitchen scale — not essential, but helpful for dividing batter evenly
- Offset spatula — for smooth frosting application
- Cake turntable — makes frosting so much easier, but a lazy Susan works in a pinch
- Parchment paper rounds — cut to fit your pans perfectly
- Cooling rack — wire racks work best for even cooling
- Food scale or measuring cups — for dividing batter accurately
If you don’t have three cake pans, you can bake the layers one at a time—just let the pans cool completely between batches. I’ve done it that way when I was just starting out, and it works fine. Also, a bench scraper helps get those clean, sharp edges on the frosting if you’re going for that polished look.
Preparation Method
Let’s walk through this step by step. Take your time with the coloring—it’s the most important part for that gorgeous ombre effect.
- Preheat and Prep : Preheat your oven to 350°F (175°C). Grease three 8-inch cake pans, line the bottoms with parchment paper rounds, and dust with flour. Set aside.
- Mix Dry Ingredients : In a large bowl, whisk together 3 cups flour, 2 cups sugar, 1 tablespoon baking powder, and 1 teaspoon salt. Make sure there are no lumps—sift if necessary.
- Combine Wet Ingredients : In a separate bowl or large measuring cup, whisk together 1 cup buttermilk, 1 cup oil, 4 eggs, and 2 teaspoons vanilla. Whisk until smooth and well combined.
- Make the Batter : Pour the wet ingredients into the dry ingredients. Mix on low speed until just combined—about 30 seconds. Scrape the bowl and mix another 10 seconds. Do not overmix, or the cake will be tough. The batter should be smooth and slightly thick.
- Divide and Color : Divide the batter evenly into 5 small bowls. You’ll have about 1 cup of batter per bowl. Leave the first bowl plain (lightest shade). Add 1 drop of purple gel to the second bowl, 3 drops to the third, 6 drops to the fourth, and 10 drops to the fifth. Mix each until the color is uniform. For the darkest shade, add a tiny bit of black gel if you want a deeper purple.
- Layer the Batter : This is where the ombre magic happens. Working quickly, spoon the darkest purple batter into the bottom of one prepared pan. Gently layer the next darkest on top, then continue with medium, light, and finally the plain batter. Don’t stir—let the layers sit naturally. Repeat with the remaining two pans.
- Bake : Bake for 25-30 minutes, or until a toothpick inserted in the center comes out clean or with a few moist crumbs. The layers should spring back when touched lightly. Let cool in pans for 10 minutes, then turn out onto wire racks to cool completely. This is crucial—warm cake will melt your frosting.
- Make the Buttercream : While the cake cools, beat the softened butter in a stand mixer with the paddle attachment until smooth and creamy—about 2 minutes. Add the sifted powdered sugar and black cocoa powder alternately with the heavy cream, starting and ending with sugar. Beat on medium speed for 3-4 minutes until light and fluffy. Add vanilla and salt. If the frosting is too thick, add more cream a tablespoon at a time. If too thin, add more powdered sugar.
- Assemble : Level each cake layer with a serrated knife if needed. Place one layer on your cake board or plate. Spread about 1/2 cup of black buttercream evenly on top. Repeat with the second and third layers. Apply a thin crumb coat (a thin layer of frosting that traps crumbs) and refrigerate for 20 minutes.
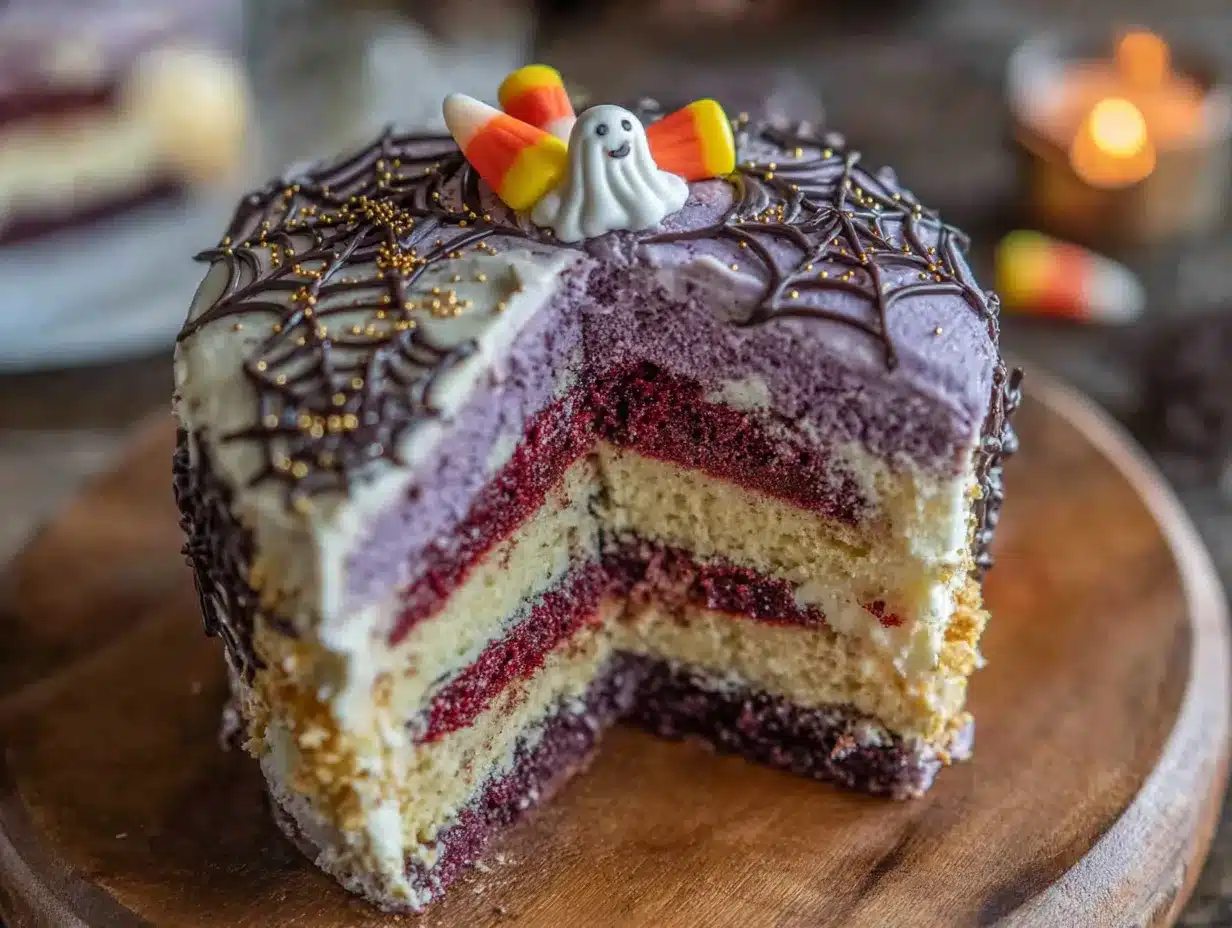
- Frost and Finish : Apply the final coat of black buttercream, smoothing with an offset spatula. For a dramatic look, create swoops or peaks with the spatula. The contrast between the black outside and the purple ombre inside when you slice it is absolutely stunning.
Pro tip from my many failures : If your layers seem a little domed, don’t panic—just level them. I once tried to skip this step and ended up with a leaning tower of cake. Also, if the buttercream gets too soft while you’re working, pop it in the fridge for 10 minutes. A cold cake is much easier to frost neatly.
Cooking Tips & Techniques
I’ve made this cake enough times to know where things can go wrong. Here’s what I’ve learned the hard way:
Color Control : The biggest mistake I made early on was using too much food coloring at once. Gel colors are concentrated—start with tiny amounts and build up. You can always add more, but you can’t take it out. I once ended up with a batter that looked like grape soda because I got too enthusiastic.
Batter Temperature : Room temperature ingredients are non-negotiable here. Cold eggs or buttermilk will make the batter lumpy and affect how the colors blend. Take everything out of the fridge an hour before you start. I forgot this once and ended up with a streaky, weirdly textured cake.
Even Layers : For perfect ombre stripes when you slice, make sure each colored layer is roughly the same thickness. I use a kitchen scale to weigh my batter portions—about 200g per color per pan. Eyeballing it works too, but the scale gives you more consistent results.
Frosting Consistency : Black buttercream can be tricky because the cocoa powder absorbs moisture. If it seems too thick, add cream a tablespoon at a time. Too thin? More powdered sugar. The perfect consistency is spreadable but not runny—it should hold its shape when you lift the spatula.
Timing Strategy : I like to bake the layers a day ahead, wrap them tightly in plastic wrap, and refrigerate overnight. Cold layers are much easier to frost, and the flavor actually improves. The buttercream can also be made a day ahead and brought to room temperature before using.
Variations & Adaptations
One of the best things about this cake is how adaptable it is. Here are some variations I’ve tried:
- Gluten-Free Version : Substitute the all-purpose flour with a 1:1 gluten-free baking flour blend. I’ve had good results with King Arthur’s Measure for Measure. Add an extra tablespoon of buttermilk to compensate for the drier texture.
- Different Color Themes : The ombre technique works with any color. Try orange to yellow for a sunset effect, or green to black for a witchy vibe. I made a blue ombre version for a mermaid-themed party, and it was a hit.
- Flavor Variations : Add 1 tablespoon of espresso powder to the batter for a mocha twist, or swap the vanilla for almond extract. For a chocolate version, replace 1/2 cup of flour with unsweetened cocoa powder.
- Dairy-Free Adaptation : Use plant-based butter and coconut cream for the frosting. For the cake, substitute buttermilk with almond milk mixed with 1 tablespoon of vinegar. The texture will be slightly different but still delicious.
- Spooky Add-Ins : Fold in 1/2 cup of black sprinkles or edible glitter into the darkest batter layer for extra Halloween sparkle. I did this for a party and the kids went wild.
My personal favorite variation? I once added a layer of blackberry jam between the cake and frosting. The tartness cut through the sweetness beautifully, and the purple tones matched perfectly. Just spread a thin layer on top of each cake layer before frosting.
Serving & Storage Suggestions
This cake is best served at room temperature, so take it out of the fridge about 30 minutes before slicing. The contrast between the black frosting and the purple ombre interior is most dramatic when the cake is cold, but the flavor is fuller at room temperature.
For serving, I like to present the whole cake on a black cake stand with some edible glitter dusted on top. A few black sugar crystals or candy eyeballs around the base add a fun Halloween touch without overwhelming the elegant look.
Storage: The assembled cake keeps well in the refrigerator for up to 5 days. Cover it loosely with plastic wrap or store it in a cake carrier. The flavors actually meld together and improve after a day or two.
Freezing: You can freeze the unfrosted cake layers for up to 3 months. Wrap each layer tightly in plastic wrap, then foil. Thaw overnight in the refrigerator before frosting. The buttercream also freezes well for up to 2 months—just thaw in the fridge and re-whip before using.
Reheating: If you prefer your cake slightly warm, microwave individual slices for 10-15 seconds. The buttercream will soften but won’t melt completely. Honestly, I love it cold straight from the fridge—the texture is dense and fudgy.
One thing I’ve noticed is that the purple colors deepen slightly overnight. So if you’re making this for a party, the colors will actually look more vibrant on day two. Plan accordingly!
Nutritional Information & Benefits
Let’s be real—this is a celebration cake, not a health food. But here’s a rough breakdown per slice (based on 16 servings):
- Calories: Approximately 520 per slice
- Fat: 28g
- Carbohydrates: 68g
- Protein: 5g
- Sugar: 52g
That said, there are a few redeeming qualities. The buttermilk adds calcium and probiotics, and the eggs provide protein. The black cocoa powder is rich in antioxidants—more than regular cocoa, actually. And honestly, a slice of this cake with a glass of milk is one of life’s simple pleasures.
For dietary considerations: This recipe contains gluten, dairy, and eggs. I’ve included substitution notes above for those with restrictions. If you’re watching your sugar intake, you can reduce the sugar in the cake to 1 3/4 cups without affecting the texture too much.
My personal take? Life is short. Eat the cake. Balance it out with a salad the next day and enjoy every single bite of this gorgeous creation.
Conclusion
This Perfect Purple Ombre Halloween Layer Cake is more than just a pretty dessert—it’s a conversation starter, a showstopper, and honestly, a labor of love that’s totally worth the effort. The first time I sliced into one of these and saw those perfect purple stripes, I actually teared up a little. That moment of reveal—when everyone gasps at the ombre interior—is pure magic.
I want you to make this cake your own. Maybe you’ll use different colors, add a different filling, or decorate it with your favorite Halloween candies. That’s the beauty of baking—you get to put your own spin on things. Don’t be afraid to experiment. If your first attempt isn’t perfect, that’s okay. My first one looked like a purple mess, but it still tasted amazing.
So go ahead, preheat that oven, and get ready to create something beautiful. And when you do, I’d love to hear about it. Drop a comment below and tell me how your cake turned out—what colors did you use? Any fun decorations? Did your guests freak out when you sliced it? Share your photos, your questions, your successes, and even your messy failures. We’re all in this together, and I can’t wait to see what you create.
Happy Halloween, and happy baking, friends!
Frequently Asked Questions
Can I use liquid food coloring instead of gel?
I really don’t recommend it. Liquid food coloring will thin out your batter and won’t give you those deep, vibrant purple shades. Gel colors are much more concentrated and won’t affect the texture. Trust me on this one—I learned the hard way.
How far in advance can I make this cake?
You can bake the layers up to 3 days ahead and store them wrapped tightly in the fridge. The buttercream can be made 2 days ahead. Assemble the cake the day before serving for the best color development—the purple actually deepens overnight.
Why did my purple batter turn brown after baking?
This happens when you use too much red-based purple coloring. Look for a true purple gel that’s more blue-based. Also, make sure your oven isn’t too hot—overbaking can cause colors to darken and muddy. Check the cake at 25 minutes.
Can I make this into cupcakes instead?
Absolutely! Divide the colored batter into cupcake liners, layering the colors just like you would for the cake. Bake at 350°F for 18-20 minutes. You’ll get about 24 cupcakes with the same gorgeous ombre effect when you bite into them.
How do I get clean, sharp slices?
Use a long, sharp knife and wipe it clean between each cut. For the cleanest slices, refrigerate the cake for at least an hour before cutting. Run the knife under hot water, dry it, then slice. The heat helps the knife glide through the frosting without dragging.
Pin This Recipe!
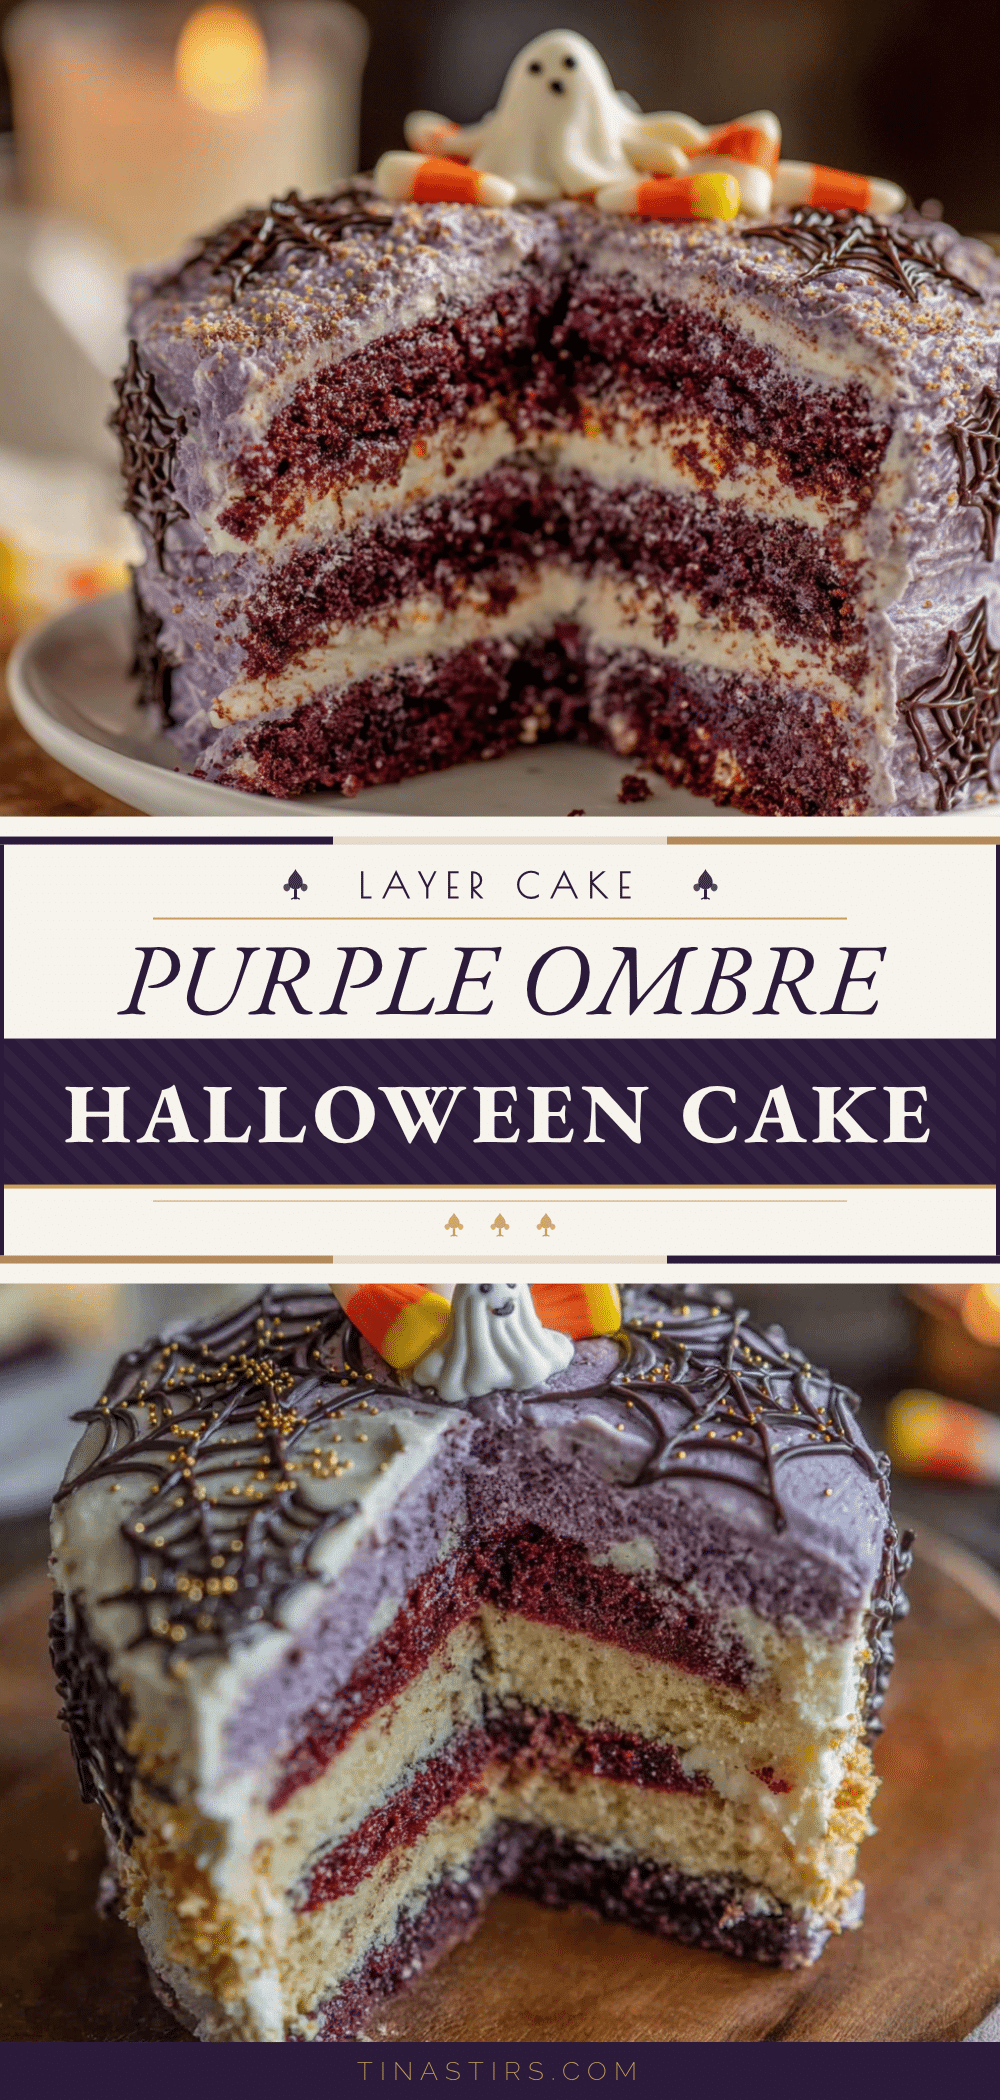
Perfect Purple Ombre Halloween Layer Cake
A stunning purple ombre layer cake with black buttercream that’s perfect for Halloween. This tender vanilla cake features five distinct purple shades and a rich, dark frosting that’s both elegant and spooky.
- Prep Time: 30 minutes
- Cook Time: 30 minutes
- Total Time: 1 hour 30 minutes
- Yield: 16 servings 1x
- Category: Dessert
- Cuisine: American
Ingredients
- 3 cups all-purpose flour (375g)
- 2 cups granulated sugar (400g)
- 1 tablespoon baking powder
- 1 teaspoon salt
- 1 cup buttermilk (240ml), room temperature
- 1 cup vegetable oil (240ml) (canola or avocado oil recommended)
- 4 large eggs, room temperature
- 2 teaspoons vanilla extract (pure vanilla recommended)
- Purple gel food coloring (Americolor or Wilton recommended)
- 2 cups unsalted butter (4 sticks), softened
- 6 cups powdered sugar (720g), sifted
- 1/4 cup black cocoa powder (20g)
- 1/4 cup heavy cream (60ml), plus more as needed
- 2 teaspoons vanilla extract
- Pinch of salt
- Black gel food coloring (optional, for deeper color)
- White gel food coloring (optional, for lighter base shade)
Instructions
- Preheat oven to 350°F (175°C). Grease three 8-inch cake pans, line bottoms with parchment paper rounds, and dust with flour.
- In a large bowl, whisk together 3 cups flour, 2 cups sugar, 1 tablespoon baking powder, and 1 teaspoon salt.
- In a separate bowl, whisk together 1 cup buttermilk, 1 cup oil, 4 eggs, and 2 teaspoons vanilla until smooth.
- Pour wet ingredients into dry ingredients. Mix on low speed until just combined (about 30 seconds). Scrape bowl and mix another 10 seconds. Do not overmix.
- Divide batter evenly into 5 small bowls (about 1 cup each). Leave first bowl plain. Add 1 drop purple gel to second bowl, 3 drops to third, 6 drops to fourth, and 10 drops to fifth. Mix each until color is uniform.
- Spoon darkest purple batter into bottom of one prepared pan. Gently layer next darkest on top, then continue with medium, light, and plain batter. Repeat with remaining two pans.
- Bake for 25-30 minutes, until toothpick inserted in center comes out clean or with a few moist crumbs. Cool in pans for 10 minutes, then turn out onto wire racks to cool completely.
- Beat softened butter in stand mixer with paddle attachment until smooth and creamy (about 2 minutes). Add sifted powdered sugar and black cocoa powder alternately with heavy cream, starting and ending with sugar. Beat on medium speed for 3-4 minutes until light and fluffy. Add vanilla and salt.
- Level each cake layer with a serrated knife if needed. Place one layer on cake board or plate. Spread about 1/2 cup black buttercream evenly on top. Repeat with second and third layers. Apply thin crumb coat and refrigerate for 20 minutes.
- Apply final coat of black buttercream, smoothing with offset spatula. Create swoops or peaks for dramatic look.
Notes
Room temperature ingredients are essential. Gel food coloring is recommended over liquid for vibrant colors. For perfect ombre stripes, weigh batter portions (about 200g per color per pan). Cake layers can be baked a day ahead and refrigerated. Buttercream can be made a day ahead. Purple colors deepen slightly overnight.
Nutrition
- Serving Size: 1 slice
- Calories: 520
- Sugar: 52
- Sodium: 280
- Fat: 28
- Saturated Fat: 14
- Carbohydrates: 68
- Fiber: 1
- Protein: 5
Keywords: Halloween cake, purple ombre cake, layer cake, black buttercream, vanilla cake, spooky cake, Halloween dessert


