Love this? Save it for later!
Share the inspiration with your friends
My husband had avoided pumpkin spice anything for a decade. He’d call it cloying, too sweet, or just plain unnecessary when real coffee existed. I’m not supposed to play favorites with recipes, but honestly, I kept trying to bridge that gap because I love him and I love baking. Then last Tuesday, I made a batch of these soft chewy brown butter pumpkin snickerdoodles just for myself. I was stuck in the kitchen because the dishwasher was leaking, and I needed something that smelled like autumn to keep me sane. I found him twenty minutes later, standing by the counter, holding a napkin with a single crumb on it. He didn’t say anything. He just pointed at the plate and asked if I had saved the rest for tomorrow. The crack in his armor was subtle, but it was there.
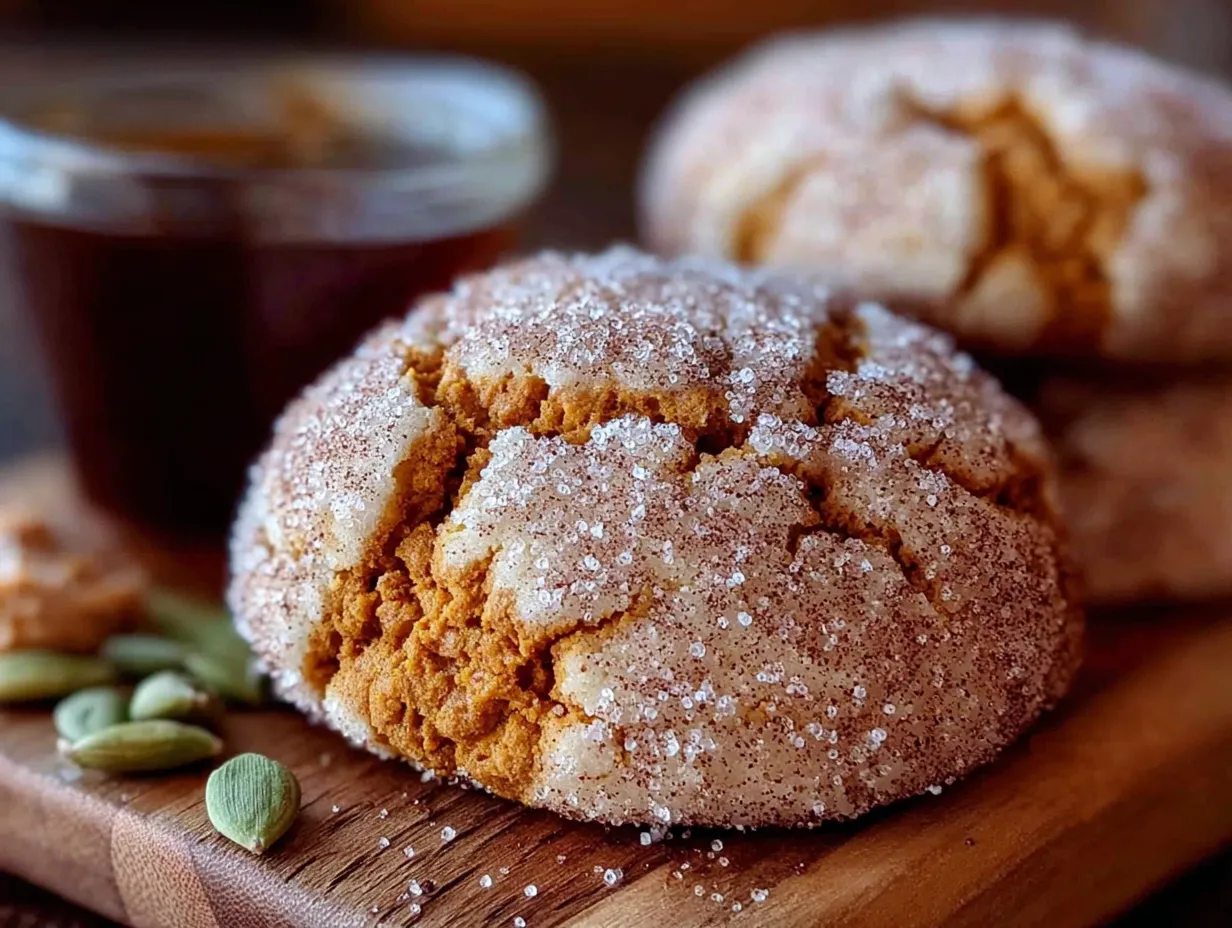
Let me tell you, there is nothing quite like the smell of brown butter hitting the pan. It’s nutty, rich, and deeply comforting. These cookies aren’t your standard pumpkin spice cookie. They have that tangy kick from the cream of tartar that defines a true snickerdoodle, but they’re elevated by the toasty depth of browned butter. The texture is the real star here. They are soft in the center, chewy on the edges, and dusted with that classic cinnamon-sugar coating that makes you feel like you’re eating dessert for breakfast. Maybe you’ve been there, trying to convince a skeptic that a certain flavor profile is worth their time. This recipe changed the conversation.
I’ve made these cookies at least five times since that Tuesday. The dough gets chilled, which helps them hold their shape, and the result is a cookie that stays fresh for days. It’s the kind of baking that feels like a hug. You mix, you chill, you roll, you bake. It’s simple, but the flavor development from browning the butter makes it feel sophisticated. Honestly, if you have a pumpkin spice skeptic in your life, this is the one to win them over. If you don’t, well, you’ll just have more cookies for yourself. And let’s face it, who am I to judge?
Why You’ll Love This Recipe
There’s a reason this soft chewy brown butter pumpkin snickerdoodle recipe has become a staple in my kitchen. It’s not just about the flavor, though that’s definitely the hook. It’s about the texture and the balance. I’ve tested dozens of pumpkin cookie recipes, and most of them turn out cakey or dry. This one is different. The brown butter adds a layer of complexity that regular melted butter just can’t match. It brings a toasted, hazelnut-like aroma that pairs perfectly with the warm spices. Plus, the cream of tartar gives it that signature tangy snap you expect from a snickerdoodle.
- Quick & Easy: While the dough needs to chill, the active prep time is under 20 minutes. This is perfect for busy weeknights or when you have a sudden craving and don’t want to spend hours in the kitchen.
- Simple Ingredients: You likely already have most of this in your pantry. Brown butter is just butter you’ve cooked a bit longer. The rest is flour, sugar, eggs, and spices. No fancy grocery trips needed.
- Perfect for Autumn: These are great for cozy dinners, holiday potlucks, or just as a treat with your morning coffee. They capture the essence of fall without being overly heavy.
- Crowd-Pleaser: I’ve served these to people who claim they hate pumpkin, and they always come back for seconds. The combination of tangy, sweet, and spiced is hard to resist.
- Unbelievably Delicious: The texture is next-level comfort food. Soft, chewy, and slightly crisp on the outside, they melt in your mouth.
What makes this recipe stand out is the technique. Browning the butter changes the entire game. It concentrates the flavor and adds a nutty depth that complements the pumpkin puree without making it taste like mush. I also make sure to chill the dough thoroughly. This step is crucial for preventing the cookies from spreading too thin. It’s a small effort that results in a much better texture. This isn’t just another pumpkin cookie; it’s your best version of a snickerdoodle. It’s the kind of cookie that makes you close your eyes after the first bite. It’s comfort food reimagined—healthier in spirit, if not in calories, but with the same soul-soothing satisfaction.
What Ingredients You Will Need
This recipe uses simple, wholesome ingredients to deliver bold flavor and satisfying texture without the fuss. The key here is quality. Since there are fewer ingredients, each one plays a significant role. I like to use unsalted butter so I can control the saltiness, and I always go for pure pumpkin puree, not pumpkin pie filling, which has added sugars and spices. The cream of tartar is non-negotiable for that authentic snickerdoodle tang.
For the Dough
- Unsalted Butter: 1 cup (2 sticks or 226g). You’ll need to brown this. Look for high-quality butter with a higher fat content for better browning.
- Granulated Sugar: 1 cup (200g). This provides sweetness and helps create the crisp edges.
- Light Brown Sugar: 1 cup (200g). Packed. This adds moisture and chewiness to the cookies.
- Eggs: 2 large eggs, room temperature. This helps bind the dough and adds richness.
- Pure Pumpkin Puree: ½ cup (120g). Make sure it’s 100% pure pumpkin, not pie filling.
- Vanilla Extract: 2 teaspoons. Use a good quality vanilla for the best flavor.
For the Dry Ingredients
- All-Purpose Flour: 3 cups (375g). Spoon and level for accuracy. I recommend King Arthur Flour for consistent results.
- Baking Soda: 1 teaspoon. Helps the cookies rise.
- Cream of Tartar: 1 teaspoon. This is the secret ingredient for the tangy snickerdoodle flavor.
- Salt: ½ teaspoon. Enhances all the other flavors.
- Cinnamon: 1 teaspoon. Ground cinnamon for warmth.
For the Coating
- Granulated Sugar: ½ cup (100g).
- Ground Cinnamon: 1 tablespoon. Mix this with the sugar before rolling the dough balls.
If you need to substitute, you can use dairy-free butter for the brown butter step, though the flavor will be slightly different. For a gluten-free option, use a 1:1 gluten-free flour blend, but note that the texture might be slightly more crumbly. In summer, you could swap the pumpkin for apple butter, but the moisture content will vary, so you may need to adjust the flour slightly.
Equipment Needed
You don’t need much fancy gear to make these cookies. A large mixing bowl is essential for combining the wet and dry ingredients without making a mess. I prefer a stand mixer with a paddle attachment because it creams the butter and sugars evenly, but a hand mixer works fine too. Just make sure you beat the brown butter until it’s cool before mixing it with the sugar, or you’ll get greasy cookies.
A baking sheet with parchment paper is crucial. Lining your sheets prevents sticking and ensures even baking. I use half-sheet pans, but if you have quarter-sheet pans, you’ll need to double the batches. A wire cooling rack is necessary to let the cookies cool completely. If you leave them on the hot pan, they might continue to cook and become too crisp. I also recommend a small saucepan for browning the butter. It gives you better control over the heat than using a microwave or a deep skillet.
If you don’t have a stand mixer, a sturdy wooden spoon will work, but it takes a bit more arm strength. For the coating, a small shallow bowl is perfect for mixing the cinnamon and sugar. I also keep a silicone spatula handy to scrape down the sides of the bowl. It’s a small thing, but it ensures you get all the flavor in every bite. Avoid non-stick baking sheets if you can; they can cause the cookies to spread too much. Heavy-gauge aluminum sheets are my go-to for consistent browning.
Preparation Method
Start by browning the butter. This is the most important step for flavor. Melt the butter in a small saucepan over medium heat. Stir it constantly with a heatproof spatula. It will foam up and then subside. You’ll see little brown bits forming at the bottom and smell a nutty aroma. This takes about 5-7 minutes. Be careful not to burn it. If it smells like burnt toast, you’ve gone too far. Immediately pour the brown butter into a heatproof bowl to stop the cooking process. Let it cool for about 20 minutes until it’s lukewarm but still liquid. If it’s too hot, it will melt the sugar. If it’s too cold, it won’t mix well.
While the butter cools, preheat your oven to 350°F (175°C). Line two large baking sheets with parchment paper. In a medium bowl, whisk together the flour, baking soda, cream of tartar, salt, and cinnamon. Set this aside. In a large mixing bowl, combine the cooled brown butter, granulated sugar, and brown sugar. Beat on medium-high speed for about 3-4 minutes until the mixture is light and fluffy. This incorporates air and helps with the chewy texture.
Add the eggs one at a time, beating well after each addition. Mix in the pumpkin puree and vanilla extract until fully combined. The mixture might look slightly curdled at first, but that’s okay. Gradually add the dry ingredients to the wet ingredients. Mix on low speed until just combined. Do not overmix, or the cookies will be tough. Once the dough comes together, cover the bowl with plastic wrap and refrigerate for at least 1 hour, or up to 24 hours. Chilling the dough is essential for preventing excessive spreading.
When you’re ready to bake, preheat the oven again if it cooled down. In a small bowl, mix the ½ cup of sugar with the 1 tablespoon of cinnamon. Scoop about 1.5 tablespoons of dough and roll it into a ball. Roll the ball in the cinnamon-sugar mixture until fully coated. Place the dough balls on the prepared baking sheets, leaving about 2 inches of space between them for spreading. Bake for 10-12 minutes. The edges should be set and lightly golden, but the centers should still look soft and slightly underbaked. They will firm up as they cool.
Remove the cookies from the oven and let them cool on the baking sheet for 5 minutes. This allows them to set. Then, transfer them to a wire rack to cool completely. If you try to move them too soon, they might break. Enjoy them warm for the best texture, or store them in an airtight container for later.
Why is my dough too sticky?
If the dough feels too sticky to roll, it might need more time in the fridge. Cold dough is easier to handle. You can also add a tablespoon of flour at a time until it reaches the right consistency.
Can I freeze the dough?
Yes! You can scoop the dough balls, freeze them on a baking sheet, and then transfer them to a freezer bag. Bake from frozen, adding 1-2 minutes to the bake time.
Cooking Tips & Techniques
Browning the butter can be tricky the first time. Watch it closely. The milk solids at the bottom of the pan are what turn brown and create the nutty flavor. If you walk away, it can go from perfect to burnt in seconds. Once you see the brown bits, remove it from the heat immediately. The residual heat will continue to cook it slightly.
Another common mistake is not chilling the dough enough. I know it’s tempting to bake them right away, but the chilling step solidifies the fat in the dough. This prevents the cookies from spreading into flat discs. If your kitchen is warm, you might need to chill the dough for longer than an hour. I often make the dough the night before and bake it in the morning.
When you’re rolling the dough balls, make sure they are uniform in size. This ensures they bake evenly. If some are bigger than others, the small ones will burn while the big ones are still raw. Use a cookie scoop for consistency. It’s a small tool that makes a big difference.
Don’t overbake these cookies. They should look slightly underdone in the center when you take them out. They will continue to cook on the hot baking sheet. If you bake them until they look fully set, they will be dry and crumbly once cool. The goal is soft and chewy, so err on the side of underbaking.
Let the cookies cool completely before storing them. If you store them while they’re still warm, the moisture will get trapped, and they’ll become soggy. Airtight containers are best for keeping them fresh. If you want them to stay chewy for longer, add a piece of bread to the container. The cookies will absorb the moisture from the bread.
Variations & Adaptations
While the classic brown butter pumpkin snickerdoodle is delicious on its own, there are plenty of ways to customize these cookies. For a nutty twist, add ½ cup of toasted pecans or walnuts to the dough. The nuts pair beautifully with the pumpkin and cinnamon. If you want a spice kick, add a pinch of nutmeg, allspice, or ginger to the dry ingredients. These spices complement the cinnamon and add complexity.
For a chocolate lover, fold in ½ cup of semi-sweet chocolate chips or white chocolate chips. The chocolate adds a rich contrast to the tangy snickerdoodle flavor. If you’re looking for a healthier option, you can substitute half of the all-purpose flour with whole wheat flour. This adds a nutty flavor and more fiber, but the cookies will be slightly denser.
For a dairy-free version, use a high-quality dairy-free butter stick. Keep in mind that dairy-free butters vary in water content, so you might need to adjust the flour slightly. You can also use coconut sugar instead of brown sugar for a lower glycemic index, though the flavor will be more molasses-like. If you’re allergic to nuts, simply omit the nuts or use sunflower seeds as a substitute.
I once tried adding orange zest to the dough, and it was a hit. The citrus brightens up the heavy pumpkin flavor. Just add the zest when you mix the wet ingredients. Another fun variation is to dip half of each cookie in melted white chocolate after baking. Let the chocolate set before serving. These variations allow you to keep the recipe interesting while sticking to the same base dough.
Serving & Storage Suggestions
These cookies are best served at room temperature. Warm cookies can be a bit messy, and the texture is optimal when they’ve cooled. They pair wonderfully with a hot cup of coffee or a glass of cold milk. For a festive touch, serve them on a platter with a dusting of powdered sugar. They also make great gifts. Package them in a tin with a ribbon for a homemade present.
For storage, keep the cookies in an airtight container at room temperature for up to 5 days. If you live in a humid climate, they might soften faster, so consume them within 2-3 days. For longer storage, freeze the cookies in a freezer-safe bag for up to 3 months. Thaw them at room temperature before eating.
To reheat, place a cookie in the microwave for 10-15 seconds. This restores the soft, chewy texture. You can also warm them in the oven at 300°F for 5 minutes. Avoid storing them in the refrigerator, as this can make them hard and stale. The flavors develop over time, so they often taste even better on the second day.
Nutritional Information & Benefits
These soft chewy brown butter pumpkin snickerdoodles are a treat, so enjoy them in moderation. Each cookie contains approximately 150-180 calories, depending on the size. They provide a good source of carbohydrates for energy and a bit of protein from the eggs. Pumpkin puree adds a touch of vitamin A and fiber, making these slightly more nutritious than a standard sugar cookie. However, they are still high in sugar and fat due to the butter and sugar content.
If you are watching your sugar intake, you can reduce the sugar in the dough by ¼ cup without significantly affecting the texture. The pumpkin puree adds natural sweetness, so you might not notice a difference. For a gluten-free option, use a gluten-free flour blend, but be aware that the texture may vary. These cookies are not suitable for those with egg or gluten allergies unless substitutions are made. As a home baker, I believe in enjoying treats that bring joy, and these cookies definitely do that.
Conclusion
These soft chewy brown butter pumpkin snickerdoodles are a testament to the power of simple ingredients and a little bit of technique. The brown butter adds a depth of flavor that transforms a classic cookie into something special. Whether you’re a pumpkin spice lover or a skeptic like my husband, these cookies are worth trying. They are easy to make, delicious to eat, and perfect for sharing. I hope you enjoy them as much as I do. Please let me know how they turn out in the comments below. I love hearing about your baking adventures.
If you try this recipe, consider sharing a photo on social media and tagging me. I’d love to see your creations. You can also experiment with the variations I suggested to make the recipe your own. Baking is all about having fun and experimenting. So grab your apron, preheat your oven, and get baking. You won’t regret it.
FAQs
Can I use pumpkin pie filling instead of pure pumpkin puree?
No, you should not use pumpkin pie filling. It contains added sugars and spices that will throw off the balance of the recipe. Always use 100% pure pumpkin puree.
Why do my cookies spread too much?
This usually happens if the dough isn’t chilled enough or if the butter was too warm when mixed with the sugar. Make sure to chill the dough for at least an hour and cool the brown butter completely before using it.
Can I freeze the baked cookies?
Yes, you can freeze baked cookies for up to 3 months. Store them in an airtight container or freezer bag. Thaw them at room temperature before eating.
What is cream of tartar, and can I skip it?
Cream of tartar is an acidic powder that gives snickerdoodles their tangy flavor and chewy texture. You can’t easily skip it, but if you don’t have it, you can use a little extra lemon juice, though the flavor will be different.
How do I know when the brown butter is done?
The butter is done when it turns a golden brown color and smells nutty. You’ll also see brown specks at the bottom of the pan. Remove it from the heat immediately to prevent burning.
Pin This Recipe!
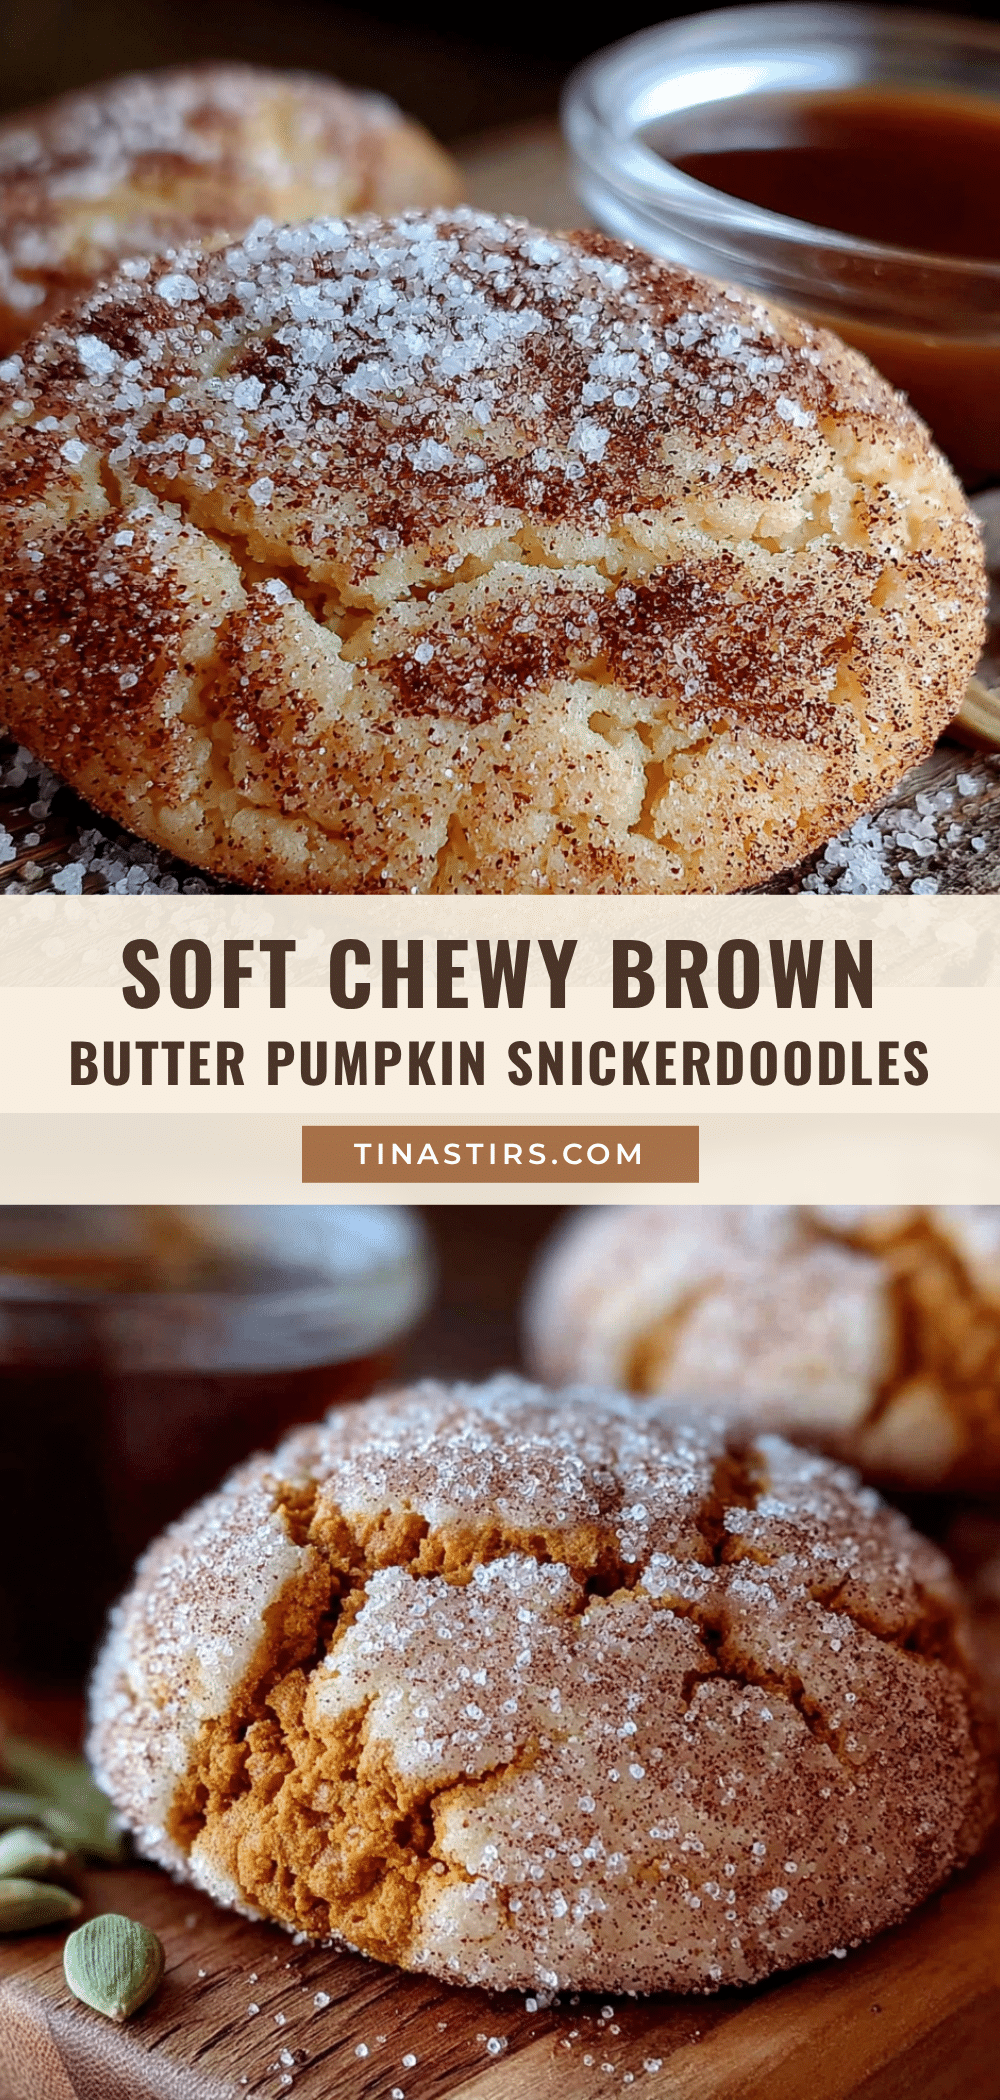
Soft Chewy Brown Butter Pumpkin Snickerdoodles
These soft chewy brown butter pumpkin snickerdoodles combine the tangy kick of a classic snickerdoodle with the nutty depth of browned butter and warm pumpkin spices. They are easy to make, perfect for autumn, and designed to win over even pumpkin spice skeptics.
- Prep Time: 20 minutes
- Cook Time: 10-12 minutes
- Total Time: 1 hour 30 minutes
- Yield: Approximately 24 cookies 1x
- Category: Dessert
- Cuisine: American
Ingredients
- 1 cup (2 sticks or 226g) unsalted butter
- 1 cup (200g) granulated sugar
- 1 cup (200g) light brown sugar, packed
- 2 large eggs, room temperature
- ½ cup (120g) pure pumpkin puree
- 2 teaspoons vanilla extract
- 3 cups (375g) all-purpose flour
- 1 teaspoon baking soda
- 1 teaspoon cream of tartar
- ½ teaspoon salt
- 1 teaspoon ground cinnamon
- ½ cup (100g) granulated sugar (for coating)
- 1 tablespoon ground cinnamon (for coating)
Instructions
- Melt the butter in a small saucepan over medium heat, stirring constantly until it foams, subsides, and develops brown bits with a nutty aroma (5-7 minutes). Pour into a heatproof bowl and let cool until lukewarm.
- Preheat oven to 350°F (175°C) and line two large baking sheets with parchment paper.
- In a medium bowl, whisk together the flour, baking soda, cream of tartar, salt, and 1 teaspoon cinnamon. Set aside.
- In a large mixing bowl, combine the cooled brown butter, 1 cup granulated sugar, and 1 cup brown sugar. Beat on medium-high speed for 3-4 minutes until light and fluffy.
- Add eggs one at a time, beating well after each addition. Mix in pumpkin puree and vanilla extract until combined.
- Gradually add the dry ingredients to the wet ingredients on low speed until just combined. Do not overmix.
- Cover the bowl and refrigerate the dough for at least 1 hour (or up to 24 hours).
- In a small bowl, mix ½ cup sugar with 1 tablespoon cinnamon for the coating.
- Scoop about 1.5 tablespoons of dough, roll into a ball, and coat thoroughly in the cinnamon-sugar mixture.
- Place dough balls on prepared baking sheets, leaving 2 inches of space between them.
- Bake for 10-12 minutes until edges are set and lightly golden, but centers still look soft.
- Let cookies cool on the baking sheet for 5 minutes, then transfer to a wire rack to cool completely.
Notes
Ensure the brown butter is cooled to lukewarm before mixing with sugar to prevent greasy cookies. Chilling the dough is crucial to prevent excessive spreading. Do not overbake; the centers should look slightly underdone as they will firm up while cooling. For best texture, store in an airtight container with a piece of bread to maintain chewiness.
Nutrition
- Serving Size: 1 cookie
- Calories: 165
- Sugar: 14
- Sodium: 150
- Fat: 8
- Saturated Fat: 5
- Carbohydrates: 22
- Fiber: 1
- Protein: 2
Keywords: pumpkin cookies, snickerdoodles, brown butter, fall baking, autumn recipes, soft chewy cookies, pumpkin spice


