Love this? Save it for later!
Share the inspiration with your friends
I was standing in the middle of a grocery store aisle last December, staring at a display of those tins of Danish butter cookies, when the smell of vanilla and powdered sugar hit me — and suddenly I was seven years old at my Aunt Jo’s tiny apartment, sitting cross-legged on her shag carpet while she pulled a cookie sheet out of the oven. She wasn’t even a particularly good baker, honestly. Her cakes sometimes sank in the middle, and she’d just cover the whole thing with extra frosting and call it “rustic.” But every Christmas Eve, she’d make this one thing — this giant, glorious cookie masquerading as a cake — and the whole room would go quiet for a minute while everyone took that first bite. She passed away a few years ago, and I’ve been trying to recreate that exact moment ever since. Not just the taste, but the feeling. You know the one — where the world outside fades away and all that exists is this warm, buttery, slightly imperfect thing in front of you. I’ve tested this recipe about six times now, and I think I’ve finally nailed it. Let me tell you, it took some trial and error. One batch came out so dry I could have used it as a doorstop. But this version? This is the one Aunt Jo would have called “rustic” and then eaten three slices of.
Why You’ll Love This Recipe
This isn’t just another holiday dessert. This is the one that disappears first at every party, potluck, and family gathering I’ve brought it to. I mean it — last year at my neighbor Sarah’s Christmas open house, three different people asked me for the recipe before I’d even taken my coat off. That’s the kind of recipe this is.
- Bakes in One Pan: No rolling out dough, no cutting individual cookies, no spending all day in the kitchen. This comes together in about 45 minutes from start to finish.
- Pantry-Friendly Ingredients: You probably already have most of what you need. Butter, sugar, flour, eggs — the basics, plus some holiday cheer in the form of sprinkles and chocolate chips.
- Perfect for Holiday Gatherings: It’s big enough to feed a crowd, slices beautifully, and looks impressive without requiring any fancy decorating skills. I promise you don’t need to be a pastry chef for this one.
- Everyone Loves It: Kids go crazy for the sprinkles, adults appreciate the nostalgic flavor, and the texture is this perfect cross between a soft cookie and a tender cake. It’s the best of both worlds.
- Make-Ahead Friendly: You can bake this a day or two ahead of time and it actually gets better as it sits. The flavors meld together, and the texture stays perfectly soft.
What really sets this recipe apart is the technique. Instead of just dumping everything in one bowl, we’re going to cream the butter and sugar properly, add the eggs one at a time, and use a specific ratio of ingredients that gives you that signature cookie-cake texture. It’s not complicated, but those little details make all the difference. And honestly? The first time I made this for a party, I forgot the vanilla extract entirely. I realized it when I pulled the cake out of the oven and it smelled… fine, but not amazing. I’ve never made that mistake again.
This is the kind of dessert that makes people close their eyes after the first bite. It’s comfort food dressed up in its holiday best — festive enough for a party, but simple enough that you’re not stressed out in the kitchen while your guests are having fun. That’s the whole point, right?
What Ingredients You Will Need
This recipe uses simple, honest ingredients to create something that tastes way more complicated than it is. Most of these are pantry staples, but I’ve included some notes on what to look for to get the best results.
- 1 cup (226g) unsalted butter, softened — I use Land O’Lakes for consistent results. Make sure it’s truly softened, not melted. You want it to give slightly when you press it with your finger.
- 1 cup (200g) granulated sugar — Regular white sugar works perfectly here. Don’t substitute with brown sugar unless you want a denser, more molasses-y texture.
- 1/2 cup (100g) packed light brown sugar — This adds moisture and a subtle caramel note. Pack it firmly into the measuring cup.
- 2 large eggs, room temperature — Cold eggs can make the batter seize up. Leave them on the counter for about 30 minutes before starting.
- 1 teaspoon vanilla extract — Pure vanilla, not imitation. Trust me on this one. I’ve tested both, and the flavor difference is noticeable.
- 2 1/2 cups (315g) all-purpose flour — Spoon and level it. Scooping directly from the bag packs in too much flour and makes the cake dry.
- 1 teaspoon baking soda — Make sure it’s not expired. Drop a little in vinegar — if it fizzes, it’s good.
- 1/2 teaspoon salt — Fine sea salt or table salt. This balances the sweetness.
- 1 1/2 cups (270g) semi-sweet chocolate chips — I prefer Ghirardelli for their rich flavor and good melt. You can also use milk chocolate if you like things sweeter.
- 1 cup (120g) holiday sprinkles — The rainbow kind with the little balls and stars. Avoid the nonpareils (the tiny round ones) as they tend to bleed color into the batter.
- Optional: 1/2 cup (60g) chopped pecans or walnuts — Adds a nice crunch if you’re into that. I leave them out for parties since not everyone loves nuts.
For the glaze, you’ll need:
- 1 cup (120g) powdered sugar — Sift it if it’s lumpy.
- 2-3 tablespoons milk — Whole milk gives the best consistency, but any milk works.
- 1/2 teaspoon vanilla extract — Same rule applies here — use the good stuff.
- Extra sprinkles for topping — Because more sprinkles is always the right answer.
One thing I’ve learned the hard way: check your sprinkles before you buy them. Some cheaper brands use artificial coloring that bleeds into the batter and turns everything an unappetizing gray. I’ve made that mistake exactly once. Look for sprinkles that say “color-safe” or just stick with a brand you trust.
Equipment Needed
You don’t need a lot of fancy tools for this recipe, which is part of why I love it for holiday entertaining. Here’s what you’ll need:
- 9-inch springform pan — This is my go-to for this recipe. The removable sides make it so easy to get clean slices. If you don’t have one, a 9-inch round cake pan works, just line it with parchment paper.
- Electric mixer — Hand mixer or stand mixer, both work fine. I use my KitchenAid stand mixer because it’s easier, but I’ve made this with a hand mixer plenty of times.
- Large mixing bowl — Glass or stainless steel. Avoid plastic bowls as they can absorb odors.
- Medium bowl — For whisking dry ingredients together.
- Rubber spatula — For folding in the chocolate chips and sprinkles without overmixing.
- Parchment paper — Cut a circle for the bottom of the pan. This guarantees the cake won’t stick.
- Cooling rack — Essential for even cooling. If you don’t have one, you can use the upside-down pan from another cake, but a wire rack is better.
- Measuring cups and spoons — Dry measuring cups for flour and sugar, liquid measuring cup for milk.
I bought my springform pan at a thrift store for three dollars, and it’s been going strong for years. You really don’t need to spend a lot of money on specialty equipment. A good nonstick spray also helps — I use Baker’s Joy, which has flour in it and works perfectly for this type of cake.
Preparation Method
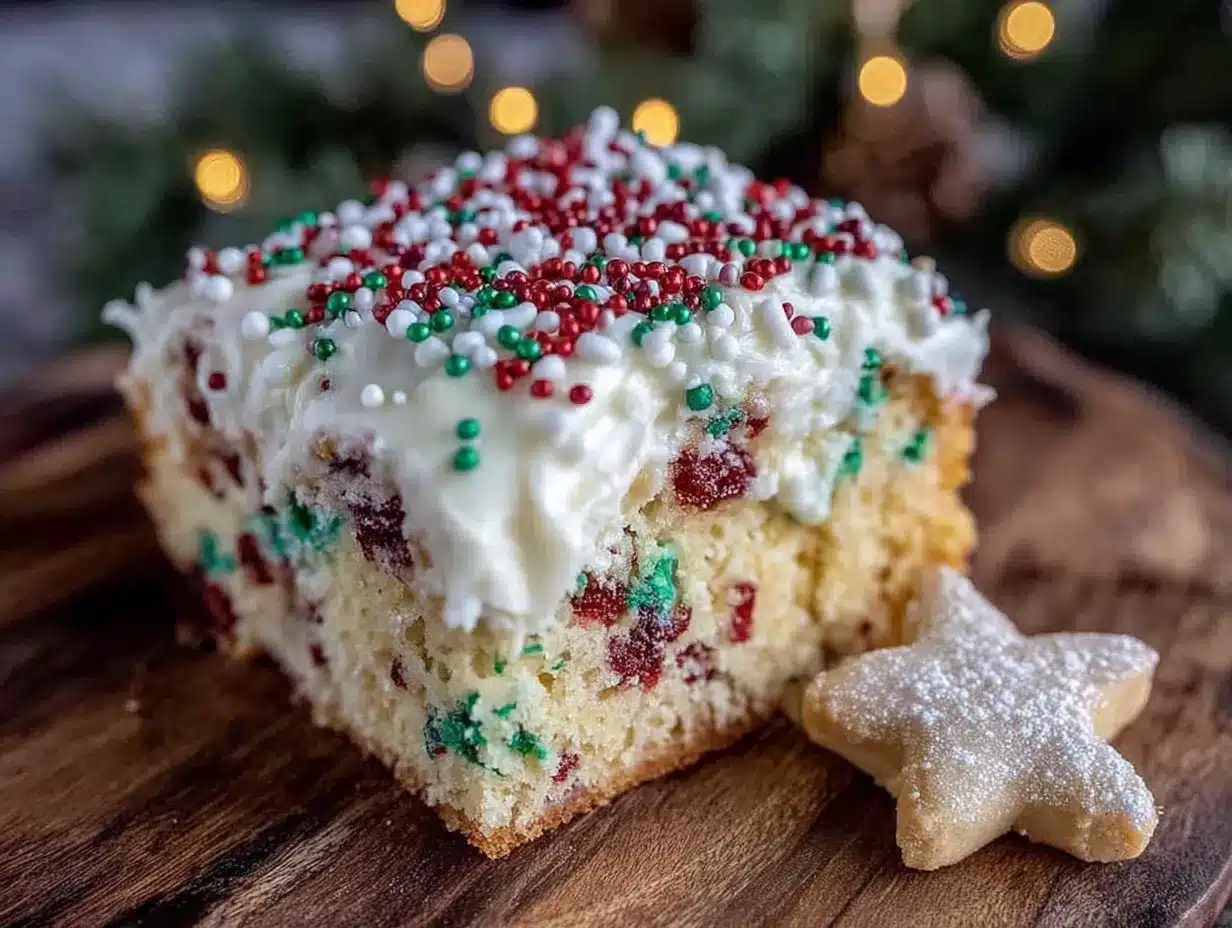
Let’s get baking! This recipe takes about 45 minutes total, with 30-35 minutes of baking time. I’ve broken it down into clear steps so you can follow along easily.
- Preheat your oven to 350°F (175°C). Get this going first so it’s ready when you are. While it’s heating, cut a circle of parchment paper to fit the bottom of your springform pan. Spray the pan with nonstick spray, place the parchment circle in, and spray again. This double-layer approach is foolproof.
- Cream the butter and sugars together. In your large mixing bowl, beat the softened butter, granulated sugar, and brown sugar together on medium speed for about 3-4 minutes. You’re looking for a light, fluffy texture — it should look pale and almost doubled in volume. Don’t rush this step. I used to skimp on the creaming time and my cakes always came out denser than I wanted. Scrape down the sides of the bowl halfway through.
- Add the eggs and vanilla. Crack both eggs into a small bowl first (just in case you get any shell — it’s easier to fish out of a small bowl than your batter). Add them one at a time, beating well after each addition. Then add the vanilla and beat until combined. The batter might look a little curdled at this point — that’s totally normal, especially if your eggs were slightly cold.
- Whisk the dry ingredients together. In your medium bowl, whisk together the flour, baking soda, and salt. This ensures the baking soda is evenly distributed so your cake rises evenly. No one wants a lopsided cookie cake.
- Gradually add the dry ingredients to the wet. With the mixer on low speed, add the flour mixture in three additions, mixing just until combined after each one. Stop the mixer and scrape down the sides as needed. Overmixing at this stage develops gluten and makes the cake tough. You want to mix until you can’t see any more white streaks of flour, then stop immediately.
- Fold in the chocolate chips and sprinkles. This is where the rubber spatula comes in. Gently fold in the chocolate chips and holiday sprinkles using a folding motion — cut down through the center of the batter, scrape along the bottom, and bring it up over the top. Repeat about 10-12 times until everything is evenly distributed. Don’t overmix or the sprinkles might start to bleed.
- Transfer the batter to the prepared pan. Spoon the batter into your springform pan and spread it evenly with the spatula. It will be thick — almost like a cookie dough. That’s exactly what you want. Smooth the top as best you can.
- Bake for 30-35 minutes. Place the pan on the middle rack of your oven. Bake until the top is golden brown and a toothpick inserted in the center comes out with just a few moist crumbs — not wet batter. Start checking at 28 minutes. Every oven runs differently, and this is one of those recipes where overbaking by even two minutes can make it dry.
- Cool in the pan for 10 minutes. Set the pan on a cooling rack and let it sit for exactly 10 minutes. Then run a knife around the edge of the pan and release the springform sides. Let the cake cool completely on the rack, about 1 hour. Don’t try to glaze it while it’s still warm or the glaze will just soak in and disappear.
- Make the glaze. While the cake is cooling, whisk together the powdered sugar, 2 tablespoons of milk, and vanilla in a small bowl. You’re looking for a thick but pourable consistency — add the third tablespoon of milk if needed. Drizzle the glaze over the cooled cake, letting it run down the sides a bit. Top with extra sprinkles while the glaze is still wet so they stick.
One thing I’ve learned: if you’re making this for a party, bake it the day before and glaze it the morning of. The cake actually tastes better the next day — the flavors have time to meld together and the texture becomes even more tender. Just store it wrapped tightly in plastic wrap at room temperature.
Cooking Tips & Techniques
I’ve made this recipe enough times to know where things can go wrong. Here are the things I wish someone had told me before I started testing:
Room temperature ingredients matter. I know, I know — everyone says this and it feels like a hassle. But cold eggs and cold butter don’t cream properly, and you end up with a dense, heavy cake. Leave your butter and eggs on the counter for about 30 minutes before you start. If you forgot, put the eggs in a bowl of warm water for 5 minutes and microwave the butter in 5-second bursts until it’s soft but not melting.
Don’t overmix the batter. This is probably the most common mistake I see. Once you add the flour, mix just until it disappears. Overmixing develops gluten, which makes the cake tough and bread-like instead of tender and cookie-like. I speak from experience — my first batch was so tough I could have used it as a frisbee.
Check your oven temperature. Ovens lie. I’m serious. My old oven ran 25 degrees hot, and I ruined three batches before I figured it out. An oven thermometer costs about five dollars and will save you a lot of frustration. If your cake is browning too fast on top but still raw in the middle, tent it with foil for the last 10 minutes of baking.
Let it cool completely. I know it’s tempting to cut into it while it’s still warm — I’ve done it too. But the texture isn’t right when it’s warm. It needs time to set up properly. Plus, the glaze won’t work on a warm cake. Patience pays off here.
Scale it for a crowd. This recipe fits perfectly in a 9-inch pan and serves about 12 people. If you’re hosting a bigger party, you can easily double the recipe and bake it in a 9×13-inch pan. Just increase the baking time by 5-8 minutes and keep an eye on it.
Variations & Adaptations
One of the best things about this recipe is how adaptable it is. Here are some variations I’ve tried and loved:
Peppermint Chocolate: Swap the sprinkles for crushed candy canes and add 1/2 teaspoon of peppermint extract instead of vanilla. Top the glaze with more crushed candy canes. This is my go-to for Christmas parties — it looks so festive and the peppermint flavor screams “holidays.”
White Chocolate Cranberry: Replace the semi-sweet chocolate chips with white chocolate chips and fold in 1/2 cup of dried cranberries. The tartness of the cranberries balances the sweetness of the white chocolate beautifully. This one always gets compliments at my work holiday party.
Gluten-Free Version: Substitute the all-purpose flour with a 1:1 gluten-free baking flour blend. I’ve tested this with Bob’s Red Mill and King Arthur brands, and both work well. Don’t use almond flour or coconut flour — they’ll change the texture completely.
Dairy-Free Adaptation: Use vegan butter (I like Miyoko’s) and a dairy-free milk alternative for the glaze. The texture will be slightly different but still delicious. Just make sure your chocolate chips are dairy-free too — most semi-sweet chips are, but check the label.
Nutella Swirl: After spreading the batter in the pan, drop spoonfuls of Nutella on top and swirl it through with a knife. This creates these beautiful pockets of chocolate-hazelnut goodness throughout the cake. I did this for a friend’s birthday and she said it was the best thing I’ve ever made.
Spiced Holiday Version: Add 1 teaspoon of cinnamon, 1/2 teaspoon of ginger, and 1/4 teaspoon of nutmeg to the dry ingredients. This gives the cake a warm, cozy flavor that’s perfect for cold winter nights. Pair it with a cup of hot cocoa and you’re in business.
Serving & Storage Suggestions
This cookie cake is honestly perfect at room temperature. Let the glaze set for about 30 minutes after drizzling, then slice and serve. I like to cut it into wedges like a pie, but you can also cut it into smaller squares if you’re serving a crowd and want people to be able to grab and go.
What to serve alongside: A scoop of vanilla ice cream is the classic pairing — the cold creaminess balances the dense, buttery cake perfectly. For a holiday party, a dollop of whipped cream and a few fresh raspberries on the side looks gorgeous. If you’re serving this as part of a dessert spread, it pairs beautifully with my soft Christmas sugar cookies and a warm mug of mulled wine.
Storage: Store the cookie cake in an airtight container at room temperature for up to 5 days. Don’t refrigerate it — the cold dries it out. If you’ve already glazed it, place a piece of parchment paper between the cake and the lid to keep the glaze from sticking. I’ve also wrapped individual slices in plastic wrap and kept them in a cookie tin for a week, and they stayed perfectly soft.
Freezing instructions: This freezes beautifully. Bake and cool the cake completely, but don’t glaze it. Wrap it tightly in plastic wrap, then in a layer of foil, and freeze for up to 3 months. When you’re ready to serve, thaw it overnight in the refrigerator, bring it to room temperature, and then glaze it. I always keep one in the freezer during the holidays for unexpected guests.
Reheating: If you want that just-baked warmth, pop individual slices in the microwave for about 10-15 seconds. For a whole cake, warm it in a 300°F oven for about 5-8 minutes. The flavors actually deepen over time — this cake is somehow even better on day two or three.
Nutritional Information & Benefits
Let’s be real — this is a holiday dessert, so it’s not exactly health food. But here’s the approximate nutritional breakdown for one slice (based on 12 servings):
- Calories: 380
- Fat: 18g
- Carbohydrates: 52g
- Protein: 5g
- Fiber: 2g
- Sugar: 34g
That said, there are a few redeeming qualities. The butter provides a good source of vitamin A, and if you use dark chocolate chips, you’re getting some antioxidants. The eggs add protein, and hey — it’s the holidays. Life is short. Eat the cookie cake.
If you’re watching your sugar intake, you can reduce the granulated sugar by 1/4 cup without affecting the texture too much. The brown sugar is harder to reduce since it contributes moisture. I’ve also made this with a sugar substitute like Swerve, and it works reasonably well, though the texture is slightly less tender.
This recipe contains gluten, dairy, and eggs. For allergen-friendly versions, check the variations section above.
Conclusion
This cookie cake has become my signature holiday dessert, and I’m honestly a little proud of that. It’s the recipe that makes people stop mid-conversation and say, “Wait, what is this? I need the recipe.” It’s the one my friends text me about in November asking if I’m making it again this year. And it’s the one that, every time I bake it, makes me think of Aunt Jo and her slightly lopsided, generously frosted “rustic” cakes.
The best part? You can customize it however you want. Swap the sprinkles for your favorite combo, add nuts or leave them out, go wild with the glaze. This recipe is forgiving and flexible, which is exactly what you need when you’re already stressed about hosting a holiday party. Make it your own. That’s what cooking is all about.
I’d love to hear how yours turns out! Drop a comment below and let me know what variations you tried, or tag me in your photos on social media. Did you add peppermint? Go with the white chocolate cranberry version? Or did you stick with the classic? Tell me all about it. And if you’re looking for more holiday inspiration, don’t miss my easy holiday dessert collection for more crowd-pleasing treats.
Happy baking, friends. May your cookie cake be buttery, your sprinkles be colorful, and your holidays be full of joy.
Frequently Asked Questions
Can I use a regular cake pan instead of a springform pan?
Absolutely. Just line the bottom of a 9-inch round cake pan with parchment paper and grease the sides well. When it’s done, let it cool in the pan for 10 minutes, then turn it out onto a cooling rack. The presentation won’t be quite as clean as with a springform, but it’ll taste just as good.
Why did my cookie cake turn out dry?
This usually happens for one of three reasons: overbaking, too much flour, or not enough butter. Make sure you’re spooning and leveling your flour, checking the cake at 28 minutes, and using exactly the amount of butter specified. Room temperature ingredients also help keep things moist.
Can I make this recipe in advance for a party?
Yes, and I actually recommend it! Bake the cake up to 2 days ahead, wrap it tightly in plastic wrap, and store it at room temperature. Glaze it the morning of your party so the glaze stays fresh and pretty. The cake actually tastes better on day two — the flavors meld together beautifully.
How do I keep the sprinkles from bleeding into the batter?
Use high-quality sprinkles from a reputable brand. Cheaper sprinkles often use artificial coloring that bleeds. Also, fold the sprinkles in gently at the very end, and don’t overmix. If you’re really worried about it, you can toss the sprinkles with a tablespoon of flour before adding them to the batter — this helps absorb any excess color.
Can I double this recipe for a larger crowd?
Definitely. Double all the ingredients and bake in a 9×13-inch pan. The baking time will increase by about 5-8 minutes, so start checking at 33 minutes. You’ll also want to double the glaze recipe. This is my go-to for big holiday gatherings — it serves about 20 people easily.
Pin This Recipe!
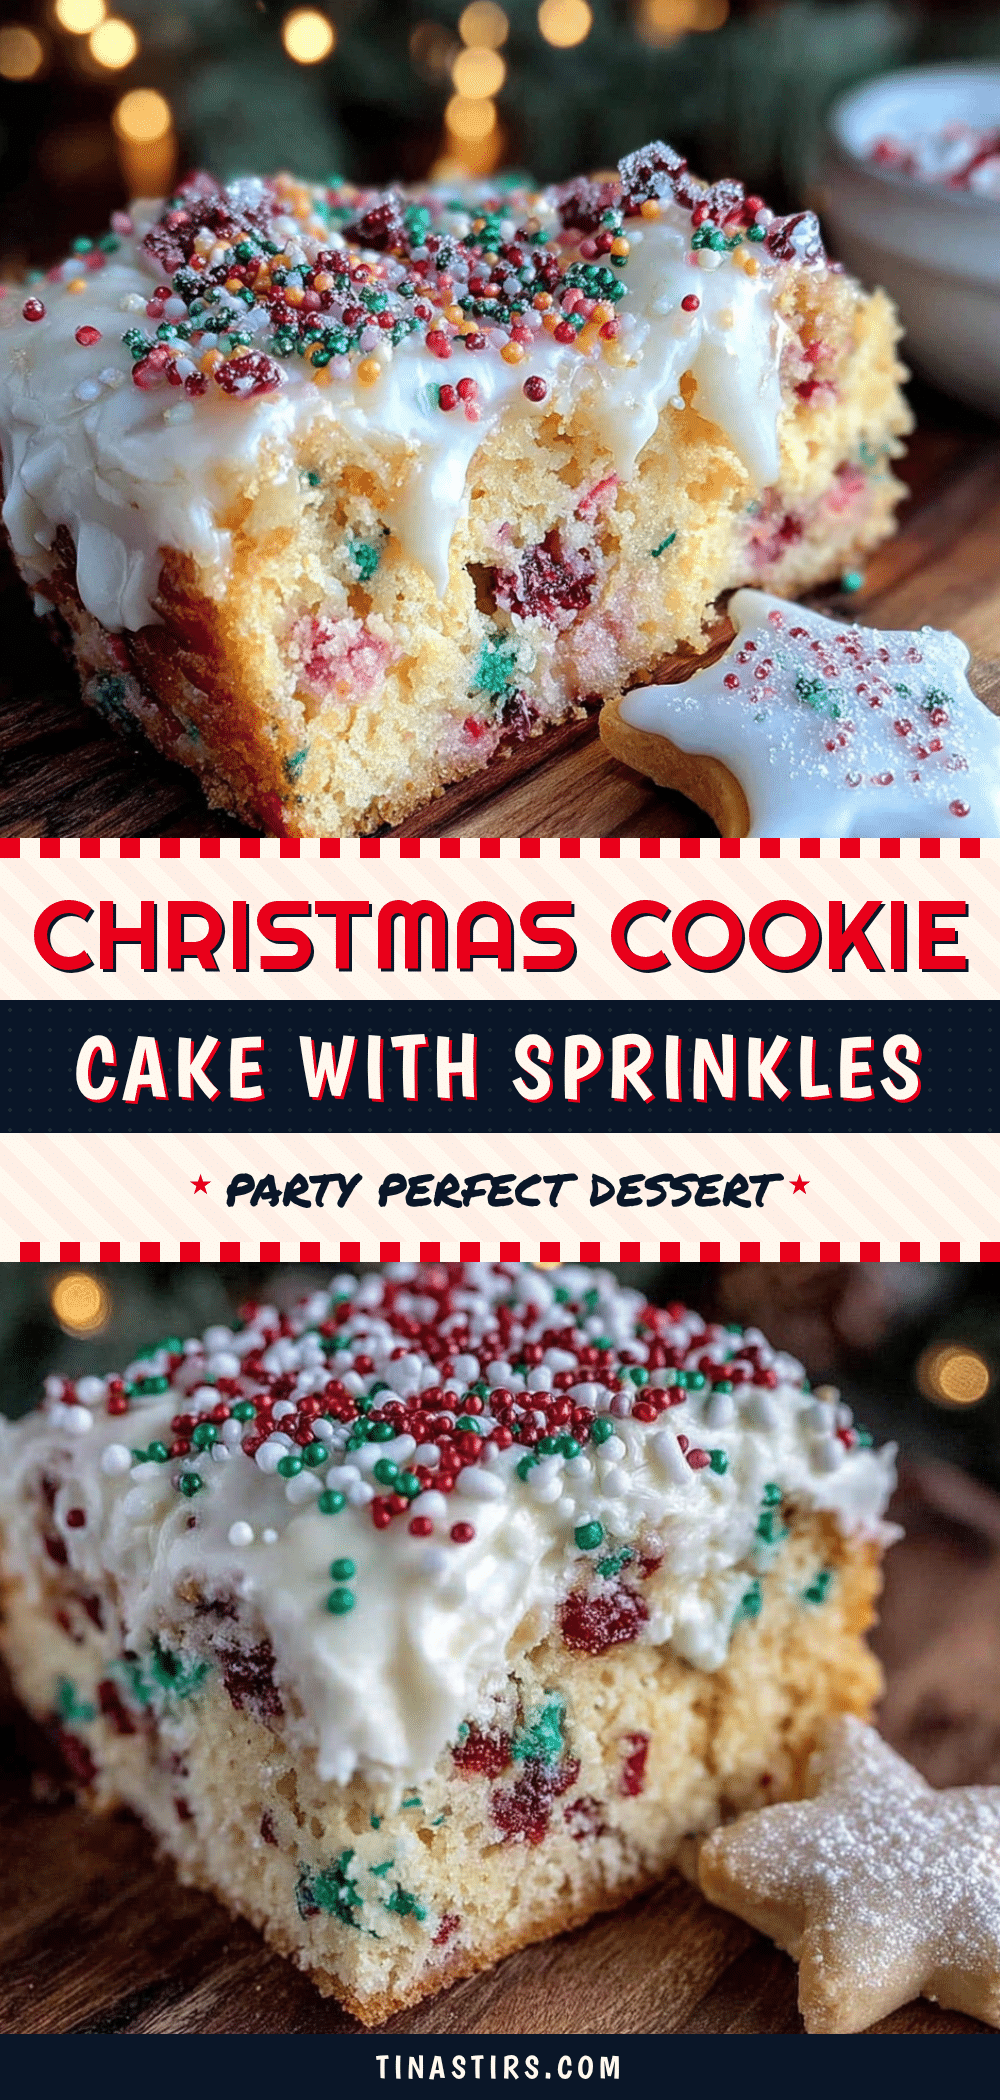
The Ultimate Christmas Cookie Cake – Easy Holiday Dessert
This giant, glorious cookie masquerading as a cake is the perfect holiday dessert. It bakes in one pan, uses pantry-friendly ingredients, and has a texture that’s a perfect cross between a soft cookie and a tender cake.
- Prep Time: 15 minutes
- Cook Time: 30-35 minutes
- Total Time: 45 minutes
- Yield: 12 servings 1x
- Category: Dessert
- Cuisine: American
Ingredients
- 1 cup (226g) unsalted butter, softened
- 1 cup (200g) granulated sugar
- 1/2 cup (100g) packed light brown sugar
- 2 large eggs, room temperature
- 1 teaspoon vanilla extract
- 2 1/2 cups (315g) all-purpose flour
- 1 teaspoon baking soda
- 1/2 teaspoon salt
- 1 1/2 cups (270g) semi-sweet chocolate chips
- 1 cup (120g) holiday sprinkles
- Optional: 1/2 cup (60g) chopped pecans or walnuts
- 1 cup (120g) powdered sugar
- 2–3 tablespoons milk
- 1/2 teaspoon vanilla extract
- Extra sprinkles for topping
Instructions
- Preheat your oven to 350°F (175°C). Cut a circle of parchment paper to fit the bottom of your springform pan. Spray the pan with nonstick spray, place the parchment circle in, and spray again.
- In your large mixing bowl, beat the softened butter, granulated sugar, and brown sugar together on medium speed for about 3-4 minutes until light and fluffy. Scrape down the sides of the bowl halfway through.
- Crack both eggs into a small bowl, then add them one at a time to the butter mixture, beating well after each addition. Add the vanilla and beat until combined.
- In your medium bowl, whisk together the flour, baking soda, and salt.
- With the mixer on low speed, add the flour mixture in three additions, mixing just until combined after each one. Stop the mixer and scrape down the sides as needed.
- Gently fold in the chocolate chips and holiday sprinkles using a rubber spatula, using a folding motion until evenly distributed.
- Spoon the batter into your prepared springform pan and spread it evenly with the spatula. Smooth the top.
- Bake for 30-35 minutes, until the top is golden brown and a toothpick inserted in the center comes out with just a few moist crumbs. Start checking at 28 minutes.
- Cool in the pan for 10 minutes. Then run a knife around the edge of the pan and release the springform sides. Let the cake cool completely on the rack, about 1 hour.
- While the cake is cooling, whisk together the powdered sugar, 2 tablespoons of milk, and vanilla in a small bowl until thick but pourable. Add the third tablespoon of milk if needed. Drizzle the glaze over the cooled cake and top with extra sprinkles while the glaze is still wet.
Notes
For best results, use room temperature ingredients. Don’t overmix the batter once flour is added. Check your oven temperature with an oven thermometer. Let the cake cool completely before glazing. The cake actually tastes better the next day – bake it a day ahead and glaze the morning of your party. Store in an airtight container at room temperature for up to 5 days. Freezes well for up to 3 months (without glaze).
Nutrition
- Serving Size: 1 slice
- Calories: 380
- Sugar: 34
- Fat: 18
- Carbohydrates: 52
- Fiber: 2
- Protein: 5
Keywords: Christmas cookie cake, holiday dessert, cookie cake, easy dessert, Christmas dessert, sprinkle cake, chocolate chip cookie cake


