Love this? Save it for later!
Share the inspiration with your friends
The Super Bowl was in six hours and I had absolutely nothing prepared. I’d volunteered to bring the main appetizer for my friend Marco’s annual watch party, and honestly, I’d let it slip my mind completely. Everyone else would be showing up with elaborate seven-layer dips, homemade pizzas from scratch, and slow-cooker creations that had been bubbling away since dawn. I had a bag of frozen chicken wings, a bottle of honey, and a head of garlic that was starting to sprout. Not exactly championship material.
I stood in my kitchen, staring at the sad little pile of ingredients, and felt that familiar panic rising. You know that feeling when you’ve promised something amazing and you’re about to show up empty-handed? I almost called Marco to make an excuse, but then I remembered his famous “no refunds on friendship” policy for party food. So I took a deep breath, preheated the oven, and decided to just make it work. I mean, how bad could honey and garlic be together on a wing?
Turns out, pretty incredible. I tossed those frozen wings in a simple mix of honey, soy sauce, garlic, and a few pantry spices, threw them in the oven, and prayed. When I pulled them out, the glaze was sticky and golden, catching the kitchen light like little edible jewels. I packed them up, still nervous, and drove to Marco’s. Within twenty minutes, the platter was empty. People were asking for the recipe. My neighbor Dave, who brings a smoked brisket every single year, actually asked for seconds. That’s when I knew this wasn’t just a last-minute save—it was a keeper. These honey garlic baked chicken wings have been my game day secret weapon ever since, and I’m pretty sure they’ll become yours too.
Why You’ll Love This Recipe
Let me tell you why these wings are different from every other game day recipe you’ve tried. I’ve tested this method about a dozen times, tweaking the glaze and the baking time until it was just right. The result is a wing that’s crispy on the outside, juicy on the inside, and coated in a sweet-savory glaze that sticks to your fingers in the best way possible.
- Quick & Easy: These come together in under an hour with just 10 minutes of prep. Perfect for those last-minute game day cravings when you forgot to plan ahead (been there).
- Simple Ingredients: No fancy grocery trips needed. You probably have honey, soy sauce, and garlic in your kitchen right now. The rest are basic pantry staples.
- Perfect for Game Day: These wings are made for gatherings. They’re easy to eat with your hands, they stay warm for a while, and they always disappear first.
- Crowd-Pleaser: I’ve served these to kids, adults, picky eaters, and wing snobs. Everyone loves them. My friend Sarah, who claims she “doesn’t like chicken wings,” ate eight of them last year.
- Unbelievably Delicious: The honey garlic glaze caramelizes in the oven, creating this sticky-sweet coating with a subtle garlic kick. It’s the kind of flavor that makes you close your eyes after the first bite.
What makes these wings stand out is the baking method. Instead of deep-frying, you bake them at a high temperature with a little baking powder, which helps the skin get incredibly crispy without all the oil. The glaze is applied halfway through, so it caramelizes without burning. It’s a simple technique that delivers restaurant-quality wings right from your oven.
This recipe isn’t just good—it’s the kind that makes you the hero of the party without any stress. Perfect for impressing your friends while you actually get to enjoy the game instead of slaving over a fryer.
What Ingredients You Will Need
This recipe uses simple, wholesome ingredients that work together to create that perfect honey garlic flavor. Most of these are pantry staples, which makes this recipe incredibly accessible when game day sneaks up on you.
For the Wings
- Chicken wings, 3 pounds (about 1.4 kg) – I use whole wings and separate them at the joints, but you can buy pre-separated wingettes and drumettes to save time. Pat them dry with paper towels for the crispiest results.
- Baking powder, 1 tablespoon – This is the secret to crispy baked wings. It helps dry out the skin and creates that golden, crunchy texture. Do not use baking soda—they are not the same thing.
- Salt, 1 teaspoon – I prefer kosher salt for its clean flavor and easy handling.
- Black pepper, 1/2 teaspoon – Freshly ground is best, but pre-ground works fine in a pinch.
- Garlic powder, 1/2 teaspoon – Adds a subtle savory note to the wings before the glaze goes on.
For the Honey Garlic Glaze
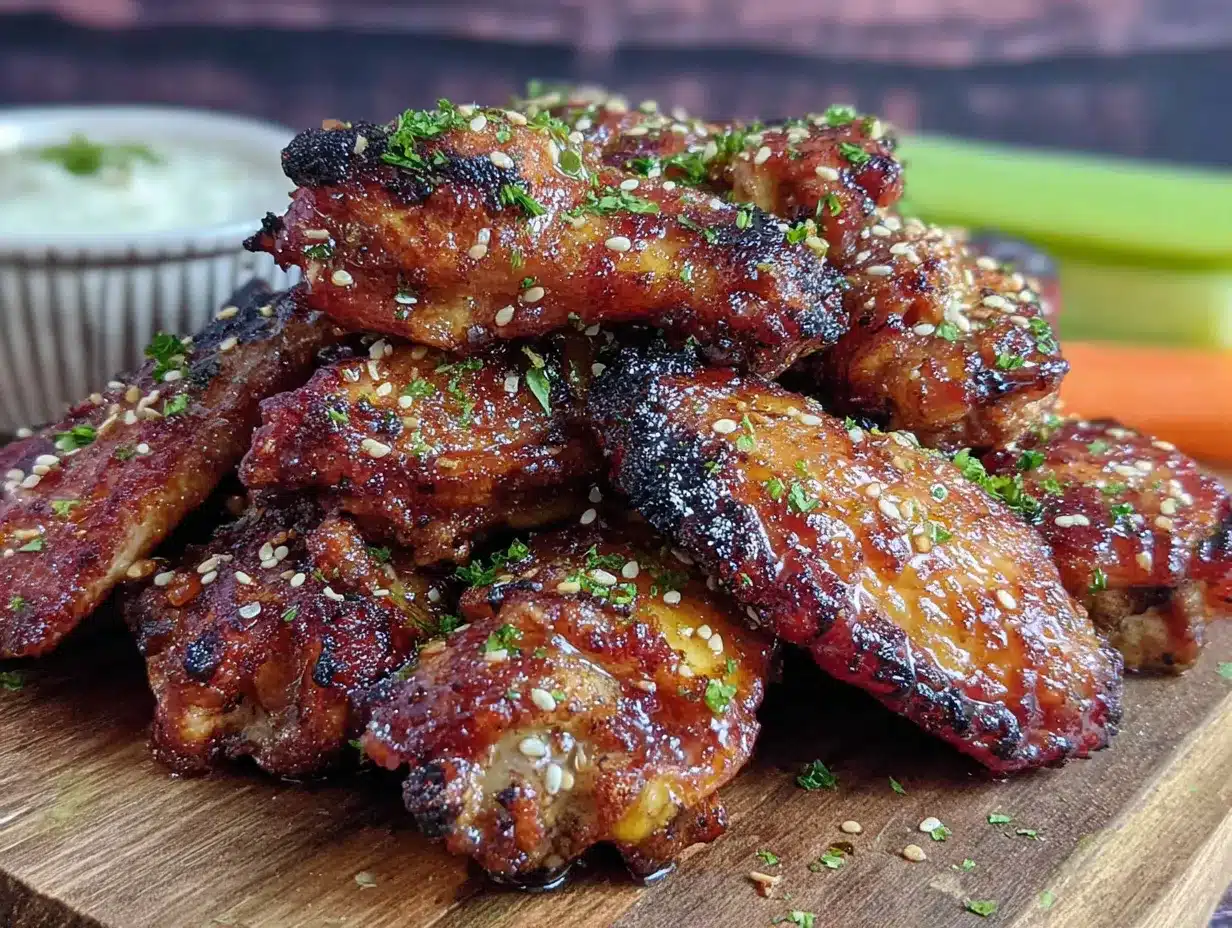
- Honey, 1/3 cup (about 110 grams) – Use a good-quality honey for the best flavor. I recommend local honey if you can find it, but any pure honey works beautifully.
- Soy sauce, 1/4 cup (60 ml) – This adds that savory umami depth that balances the sweetness of the honey. I use low-sodium soy sauce to control the salt level. For a gluten-free option, use tamari or coconut aminos.
- Garlic, 4 cloves, minced – Fresh garlic is non-negotiable here. The pre-minced stuff in a jar just doesn’t have the same punch. You want that sharp, aromatic garlic flavor that mellows as it bakes.
- Rice vinegar, 1 tablespoon – A splash of acidity brightens up the glaze and cuts through the richness of the wings. Apple cider vinegar works as a substitute.
- Sesame oil, 1 teaspoon – This adds a nutty, toasty flavor that makes the glaze taste more complex. It’s optional but highly recommended.
- Cornstarch, 1 tablespoon – Helps thicken the glaze so it clings to the wings instead of sliding off.
- Red pepper flakes, 1/2 teaspoon (optional) – Adds a gentle heat that plays nicely with the sweet honey. Leave it out if you’re serving a crowd that prefers mild flavors.
For Garnish
- Sesame seeds, 1 tablespoon – Toasted sesame seeds add a lovely nutty crunch and make the wings look gorgeous.
- Green onions, 2, sliced – A sprinkle of fresh green onion adds color and a mild oniony bite that cuts through the glaze.
One tip I learned the hard way: don’t skip the baking powder step. I tried making these without it once because I thought it wouldn’t matter, and the skin came out soft and sad. That extra step makes all the difference between okay wings and “where’s the recipe?” wings.
Equipment Needed
You don’t need a lot of fancy equipment for these wings, which is part of why I love this recipe. Here’s what you’ll need:
- Large baking sheet – A rimmed baking sheet works best to catch any drips. I use a half-sheet pan, which is about 18×13 inches. Line it with aluminum foil for easier cleanup, then place a wire rack on top for maximum air circulation.
- Wire rack – This is important for getting crispy wings all over. The rack lifts the wings off the pan so hot air can circulate underneath. If you don’t have one, you can still make these, but you’ll need to flip the wings halfway through baking.
- Mixing bowls – One large bowl for tossing the wings with the dry ingredients, and one small bowl for whisking the glaze.
- Whisk – For combining the glaze ingredients smoothly.
- Pastry brush – For brushing the glaze onto the wings. You can also use a spoon to drizzle it on, but a brush gives you more control.
- Paper towels – Essential for drying the wings thoroughly before seasoning. This step is crucial for crispy skin.
- Kitchen shears or a sharp knife – If you bought whole wings, you’ll need these to separate the drumettes from the wingettes and discard the tips.
If you don’t have a wire rack, don’t worry. I’ve made these without one plenty of times. Just flip the wings halfway through baking and they’ll still turn out great. The rack just makes them a little crispier with less effort.
Preparation Method
Let me walk you through this step by step. I’ve included all the little details that make these wings turn out perfectly every time.
- Preheat your oven to 425°F (218°C). This high temperature is key for getting the skin crispy. While the oven heats up, line your baking sheet with foil and place a wire rack on top. Spray the rack with non-stick cooking spray so the wings don’t stick.
- Prepare the chicken wings. If you bought whole wings, use kitchen shears or a sharp knife to separate the drumettes from the wingettes. Cut through the joint—it’s easier than trying to cut through bone. Discard the wing tips or save them for making stock. Pat the wings dry with paper towels. This is important: wet wings won’t get crispy. Get them as dry as you can.
- Season the wings. In a large bowl, combine the baking powder, salt, black pepper, and garlic powder. Add the dried wings and toss until they’re evenly coated. Make sure every piece gets a good dusting. The baking powder might look a little white on the wings at this point, but don’t worry—it disappears during baking.
- Arrange the wings on the rack. Place them in a single layer with a little space between each piece. Crowding the pan will steam the wings instead of baking them, which means soft skin. If you need to, use two baking sheets.
- Bake for 30 minutes. Place the baking sheet on the middle rack of your oven. After 30 minutes, the wings should be golden and starting to crisp up. Don’t open the oven door during this time—you’ll let out all the heat.
- Make the glaze while the wings bake. In a small bowl, whisk together the honey, soy sauce, minced garlic, rice vinegar, sesame oil, cornstarch, and red pepper flakes (if using). Set it aside. The cornstarch will help the glaze thicken and stick to the wings.
- Glaze the wings. After 30 minutes, remove the wings from the oven. Use a pastry brush to generously coat each wing with the honey garlic glaze. Don’t be shy—you want them well covered. Return the wings to the oven and bake for another 10-15 minutes. The glaze will bubble and caramelize, creating that beautiful sticky coating.
- Check for doneness. The wings are done when the internal temperature reaches 165°F (74°C) at the thickest part of the drumette. The skin should be golden brown and the glaze should be sticky and slightly charred in spots. If you want extra caramelization, you can broil them for 1-2 minutes at the end, but watch them closely—they burn fast.
- Let them rest. Remove the wings from the oven and let them sit on the rack for 5 minutes. This allows the glaze to set so it doesn’t slide off when you move them. Transfer the wings to a serving platter.
- Garnish and serve. Sprinkle toasted sesame seeds and sliced green onions over the wings. Serve them warm, with extra glaze on the side if you like.
One thing I’ve learned from making these so many times: the glaze will look a little thin when you first brush it on, but don’t worry. As it bakes, the honey caramelizes and the cornstarch thickens it up, creating that perfect sticky coating. Trust the process.
Cooking Tips & Techniques
I’ve made these wings enough times to know exactly where things can go wrong. Here are my best tips for getting perfect results every time.
Don’t skip the drying step. This is the number one mistake people make with baked wings. Moisture is the enemy of crispy skin. After you wash the wings, pat them dry with paper towels and let them sit on a plate for a few minutes to air dry. The drier they are, the crispier they’ll get.
Use a wire rack. I know I mentioned this already, but it really does make a difference. The rack allows hot air to circulate around the entire wing, so you don’t have to flip them halfway through. If you don’t have a rack, just flip the wings after 20 minutes and they’ll still turn out good.
Watch the glaze. Honey burns easily because of its high sugar content. That’s why I apply the glaze halfway through baking instead of at the beginning. This gives the wings time to crisp up before the glaze goes on, and the 10-15 minutes of additional baking is just enough to caramelize the glaze without burning it.
Don’t overcrowd the pan. This is another common mistake. If the wings are touching each other, they’ll steam instead of bake. Leave a little space between each piece so the hot air can circulate. If you’re making a big batch, use two baking sheets and rotate them halfway through.
Test for doneness properly. The safest way to check if your wings are done is with an instant-read thermometer. Insert it into the thickest part of a drumette, avoiding the bone. You’re looking for 165°F (74°C). If you don’t have a thermometer, cut into the thickest part—the juices should run clear and the meat should no longer be pink at the bone.
I once forgot to pat the wings dry and ended up with soggy, sad wings that nobody wanted to eat. It was a total waste of ingredients and game day disappointment. Learn from my mistake and take that extra 30 seconds to dry them properly.
Variations & Adaptations
One of the best things about this recipe is how easy it is to adapt. Here are some variations I’ve tried and loved.
Spicy Honey Garlic Wings: Add an extra teaspoon of red pepper flakes to the glaze, or stir in a tablespoon of sriracha for a fiery kick. My friend Tom, who loves heat, requests this version every time we watch football together.
Gluten-Free Option: Simply swap the soy sauce for tamari or coconut aminos. Everything else in the recipe is naturally gluten-free. I’ve tested this with tamari and the flavor is almost identical—you honestly can’t tell the difference.
Air Fryer Version: If you have an air fryer, you can make these wings in half the time. Cook the seasoned wings at 380°F (193°C) for 20 minutes, shaking the basket halfway through. Then brush with glaze and cook for another 5 minutes at 400°F (204°C). They come out incredibly crispy.
Lemon Garlic Twist: Add the zest of one lemon and a tablespoon of lemon juice to the glaze. The citrus brightens up the honey and cuts through the richness of the wings. This version is especially good in the summer when you want something a little fresher.
Smoky Maple Variation: Replace the honey with maple syrup and add a teaspoon of smoked paprika to the glaze. The smoky flavor pairs beautifully with the maple sweetness. I made this for a fall gathering and it was a huge hit.
My personal favorite variation is the spicy one. I love the contrast between the sweet honey and the heat from the red pepper flakes. It keeps you reaching for another wing even when you’re already full.
Serving & Storage Suggestions
These wings are best served warm, right after the glaze has had a chance to set. I like to arrange them on a large platter with extra sauce on the side for dipping. A sprinkle of sesame seeds and green onions makes them look like they came from a fancy restaurant.
For game day, I pair these wings with classic sides like celery sticks, carrot sticks, and a creamy ranch or blue cheese dressing. The cool, crunchy vegetables balance out the sticky, sweet wings perfectly. If you’re serving a crowd, add some crispy garlic chicken for variety—they use similar techniques and complement each other beautifully.
These wings also go great with coleslaw, potato wedges, or a simple green salad. For drinks, I recommend a cold beer or a crisp lemonade. The sweetness of the glaze pairs well with something refreshing and bubbly.
Storage: Leftover wings can be stored in an airtight container in the refrigerator for up to 4 days. The glaze will soften the skin a bit, but they’re still delicious cold or reheated.
Reheating: The best way to reheat these wings is in the oven at 350°F (177°C) for 10-15 minutes. This helps restore some of the crispiness. You can also reheat them in an air fryer at 350°F for 5-7 minutes. Avoid the microwave—it will make the skin rubbery and the glaze will slide off.
Freezing: You can freeze the baked wings (without the glaze) for up to 3 months. Wrap them tightly in plastic wrap and then foil. When you’re ready to serve, thaw them in the refrigerator overnight, then bake at 400°F (204°C) for 15 minutes, brush with fresh glaze, and bake for another 10 minutes.
The flavors actually deepen after a day in the fridge. I sometimes make a double batch on purpose just so I can have leftovers for lunch the next day. Cold honey garlic wings are surprisingly addictive.
Nutritional Information & Benefits
Here’s an approximate nutritional breakdown per serving (about 4-5 wings):
| Nutrient | Amount |
|---|---|
| Calories | 380 |
| Protein | 28g |
| Fat | 18g |
| Saturated Fat | 5g |
| Carbohydrates | 22g |
| Sugar | 18g |
| Sodium | 720mg |
| Fiber | 0g |
Chicken wings are a good source of protein, which helps keep you full and satisfied. The honey provides natural sugars that give you a quick energy boost—perfect for game day stamina. Garlic is known for its immune-boosting properties, and sesame seeds add a small amount of healthy fats and calcium.
This recipe is naturally dairy-free and can be made gluten-free with a simple swap. It’s also nut-free, making it safe for most allergy concerns. The main allergens to note are soy (from the soy sauce) and sesame (from the sesame oil and seeds).
I’m not a nutritionist, but I believe in balance. These wings are a treat, and there’s nothing wrong with enjoying them on game day. Pair them with plenty of vegetables and you’ve got a pretty well-rounded meal.
Conclusion
These honey garlic baked chicken wings have saved me more times than I can count. From last-minute game day emergencies to casual family dinners, they never disappoint. The combination of sticky-sweet glaze, crispy skin, and tender meat is just unbeatable.
What I love most about this recipe is how forgiving it is. Even if you forget to pat the wings dry or you accidentally add a little extra garlic, they still turn out delicious. It’s the kind of recipe that builds confidence in the kitchen because it works every single time.
I hope you give these wings a try for your next game day gathering. Customize them to your taste—make them spicier, sweeter, or tangier. That’s the beauty of a simple recipe like this one. It’s a canvas for your own creativity.
If you make these, I’d love to hear how they turned out. Leave a comment below and let me know if they disappeared as fast at your party as they did at Marco’s. And if you come up with your own variation, please share it—I’m always looking for new ideas to try!
Happy cooking, and see you at the game!
Frequently Asked Questions
Can I use frozen chicken wings for this recipe?
Yes, you can use frozen wings, but you’ll need to thaw them completely first. Pat them very dry after thawing, as frozen wings release more moisture. The baking time may also need to increase by 5-10 minutes.
Why did my wings turn out soggy?
Soggy wings are usually caused by too much moisture. Make sure you pat the wings dry thoroughly before seasoning. Also, avoid overcrowding the baking sheet, which can trap steam and prevent crisping.
Can I make these wings ahead of time?
Absolutely! You can bake the wings without the glaze up to a day ahead. Store them in the refrigerator, then reheat at 400°F (204°C) for 10 minutes, brush with glaze, and bake for another 10 minutes. They’ll taste just as fresh.
How do I make the glaze less sweet?
If you prefer a less sweet wing, reduce the honey to 1/4 cup and add an extra tablespoon of soy sauce or rice vinegar. You can also add a teaspoon of Dijon mustard for a tangy contrast that balances the sweetness.
Can I grill these wings instead of baking?
Yes, grilling works great! Cook the seasoned wings over medium heat for about 20 minutes, turning occasionally, until they reach 165°F (74°C). Brush with glaze during the last 5 minutes of grilling. The smoky flavor from the grill adds another layer of deliciousness.
Pin This Recipe!
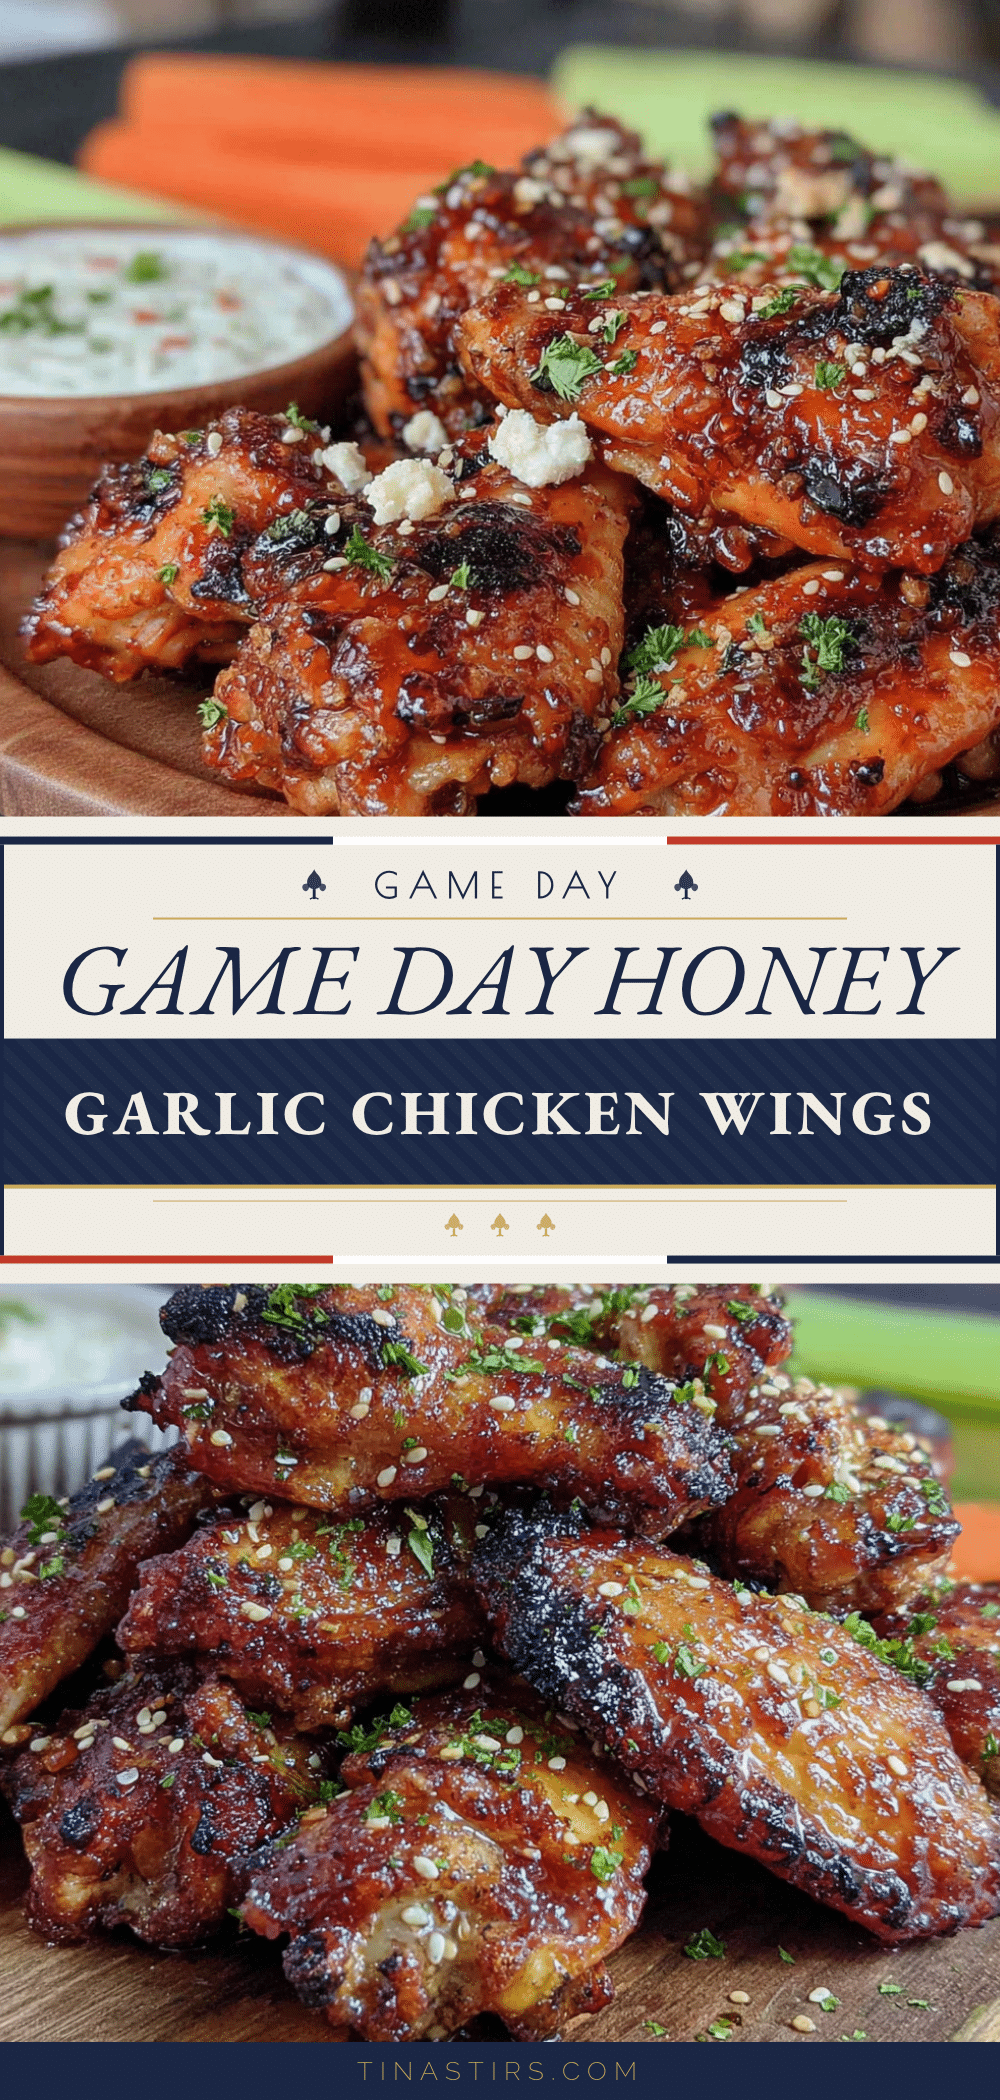
Best Honey Garlic Baked Chicken Wings for Game Day

These honey garlic baked chicken wings are crispy on the outside, juicy on the inside, and coated in a sweet-savory glaze that sticks to your fingers in the best way possible. Perfect for game day gatherings, they come together in under an hour with simple pantry ingredients.
- Prep Time: 10 minutes
- Cook Time: 40-45 minutes
- Total Time: 50-55 minutes
- Yield: 4 servings 1x
- Category: Appetizer
- Cuisine: American
Ingredients
- 3 pounds chicken wings (about 1.4 kg)
- 1 tablespoon baking powder
- 1 teaspoon kosher salt
- 1/2 teaspoon black pepper, freshly ground
- 1/2 teaspoon garlic powder
- 1/3 cup honey (about 110 grams)
- 1/4 cup low-sodium soy sauce (60 ml)
- 4 cloves garlic, minced
- 1 tablespoon rice vinegar
- 1 teaspoon sesame oil
- 1 tablespoon cornstarch
- 1/2 teaspoon red pepper flakes (optional)
- 1 tablespoon sesame seeds, toasted
- 2 green onions, sliced
Instructions
- Preheat your oven to 425°F (218°C). Line a baking sheet with aluminum foil and place a wire rack on top. Spray the rack with non-stick cooking spray.
- If using whole wings, separate the drumettes from the wingettes at the joint using kitchen shears or a sharp knife. Discard the wing tips or save for stock. Pat the wings dry thoroughly with paper towels.
- In a large bowl, combine the baking powder, salt, black pepper, and garlic powder. Add the dried wings and toss until evenly coated.
- Arrange the wings in a single layer on the wire rack, leaving space between each piece. Bake for 30 minutes without opening the oven door.
- While the wings bake, make the glaze: In a small bowl, whisk together the honey, soy sauce, minced garlic, rice vinegar, sesame oil, cornstarch, and red pepper flakes (if using). Set aside.
- After 30 minutes, remove the wings from the oven. Use a pastry brush to generously coat each wing with the honey garlic glaze. Return to the oven and bake for another 10-15 minutes, until the glaze is bubbly and caramelized and the internal temperature reaches 165°F (74°C).
- Remove from the oven and let the wings rest on the rack for 5 minutes to allow the glaze to set. Transfer to a serving platter.
- Sprinkle with toasted sesame seeds and sliced green onions. Serve warm.
Notes
Don’t skip drying the wings thoroughly for crispy skin. Use a wire rack for best results; if unavailable, flip wings halfway through baking. Watch the glaze closely as honey burns easily. For extra caramelization, broil for 1-2 minutes at the end.
Nutrition
- Serving Size: 4-5 wings
- Calories: 380
- Sugar: 18
- Sodium: 720
- Fat: 18
- Saturated Fat: 5
- Carbohydrates: 22
- Protein: 28
Keywords: honey garlic chicken wings, baked chicken wings, game day appetizer, crispy chicken wings, honey garlic wings


