Love this? Save it for later!
Share the inspiration with your friends
It was 10:47 PM on a rainy Wednesday in mid-October, and I had a stupid amount of Halloween candy staring at me from the kitchen counter. I’d bought way too much “just in case” the neighborhood kids showed up in droves, but honestly, I think I was just excited. The problem? I was bored of plain chocolate bars and those little peanut butter cups. I wanted something that felt festive but wasn’t another pumpkin-shaped cookie or a dozen cupcakes that would dry out by morning. I didn’t have any fancy piping bags or those little candy eyes you see on every Pinterest board, but I had a box of brownie mix (don’t judge), a bag of white chocolate chips I’d impulse-bought, and this weird idea that wouldn’t leave me alone: what if I made the brownies look like little mummies?
I mean, I’ve made brownies a thousand times. They’re my go-to when I need something reliable and chocolatey. But wrapping them in white chocolate like tiny bandages? That felt a little unhinged, and honestly, that’s exactly the energy Halloween needs. So I grabbed my favorite mixing bowl—the one with the chip on the rim that I refuse to throw away—and started experimenting. The first batch looked like a disaster. The white chocolate was too thin, the eyes (I used mini chocolate chips because that’s what I had) kept sliding off. But by the third try, something clicked. The brownies were fudgy, the white chocolate stripes were perfectly set, and they looked ridiculous in the best possible way. Maybe you’ve been there—staring at a half-empty pantry at 11 PM, convinced you can make something magical out of leftovers. That’s exactly how these Best White Chocolate Mummy Brownies were born, and I’ve been making them every Halloween since.
Why You’ll Love This Recipe
Let me tell you why these Best White Chocolate Mummy Brownies have become my non-negotiable Halloween tradition. They’re not just another dessert—they’re the kind of thing that makes people stop and say, “Wait, you made those?”
- Quick & Easy: From start to finish, we’re looking at about 45 minutes. The brownie base comes together in one bowl (less dishes, more candy), and the decorating is so simple a five-year-old could help. Perfect for last-minute Halloween parties or when the sugar craving hits hard.
- Simple Ingredients: You probably have most of this stuff already. Brownie mix or your favorite from-scratch recipe, butter, eggs, white chocolate chips, and some candy eyes. No weird specialty items that’ll sit in your pantry until next October.
- Perfect for Halloween: These are the star of any Halloween gathering. Kids love the mummy look, adults appreciate the fudgy brownie underneath, and everyone fights over the ones with the most white chocolate stripes.
- Crowd-Pleaser: I’ve brought these to work parties, neighbor get-togethers, and family dinners. Every single time, someone asks for the recipe. Even people who “don’t like white chocolate” end up grabbing a second one.
- Unbelievably Delicious: The combo is next-level. You’ve got this rich, fudgy, deeply chocolate brownie, and then this creamy, sweet white chocolate on top. The texture contrast—soft brownie, firm white chocolate—is honestly addictive.
What makes these different from every other Halloween brownie out there? It’s the technique. Instead of drizzling white chocolate randomly, we’re wrapping it around the brownie like actual mummy bandages. It’s intentional, it’s fun, and it makes the final result look professional without needing any fancy piping skills. Plus, I’ve tested this with boxed mix and from scratch, and both work beautifully. This isn’t just another version—it’s the best version.
What Ingredients You Will Need
This recipe uses simple, everyday ingredients to create something that looks like it came from a bakery. The magic is in how you put it all together, not in hunting down obscure items.
For the Brownie Base
- 1 box (18.4 oz) brownie mix (I prefer Ghirardelli or Duncan Hines for the fudgiest texture)
- 2 large eggs, room temperature (cold eggs can make the batter seize up)
- 1/2 cup vegetable oil (or melted coconut oil for a subtle flavor twist)
- 1/4 cup water (some mixes call for less—just follow the box directions for fudgy brownies)
- 1 teaspoon vanilla extract (adds warmth and depth to the chocolate)
For the Mummy Decorations
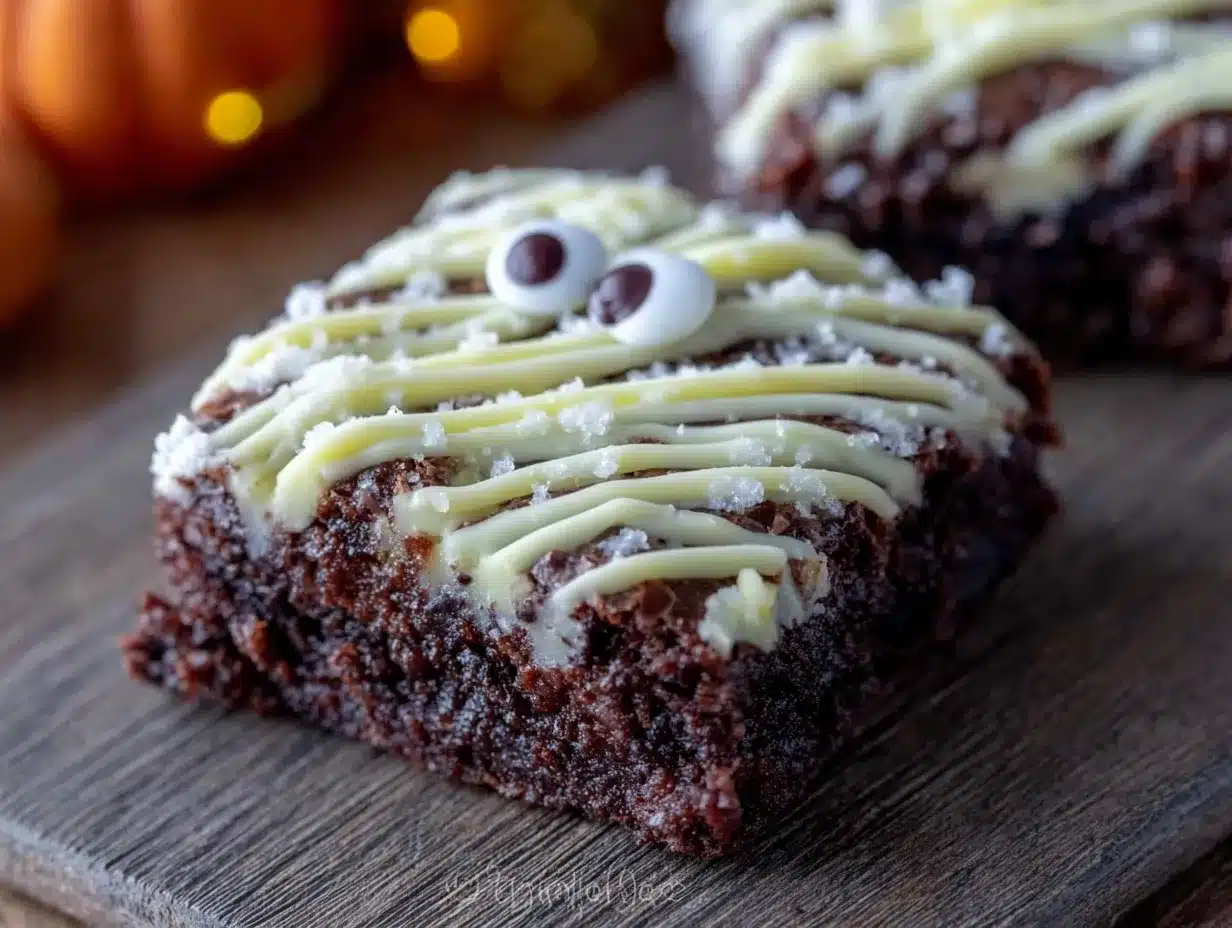
- 2 cups white chocolate chips (I use Ghirardelli white chocolate chips—they melt smoother and taste less waxy than store brands)
- 1 tablespoon coconut oil or shortening (this keeps the white chocolate from seizing and makes it easier to drizzle)
- 48-60 candy eyes (you can find these at craft stores or online—Wilton brand works great)
- Optional: 1/4 cup mini chocolate chips (if you want to make your own eyes instead of buying candy eyes)
Substitution Guidance
- Gluten-free option: Use a gluten-free brownie mix (King Arthur Flour makes an excellent one) and double-check your white chocolate chips are certified gluten-free
- Dairy-free option: Use dairy-free brownie mix and dairy-free white chocolate chips (Enjoy Life brand works well, though the texture is slightly different)
- From-scratch option: Use your favorite fudgy brownie recipe—just make sure it yields a 9×13 inch pan of brownies
- Coconut oil substitute: You can use vegetable shortening or even a pat of butter to thin the white chocolate, but coconut oil gives the cleanest melt
One thing I’ve learned the hard way: don’t skimp on the white chocolate. Cheap white chocolate chips often have a weird, waxy texture and don’t melt as smoothly. Spend the extra dollar on a good brand—your mummies will thank you.
Equipment Needed
You don’t need a ton of fancy equipment for these Best White Chocolate Mummy Brownies, which is part of why I love this recipe. Here’s what you’ll want on hand:
- 9×13 inch baking pan (metal works better than glass for even browning)
- Parchment paper (non-negotiable—it makes lifting the brownies out so much easier and saves you from scrubbing)
- Large mixing bowl (I use my grandmother’s old ceramic bowl, but any large bowl works)
- Whisk and rubber spatula (the spatula is crucial for scraping every last bit of batter)
- Small microwave-safe bowl (for melting the white chocolate)
- Spoon or small offset spatula (for drizzling the white chocolate stripes)
- Wire cooling rack (helps the brownies cool evenly so the white chocolate sets properly)
- Sharp knife (for cutting clean squares—a dull knife will smush the brownies)
If you don’t have a wire cooling rack, you can use a cutting board with paper towels underneath. And if you’re short on time, skip the parchment paper and just grease the pan well—but honestly, the parchment makes life so much easier. I learned that lesson after a particularly stubborn batch that refused to leave the pan.
Preparation Method
Alright, let’s make some mummies. This process is straightforward, but I’ve included every little detail I wish someone had told me the first time I tried this.
- Preheat your oven to 350°F (175°C). Line your 9×13 inch baking pan with parchment paper, leaving a few inches of overhang on the long sides. This creates “handles” that’ll let you lift the entire brownie slab out later. Lightly grease the parchment with cooking spray or butter.
- Make the brownie batter. In your large mixing bowl, combine the brownie mix, eggs, oil, water, and vanilla extract. Stir with a whisk or spatula until just combined—about 40 strokes. Don’t overmix! Overmixing develops gluten and makes brownies cakey instead of fudgy. You want to see a few streaks of dry mix disappear, then stop.
- Bake the brownies. Pour the batter into your prepared pan and spread it evenly with the spatula. Bake for 22-25 minutes, or until a toothpick inserted into the center comes out with a few moist crumbs attached. If it comes out clean, you’ve overbaked them. The edges should be set and starting to pull away from the pan, but the center should still look slightly soft.
- Cool completely. This step is crucial. Place the pan on a wire cooling rack and let the brownies cool for at least 1 hour. Then transfer the whole slab (using the parchment handles) to the cooling rack and let it cool completely, about another 30 minutes. Warm brownies will melt the white chocolate into a puddle, and nobody wants a puddle mummy.
- Cut the brownies. Once completely cool, use a sharp knife to cut the brownies into 12-16 rectangles. I prefer 12 bigger squares (about 3×3 inches each) because they look more impressive. Wipe the knife clean between cuts for neat edges.
- Melt the white chocolate. Place the white chocolate chips and coconut oil in a small microwave-safe bowl. Microwave in 30-second intervals at 50% power, stirring thoroughly after each interval. It usually takes 2-3 intervals total. Stop heating when most of the chips are melted but a few solid pieces remain—the residual heat will finish the job as you stir. If the chocolate looks thick or grainy, add another 1/2 teaspoon of coconut oil and stir.
- Decorate the mummies. Work with one brownie at a time. Dip a spoon into the melted white chocolate and drizzle it back and forth across the brownie in uneven stripes. You want it to look like bandages wrapped around a mummy—some stripes going horizontally, some at slight angles. Leave a small gap near the top for the eyes.
- Add the eyes. While the white chocolate is still wet, gently press two candy eyes into the gap you left. Don’t push too hard or they’ll sink into the brownie. If you’re using mini chocolate chips, place them pointed-side down so they look like little pupils.
- Let the white chocolate set. Place the decorated brownies on a parchment-lined baking sheet and let them sit at room temperature for about 20-30 minutes, or until the white chocolate is firm to the touch. If you’re in a hurry, pop them in the fridge for 10 minutes—just don’t leave them longer or condensation can form.
A quick note from my first attempt: I tried to drizzle the white chocolate over all the brownies at once, and it was a disaster. The chocolate started setting before I could add the eyes, and half my mummies ended up blind. Work one at a time, and you’ll be fine.
Cooking Tips & Techniques
After making these Best White Chocolate Mummy Brownies about a dozen times (no exaggeration), I’ve collected some hard-won wisdom. Here’s what I wish I’d known from the start.
The biggest mistake is rushing the cooling process. I know, I know—you want to eat them immediately. But if the brownies are even slightly warm, the white chocolate will slide right off like a sad, melted ghost. I once tried to speed things up by putting warm brownies in the fridge, and the condensation made the white chocolate look streaky and weird. Patience, my friend. Let them cool completely.
Use a serrated knife for cutting. This was a game-changer for me. A serrated knife cuts through the brownie without squishing it, giving you clean edges that look professional. And please, for the love of all things spooky, wipe the blade between cuts. That first cut is always messy, but the rest will be beautiful.
Mind your white chocolate temperature. If you overheat white chocolate, it seizes up into a thick, crumbly paste that’s impossible to drizzle. Always melt at 50% power and stir frequently. If it does seize, a splash of hot water or extra coconut oil can sometimes save it—but honestly, it’s better to start fresh with a new batch of chips.
Multitasking tip: While the brownies are cooling, set up your decorating station. Line a baking sheet with parchment, open your candy eyes, and have your spoon ready. The white chocolate sets fast, so you want everything within arm’s reach.
Consistency is key. If your white chocolate is too thick, add a little more coconut oil until it flows like thick maple syrup. Too thin, and it’ll run off the brownies. You want it to hold its shape when drizzled but still be fluid enough to spread slightly.
Variations & Adaptations
One of the best things about this recipe is how flexible it is. Here are some variations I’ve tried and loved.
Dark Chocolate Mummies
Swap the white chocolate for dark or semi-sweet chocolate chips. The contrast between the dark chocolate “bandages” and the brownie is less dramatic visually, but the flavor is incredible—like a double-chocolate mummy. Use the same melting technique, but skip the coconut oil since dark chocolate melts more easily on its own.
Peanut Butter Mummies
Before adding the white chocolate stripes, spread a thin layer of melted peanut butter over each brownie. Then proceed with the white chocolate drizzle. The salty peanut butter against the sweet white chocolate and fudgy brownie is absolutely addictive. I made these for a Halloween party last year, and they were gone in fifteen minutes.
Gluten-Free Mummies
Use a gluten-free brownie mix and check that your white chocolate chips are certified gluten-free. The texture is slightly more delicate, so let the brownies cool extra long before cutting. I’ve found that King Arthur Flour’s gluten-free mix gives the closest texture to regular brownies.
Vegan Mummies
Use a vegan brownie mix (or a from-scratch recipe with flax eggs) and dairy-free white chocolate chips. The melting technique is the same, though vegan white chocolate can be a bit grainier. Add an extra teaspoon of coconut oil to help it flow smoothly.
I once tried a matcha white chocolate version where I mixed a teaspoon of matcha powder into the melted white chocolate. It turned the bandages a pale green, which looked surprisingly cool—like swamp mummies. The flavor was subtle but interesting, though my kids gave me some very suspicious looks.
Serving & Storage Suggestions
These Best White Chocolate Mummy Brownies are best served at room temperature, which lets the white chocolate stay firm while the brownie stays fudgy. If you’ve refrigerated them, let them sit out for about 15 minutes before serving.
For presentation, I like to arrange them on a black or orange platter—it makes the white mummy stripes pop. Sprinkle a few candy pumpkins or spiders around the edges for extra Halloween flair. They also look fantastic on a tiered cake stand for parties.
Storage: Place the brownies in an airtight container at room temperature for up to 3 days. Layer them between sheets of parchment paper so the white chocolate doesn’t stick together. If you stack them without parchment, you’ll end up with a sad pile of bald mummies.
Freezer instructions: These freeze beautifully! Place the undecorated brownies in a single layer on a baking sheet and freeze for 1 hour. Then transfer them to a freezer-safe bag or container for up to 3 months. When you’re ready to serve, thaw them at room temperature, then decorate with fresh white chocolate. I do this every year—bake a double batch in September, freeze the brownies, and decorate them the day before Halloween. It saves so much stress.
Reheating: If you want a warm brownie (which is amazing), microwave an undecorated brownie for 10-15 seconds. Don’t microwave the decorated ones—the white chocolate will melt into a puddle. Trust me on this one.
One thing I’ve noticed: these brownies actually taste better the next day. The flavors meld together, and the brownie gets even fudgier. So if you can resist eating them all immediately, you’re in for a treat.
Nutritional Information & Benefits
Let’s be real—these are a treat, not a health food. But here’s the breakdown so you know what you’re working with. Per brownie (based on 12 servings):
- Calories: Approximately 320-350
- Fat: 18-20g
- Carbohydrates: 40-45g
- Protein: 4-5g
- Sugar: 28-32g
That said, there are a few bright spots. The brownie base provides a small amount of iron from the cocoa powder, and if you use dark chocolate chips instead of white, you’ll get some antioxidants. The eggs add protein, and hey—there’s no judgment here. Halloween comes once a year, and these brownies are worth every single calorie.
For dietary considerations: this recipe contains gluten, dairy, and eggs. For a gluten-free version, use a certified gluten-free brownie mix. For a dairy-free version, use dairy-free brownie mix and dairy-free white chocolate chips. For an egg-free version, use a flax egg (1 tablespoon ground flaxseed + 3 tablespoons water per egg) or a commercial egg replacer.
From my perspective, food is about joy and connection, especially on holidays. These brownies bring people together, make kids giggle, and turn an ordinary October evening into something special. That’s a kind of nutrition too, if you ask me.
Conclusion
These Best White Chocolate Mummy Brownies are everything I want in a Halloween recipe: fun to make, delicious to eat, and impressive enough to steal the show at any party. They’re the kind of treat that makes people smile before they even take a bite, and that first bite—fudgy chocolate, creamy white chocolate, a little crunch from the candy eyes—is pure magic.
I love that this recipe doesn’t take itself too seriously. It’s playful, a little messy, and completely customizable. Maybe you’ll add peanut butter, or use dark chocolate, or experiment with different candy eyes. Maybe you’ll make them with your kids and end up with flour on the ceiling and white chocolate in your hair. That’s the whole point. Halloween is about having fun, and these brownies deliver.
So grab your brownie mix, your white chocolate chips, and a handful of candy eyes. Make a batch for your next Halloween party, or just for yourself on a quiet October night. And when you do, come back and tell me how they turned out. Did your mummies look perfect, or did they come out a little wonky? Either way, I want to hear about it. Drop a comment below, share a photo, or tag me on social media. Let’s make this Halloween the tastiest one yet.
Happy Halloween, and happy baking!
Frequently Asked Questions
Can I use a from-scratch brownie recipe instead of a box mix?
Absolutely! Any fudgy brownie recipe that yields a 9×13 inch pan will work perfectly. Just make sure the brownies are completely cool before decorating. I’ve used my favorite from-scratch recipe many times, and the mummies turn out just as cute.
Why did my white chocolate seize up?
White chocolate is sensitive to heat and moisture. If you overheated it or got even a drop of water in the bowl, it can seize into a thick, grainy mess. Always melt at 50% power in short bursts, and make sure your bowl and spoon are completely dry. If it does seize, you can try adding a teaspoon of coconut oil or hot water and stirring vigorously—but sometimes it’s better to start fresh.
Can I make these ahead of time?
Yes! Bake the brownies up to 3 days in advance and store them in an airtight container at room temperature. Decorate them the day you plan to serve them for the best appearance. Or freeze the undecorated brownies for up to 3 months and decorate after thawing.
How do I keep the white chocolate from cracking when I cut the brownies?
Use a sharp serrated knife and a gentle sawing motion. A dull knife will crack the white chocolate and squish the brownie. If the white chocolate is very thick, let the brownies sit at room temperature for a few minutes to soften slightly before cutting.
Can I use white chocolate melting wafers instead of chips?
Yes, melting wafers are actually easier to work with because they’re designed to melt smoothly and set firmly. They often don’t need any added oil. Just follow the package directions for melting, and you’re good to go. The texture will be slightly different—smoother and more candy-like—but the mummies will look fantastic.
Pin This Recipe!
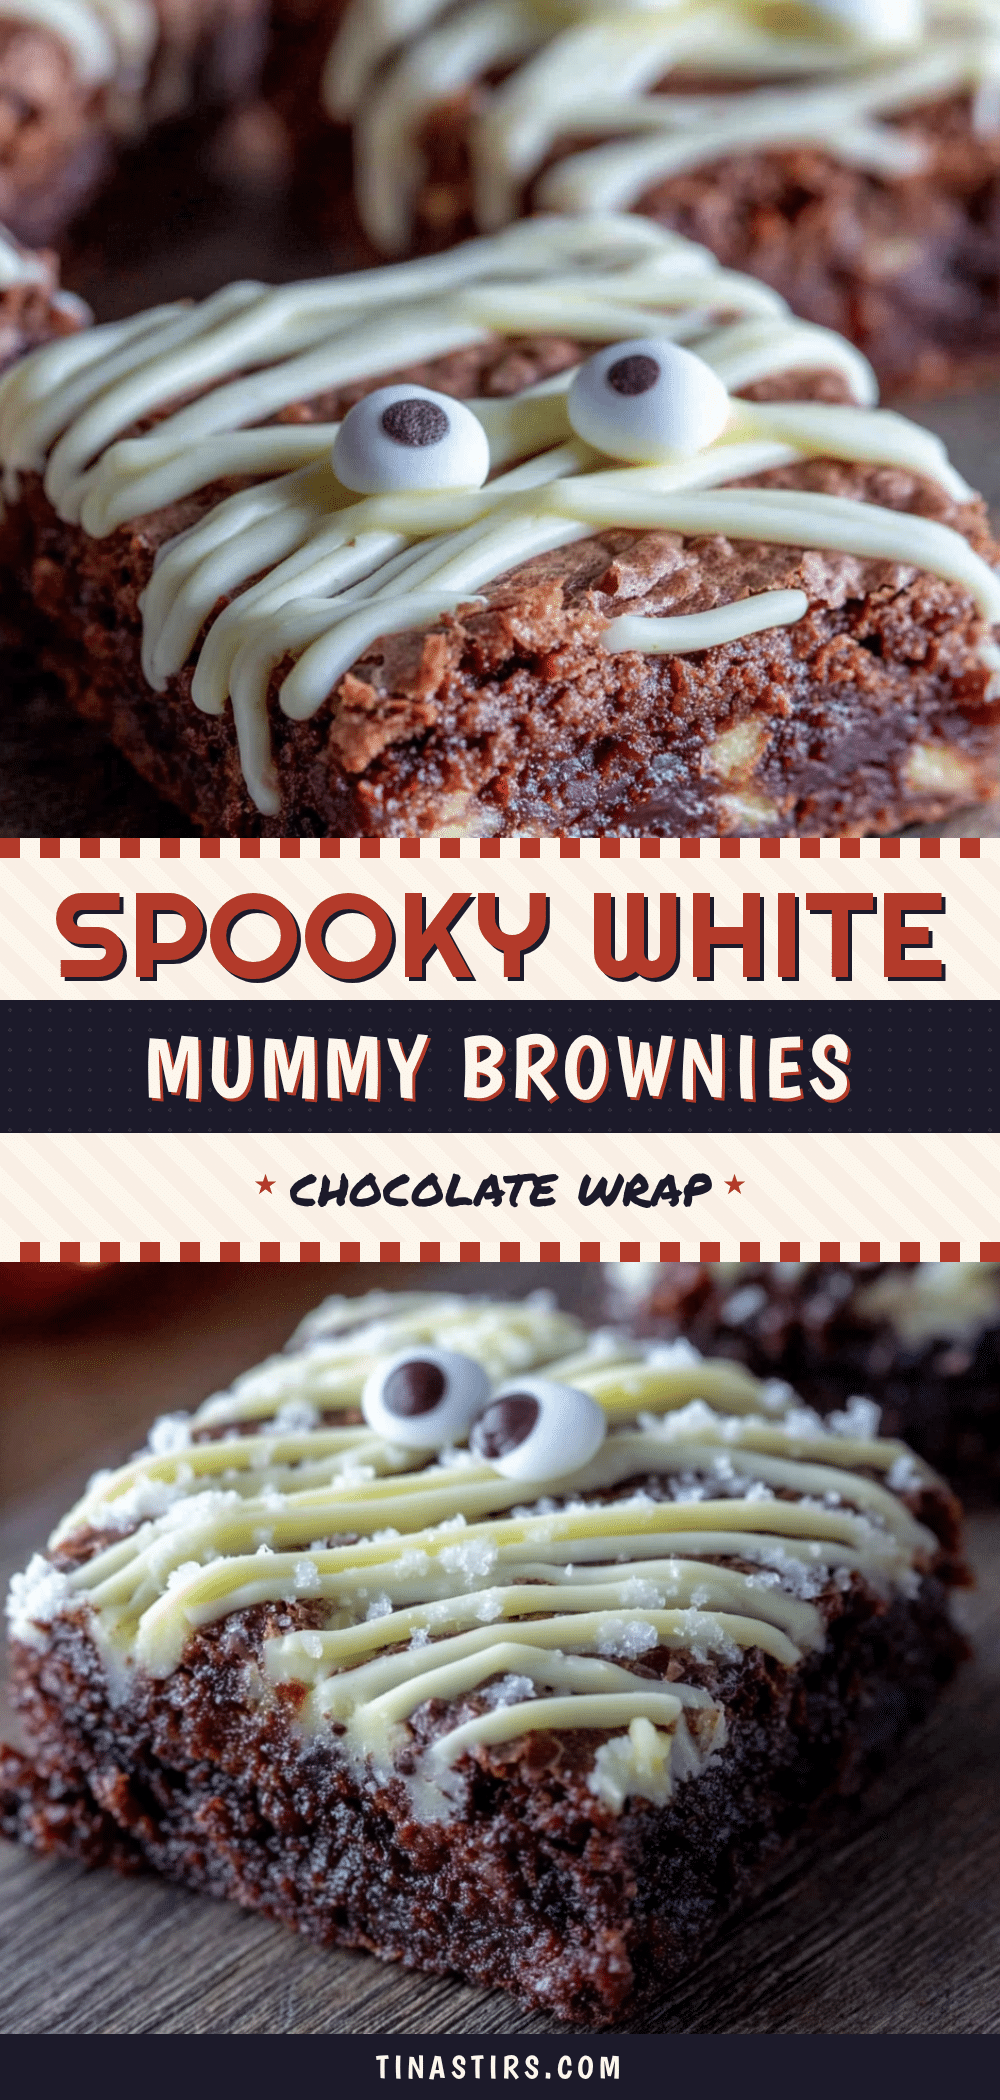
Best White Chocolate Mummy Brownies – Easy Halloween Recipe
Fudgy brownies wrapped in creamy white chocolate bandages with candy eyes, creating adorable mummy treats that are perfect for Halloween parties and gatherings.
- Prep Time: 15 minutes
- Cook Time: 25 minutes
- Total Time: 45 minutes
- Yield: 12-16 servings 1x
- Category: Dessert
- Cuisine: American
Ingredients
- 1 box (18.4 oz) brownie mix (Ghirardelli or Duncan Hines recommended)
- 2 large eggs, room temperature
- 1/2 cup vegetable oil (or melted coconut oil)
- 1/4 cup water
- 1 teaspoon vanilla extract
- 2 cups white chocolate chips (Ghirardelli recommended)
- 1 tablespoon coconut oil or shortening
- 48–60 candy eyes (Wilton brand recommended)
- Optional: 1/4 cup mini chocolate chips (for homemade eyes)
Instructions
- Preheat oven to 350°F (175°C). Line a 9×13 inch baking pan with parchment paper, leaving overhang on long sides. Lightly grease parchment.
- In a large mixing bowl, combine brownie mix, eggs, oil, water, and vanilla extract. Stir until just combined (about 40 strokes). Do not overmix.
- Pour batter into prepared pan and spread evenly. Bake for 22-25 minutes, until a toothpick inserted in center comes out with moist crumbs. Do not overbake.
- Cool completely in pan on a wire rack for at least 1 hour, then transfer slab to rack and cool completely (about 30 more minutes).
- Cut cooled brownies into 12-16 rectangles using a sharp knife, wiping blade clean between cuts.
- Melt white chocolate chips and coconut oil in a microwave-safe bowl in 30-second intervals at 50% power, stirring after each, until smooth.
- Working one at a time, drizzle melted white chocolate over each brownie in uneven stripes to resemble mummy bandages, leaving a gap near the top for eyes.
- While white chocolate is still wet, press two candy eyes into the gap. Let set at room temperature for 20-30 minutes until firm.
Notes
Cool brownies completely before decorating to prevent white chocolate from melting. Work one brownie at a time when drizzling. For best results, use a serrated knife for cutting and wipe blade between cuts. Brownies taste even better the next day.
Nutrition
- Serving Size: 1 brownie
- Calories: 320350
- Sugar: 2832
- Sodium: 200250
- Fat: 1820
- Saturated Fat: 810
- Carbohydrates: 4045
- Fiber: 12
- Protein: 45
Keywords: Halloween brownies, mummy brownies, white chocolate brownies, easy Halloween dessert, spooky treats, fudgy brownies, holiday baking


