Love this? Save it for later!
Share the inspiration with your friends
The PTA Halloween party was in six hours and I’d completely forgotten. My son had reminded me every morning for two weeks. I’d nodded, said “got it, buddy,” and then absolutely did not have it. The sign-up sheet had gone around at drop-off, and I’d cheerfully volunteered for desserts. Now it was 2 PM on a Tuesday, my kitchen contained a box of instant pudding, a half-eaten sleeve of Oreos, and the kind of panic that makes you question your entire system of time management.
Everyone else would be bringing elaborate themed cakes. Pinterest-perfect cupcakes with fondant ghosts. Those adorable Rice Krispie treat pumpkins that take three hours to shape. I had chocolate pudding and some gummy worms from the bottom of my son’s lunchbox stash. Honestly, I almost just bought a sheet cake from the grocery store and called it a day. But then I remembered these Halloween dirt cups my aunt used to make for family cookouts. No frills, no stress, just layers of chocolate, cookie crumbs, and candy. Maybe you’ve been there—staring at a sad collection of ingredients and wondering if you can pull off a miracle.
I threw it together in twenty minutes. Layered the pudding, crushed the Oreos with a rolling pin (a bit aggressively, if I’m being honest), and stuck a gummy worm in each cup. I dropped them off at the school with zero confidence. When I came back to pick up my son, the table was empty. The fancy cakes were barely touched. A mom stopped me and asked for the recipe. “The dirt cups,” she said. “My kids won’t stop talking about them.”
That’s the thing about these easy Halloween dirt cups. They’re not trying to be fancy. They’re just good—the kind of simple, nostalgic dessert that kids actually want to eat. And I’ve been making them every Halloween since.
Why You’ll Love This Recipe
Let’s be real for a second. Halloween is chaotic. Between costume emergencies, class parties, and the sheer sugar overload, the last thing you need is a complicated dessert that requires piping bags and food coloring. These dirt cups are the opposite of that. They’re the recipe you can make in the middle of the chaos and still look like you have your life together.
- Quick & Easy: We’re talking 20 minutes, max. No baking, no stove, no stress. Just stir, layer, and chill.
- Simple Ingredients: You probably have most of this in your pantry right now. The only thing you might need to grab is the gummy worms, but let’s be honest—those are everywhere in October.
- Perfect for Halloween Parties: Classrooms, trunk-or-treats, neighborhood get-togethers. These travel well, serve easily, and require zero plates or forks.
- Crowd-Pleaser: I’ve watched kids bypass elaborate cupcakes to grab these dirt cups. There’s something about the “dirt” and “worms” combo that kids find absolutely irresistible.
- Unbelievably Delicious: It’s chocolate pudding. It’s crushed Oreos. It’s gummy worms. Do I need to say more? The texture contrast—creamy pudding, crunchy cookies, chewy candy—is pure comfort food magic.
What makes these different from every other dirt cup recipe out there? It’s the ratio. Most recipes skimp on the Oreo layer or use too much pudding. I’ve tested this exact combination until the proportions were perfect. Every spoonful gives you the right balance of creamy, crunchy, and chewy. Plus, I’ve included a trick for keeping the Oreo crumbs from getting soggy—something I learned after a few disappointing batches. Trust me, it makes all the difference.
This isn’t just a dessert. It’s the one that makes you feel like a Halloween hero without actually having to work for it. And honestly? That’s the best kind of recipe.
What Ingredients You Will Need
This recipe keeps things simple. You don’t need any special Halloween-themed products or obscure baking supplies. Just good, basic ingredients that come together to create something surprisingly satisfying.
- Chocolate instant pudding mix (two 3.9-ounce boxes) — This is the base of our “dirt.” I prefer Jell-O brand for its consistent texture, but store brands work fine too. Make sure you’re getting the instant kind, not the cook-and-serve. We don’t have time for that.
- Cold milk (3 cups) — Whole milk gives the creamiest result, but 2% works perfectly fine. For a dairy-free version, use unsweetened almond or oat milk (I’ve tested both, and oat milk gives the best texture).
- Regular Oreo cookies (one 14.3-ounce package) — You’ll use the whole package, including the cream filling. Don’t try to separate them; the cream helps the crumbs stick together and gives that authentic “dirt” texture. I’ve tried this with generic chocolate sandwich cookies, and honestly, Oreos are worth the extra dollar. The chocolate flavor is deeper and the texture crumbles better.
- Gummy worms (about 1 cup) — This is where you can get creative. I like the sour worms for an extra tangy kick, but regular ones work great too. If you’re making these for very young kids, you can substitute with fruit leather strips rolled up to look like worms.
- Green food coloring (optional) — A drop or two in the pudding gives it a slightly more “earthy” greenish-brown color. Totally optional, but it adds a fun creepy factor. I’ve skipped it plenty of times and the kids didn’t notice.
- Small clear cups (6 to 8, depending on size) — The clear plastic cups are key here. You want people to see the layers. I use 5-ounce cups for individual servings, but you can use small mason jars or even paper cups if that’s what you have.
One thing I learned the hard way: don’t use sugar-free pudding mix for this. The texture is thinner and doesn’t set up as firmly, which means your layers will blend together. Regular instant pudding is the way to go for that perfect, scoopable consistency.
Equipment Needed
You don’t need a professional kitchen for this one. Most of these tools you already own, and the ones you don’t have easy substitutes.
Mixing bowls — A medium bowl for the pudding and a separate one for crushing the Oreos. If you’re short on bowls, just crush the cookies first and wipe out the bowl before making the pudding.
Whisk or electric mixer — A whisk works fine for instant pudding, but an electric mixer on low speed makes it come together faster with fewer lumps. I’ve used a fork in a pinch, and it worked, but you’ll be whisking for a solid three minutes.
Rolling pin or food processor — For crushing the Oreos. A rolling pin and a zip-top bag is the classic method and honestly, it’s kind of therapeutic. If you have a food processor, pulse the cookies until they’re fine crumbs. Don’t overprocess or you’ll get Oreo dust instead of dirt-like crumbs.
Small clear cups (6-8) — I get mine at the dollar store. They’re cheap, disposable, and perfect for parties. If you want to be more eco-friendly, small mason jars or reusable plastic cups work beautifully.
Spoon or small spatula — For layering. A small offset spatula is nice for smoothing the pudding, but a regular spoon does the job.
Measuring cups and spoons — For the milk and any optional food coloring. Nothing fancy needed.
That’s it. No stand mixer, no piping bags, no special pans. This is the kind of recipe you can make in someone else’s kitchen without having to bring half your equipment with you.
Preparation Method
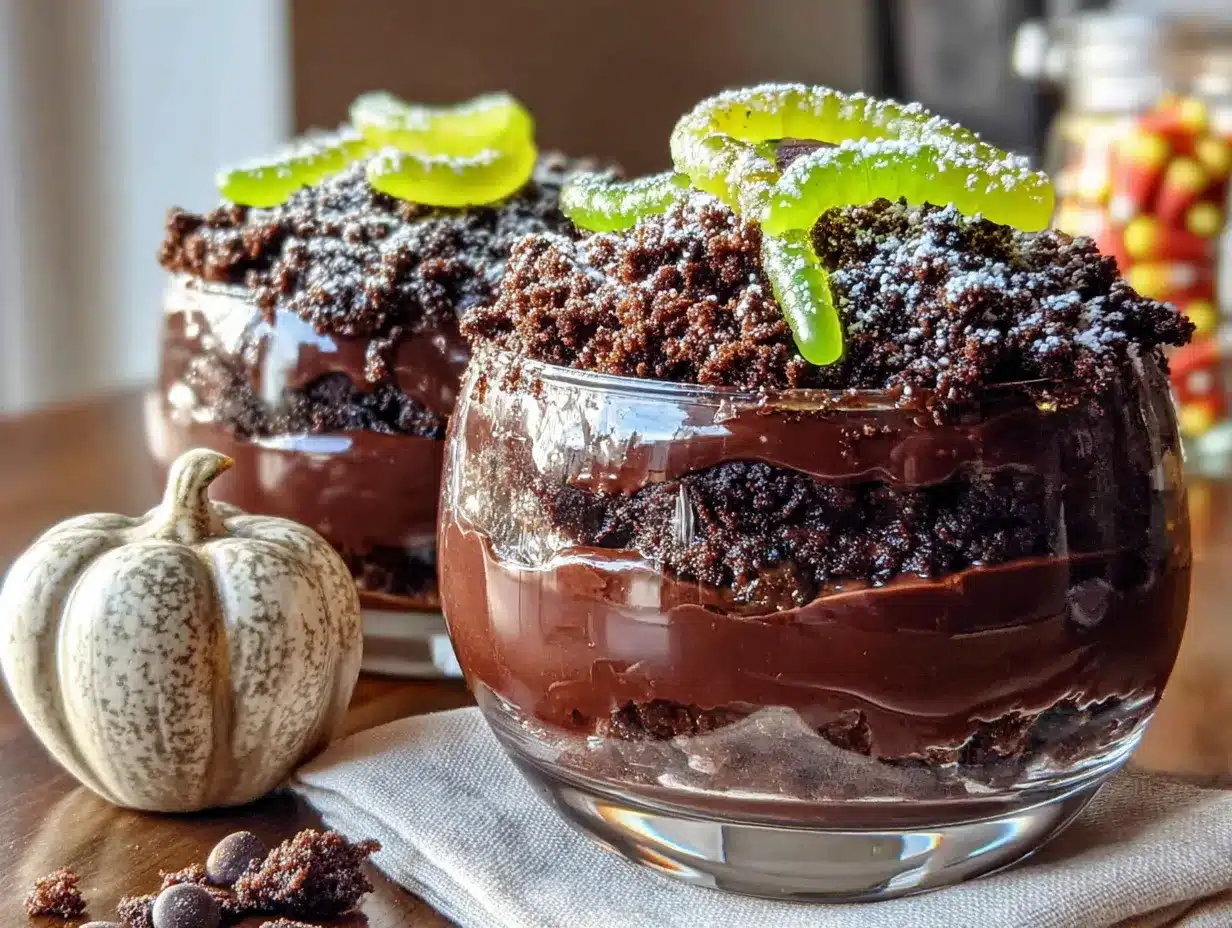
Alright, let’s make these dirt cups. I promise this is the easiest Halloween dessert you’ll ever make. Here’s exactly how to do it.
- Crush the Oreos. Place the entire package of Oreos (cream filling and all) into a large zip-top bag. Seal it, making sure to push out as much air as possible. Now, take out your aggression. Use a rolling pin to crush the cookies into fine crumbs. You want a mix of textures—some fine powder and some slightly chunkier bits. This takes about 2-3 minutes. If you’re using a food processor, pulse 8-10 times until you get the same texture. Set the crumbs aside.
- Make the pudding. In a medium mixing bowl, whisk together the two boxes of instant pudding mix with 3 cups of cold milk. Whisk vigorously for about 2 minutes until the pudding starts to thicken. If you want that greenish “dirt” color, add 2-3 drops of green food coloring and whisk until evenly distributed. The color should be subtle—think freshly turned soil, not radioactive slime. Let the pudding sit for 5 minutes to fully set. It should be thick and creamy, not runny.
- Prepare your cups. Arrange your clear cups on a baking sheet or tray. This makes it easier to move them to the refrigerator later. If you’re using plastic cups, make sure they’re stable and won’t tip over.
- Layer the first round. Spoon about 2 tablespoons of crushed Oreo crumbs into the bottom of each cup. Press down gently with the back of the spoon to create a compact base layer. This prevents the pudding from seeping through and keeps your layers distinct.
- Add the pudding layer. Spoon or pour the pudding over the Oreo layer, filling each cup about halfway. Use about 1/4 cup of pudding per cup, depending on the size of your cups. Tap the tray gently on the counter to settle the pudding and remove any air bubbles.
- Add the worms. Take 2-3 gummy worms and press them gently into the pudding layer. Let a little bit of the worm stick out—this is what makes it look like they’re crawling out of the dirt. You can coil some at the bottom for a more dramatic effect.
- Top with more Oreo crumbs. Sprinkle a generous layer of crushed Oreos over the pudding, covering the worms completely. Use about 2 tablespoons per cup. You want a thick enough layer that it looks like real dirt. Don’t press down this time; let the crumbs stay loose for that “freshly dug” look.
- Add the final worms. Poke one or two more gummy worms into the top Oreo layer, letting them wiggle out at different angles. This is the visual payoff—the worms escaping from the dirt.
- Chill for at least 1 hour. This step is crucial. The pudding needs time to fully set, and the Oreo crumbs need to soften just slightly against the pudding. Don’t skip this, or your dirt cups will be too runny. If you’re making them the night before, cover them with plastic wrap and refrigerate overnight.
A quick note from personal experience: don’t add the gummy worms too early if you’re making these ahead of time. The moisture from the pudding will make them soggy after about 6 hours. If you’re prepping a day in advance, assemble everything except the top worms and add those right before serving.
Cooking Tips & Techniques
I’ve made these dirt cups more times than I can count, and I’ve learned a few things the hard way. Here are my best tips for getting them right every time.
Don’t overcrush the Oreos. I made this mistake my first time. I was so focused on getting fine crumbs that I basically turned them into powder. The problem? Fine powder doesn’t look like dirt—it looks like cocoa powder. You want some small chunks in there. It gives the “dirt” texture and visual interest. Aim for a mix of fine crumbs and pea-sized pieces.
Let the pudding set properly. Instant pudding is forgiving, but it needs time. Don’t rush the 5-minute set time before layering. If your pudding is still runny when you spoon it in, it will seep into the Oreo layer and turn everything into a muddy mess. You want it thick enough to hold its shape when spooned.
Use cold milk. I know this seems obvious, but I’ve definitely grabbed milk from the pantry that had been sitting out (don’t judge me). Room temperature milk doesn’t activate the pudding mix properly. The milk needs to be refrigerator-cold for the pudding to set correctly.
Layer strategically. The bottom Oreo layer should be compacted. The top layer should be loose. This creates two different textures in one cup—a firm base and a crumbly top. It’s a small detail, but it makes the eating experience more interesting.
Watch the gummy worm placement. If you push the worms all the way into the pudding, they’ll be completely hidden. If you leave too much sticking out, they’ll dry out. The sweet spot is about 1/3 of the worm visible above the surface. Angle them at different directions for the most dramatic effect.
Make extra crumbs. I always crush an extra 3-4 Oreos and keep them aside. Kids love to sprinkle more “dirt” on top right before eating. It’s a fun interactive element that makes the dessert feel even more playful.
Variations & Adaptations
One of the best things about this recipe is how easy it is to adapt. Here are some of my favorite variations.
Dairy-Free Version: Use unsweetened oat milk or full-fat coconut milk for the pudding. I’ve tested this with oat milk and it works beautifully—the texture is slightly less creamy but still very good. For the Oreo layer, regular Oreos are actually dairy-free (surprise!), so you’re good there. Just double-check your gummy worm brand; some contain gelatin or dairy derivatives.
Gluten-Free Option: Use gluten-free chocolate sandwich cookies. There are several brands available now, and they crush just as well as regular Oreos. The rest of the ingredients are naturally gluten-free, but always check your pudding mix label to be safe.
Pumpkin Dirt Cups: For a fall twist, replace the chocolate pudding with pumpkin pudding. Mix one box of instant vanilla pudding with 1 cup of pumpkin puree and 1 cup of milk. Add pumpkin pie spice to taste. It gives you that autumn flavor with the same dirt cup presentation. I made these for a Thanksgiving potluck and they were a hit.
Extra Creepy Version: Add some edible “eyes” (candy eyeballs) peeking out of the dirt. You can find them at any craft store or online. I also like to add a few chocolate “rocks” (chocolate-covered almonds) scattered on top for texture variety.
Individual Trifle Version: Make this in a large glass trifle bowl instead of individual cups. Layer the ingredients three times—pudding, Oreos, worms—and finish with a thick layer of Oreo crumbs on top. It serves a crowd and looks impressive on a buffet table.
Serving & Storage Suggestions
These dirt cups are best served cold, straight from the refrigerator. The contrast between the chilled pudding and the room-temperature Oreo crumbs is part of the magic. I usually take them out about 10 minutes before serving to take the chill off slightly, but that’s a personal preference.
Presentation tips: Arrange the cups on a tray lined with fake spiderwebs or orange and black napkins. You can add a plastic spider to the tray for extra Halloween flair. If you’re serving these at a party, put a small sign next to them that says “Worm Farm” or “Dirt Dessert.” The kids will lose their minds.
Storage: Cover each cup with plastic wrap or a lid and refrigerate. They’ll keep for up to 3 days, but the texture is best within the first 24 hours. After that, the Oreo crumbs start to soften and lose their crunch. The gummy worms will also get softer the longer they sit in the pudding.
Freezing: I don’t recommend freezing these. The pudding gets icy and the texture becomes grainy when thawed. These are a make-ahead, not a freeze-ahead, recipe.
Flavor development: Interestingly, the flavors actually meld together beautifully after a few hours. The Oreo crumbs absorb a tiny bit of moisture from the pudding, creating a texture that’s almost like a soft cookie. Some people prefer this over the fresh crunch. If that’s you, make them the night before and let them sit overnight.
Reheating: There’s no reheating involved here. These are served cold. But if you’ve refrigerated them and the pudding has firmed up too much, let them sit at room temperature for 15 minutes before serving.
Nutritional Information & Benefits
Let’s be honest—these are a treat, not a health food. But they’re not as bad as you might think, especially if you’re comparing them to other Halloween desserts.
Per serving (based on 8 servings): approximately 320 calories, 14g fat, 47g carbohydrates, 4g protein, 28g sugar. The exact numbers will vary based on your specific ingredients and cup size.
On the positive side, the milk in the pudding provides calcium and vitamin D. The Oreos offer a small amount of iron (yes, really). And the gummy worms? Well, they make kids happy, and that counts for something.
If you’re looking to lighten these up, you can use low-fat milk and sugar-free pudding mix. The texture won’t be quite as rich, but it’s a decent compromise. You can also use reduced-fat Oreos, though I think the flavor suffers slightly.
For those with dietary restrictions: as mentioned earlier, regular Oreos are dairy-free and can be part of a gluten-free diet if you use the appropriate cookie substitute. The pudding mix can be made with plant-based milk. Always check labels for specific allergen information, as formulations can change.
From a wellness perspective, I think these dirt cups are a perfect example of balance. Halloween is one day (or one season, let’s be real). A single serving of a fun, nostalgic dessert isn’t going to derail anyone’s health goals. Enjoy them, savor them, and then get back to your regular routine.
Conclusion
These easy Halloween dirt cups are proof that you don’t need to spend hours in the kitchen to create something memorable. They’re simple, they’re fun, and they taste like childhood in the best possible way. Every time I make them, I think about that panicked Tuesday afternoon when I threw them together in desperation—and how they turned out to be the hit of the party.
I love this recipe because it’s forgiving. You can’t really mess it up. The ratios are flexible, the ingredients are basic, and the presentation is foolproof. You can dress them up or keep them simple. They work for classroom parties, family gatherings, or just a fun weekend project with your kids.
So go ahead and make a batch. Customize them however you like—more worms, less worms, pumpkin spice, extra creepy. Make them your own. And when someone asks for the recipe (they will), send them my way.
I’d love to hear how yours turn out! Drop a comment below and let me know what variations you tried. Did your kids love them? Did you add anything unexpected? Share your dirt cup stories—I read every single one. And if you’re looking for more easy Halloween treats, check out my spider web cupcakes and pumpkin patch brownies for more no-fuss party ideas.
Happy Halloween, and happy eating!
Frequently Asked Questions
Can I make these dirt cups ahead of time?
Yes! You can assemble them up to 24 hours in advance. Just add the top layer of gummy worms right before serving to keep them from getting too soft. Cover the cups with plastic wrap and refrigerate.
Can I use homemade pudding instead of instant?
You can, but it changes the texture. Homemade pudding is thinner and won’t set as firmly, which means your layers might blend together. If you go this route, use a bit more cornstarch in your recipe to get a thicker consistency, and chill the cups for at least 4 hours.
How do I keep the Oreo crumbs crunchy?
The key is the bottom layer. Press the first layer of crumbs firmly into the cup before adding the pudding. This creates a barrier that prevents moisture from seeping through. Also, don’t add the top layer of crumbs until right before serving if you want maximum crunch.
What if I don’t have clear cups?
No problem! You can use small mason jars, paper cups, or even small bowls. The clear cups just make the layers visible, which is part of the fun. If you’re using opaque cups, consider adding a label that says “Dirt Cup” so people know what’s inside.
Can I use different types of cookies?
Absolutely. Golden Oreos create a “sand” effect that’s fun for beach-themed parties. Chocolate wafer cookies work well too. Just avoid cookies with cream filling that’s different from the cookie itself (like double-stuffed), as they can create an uneven texture when crushed.
Pin This Recipe!
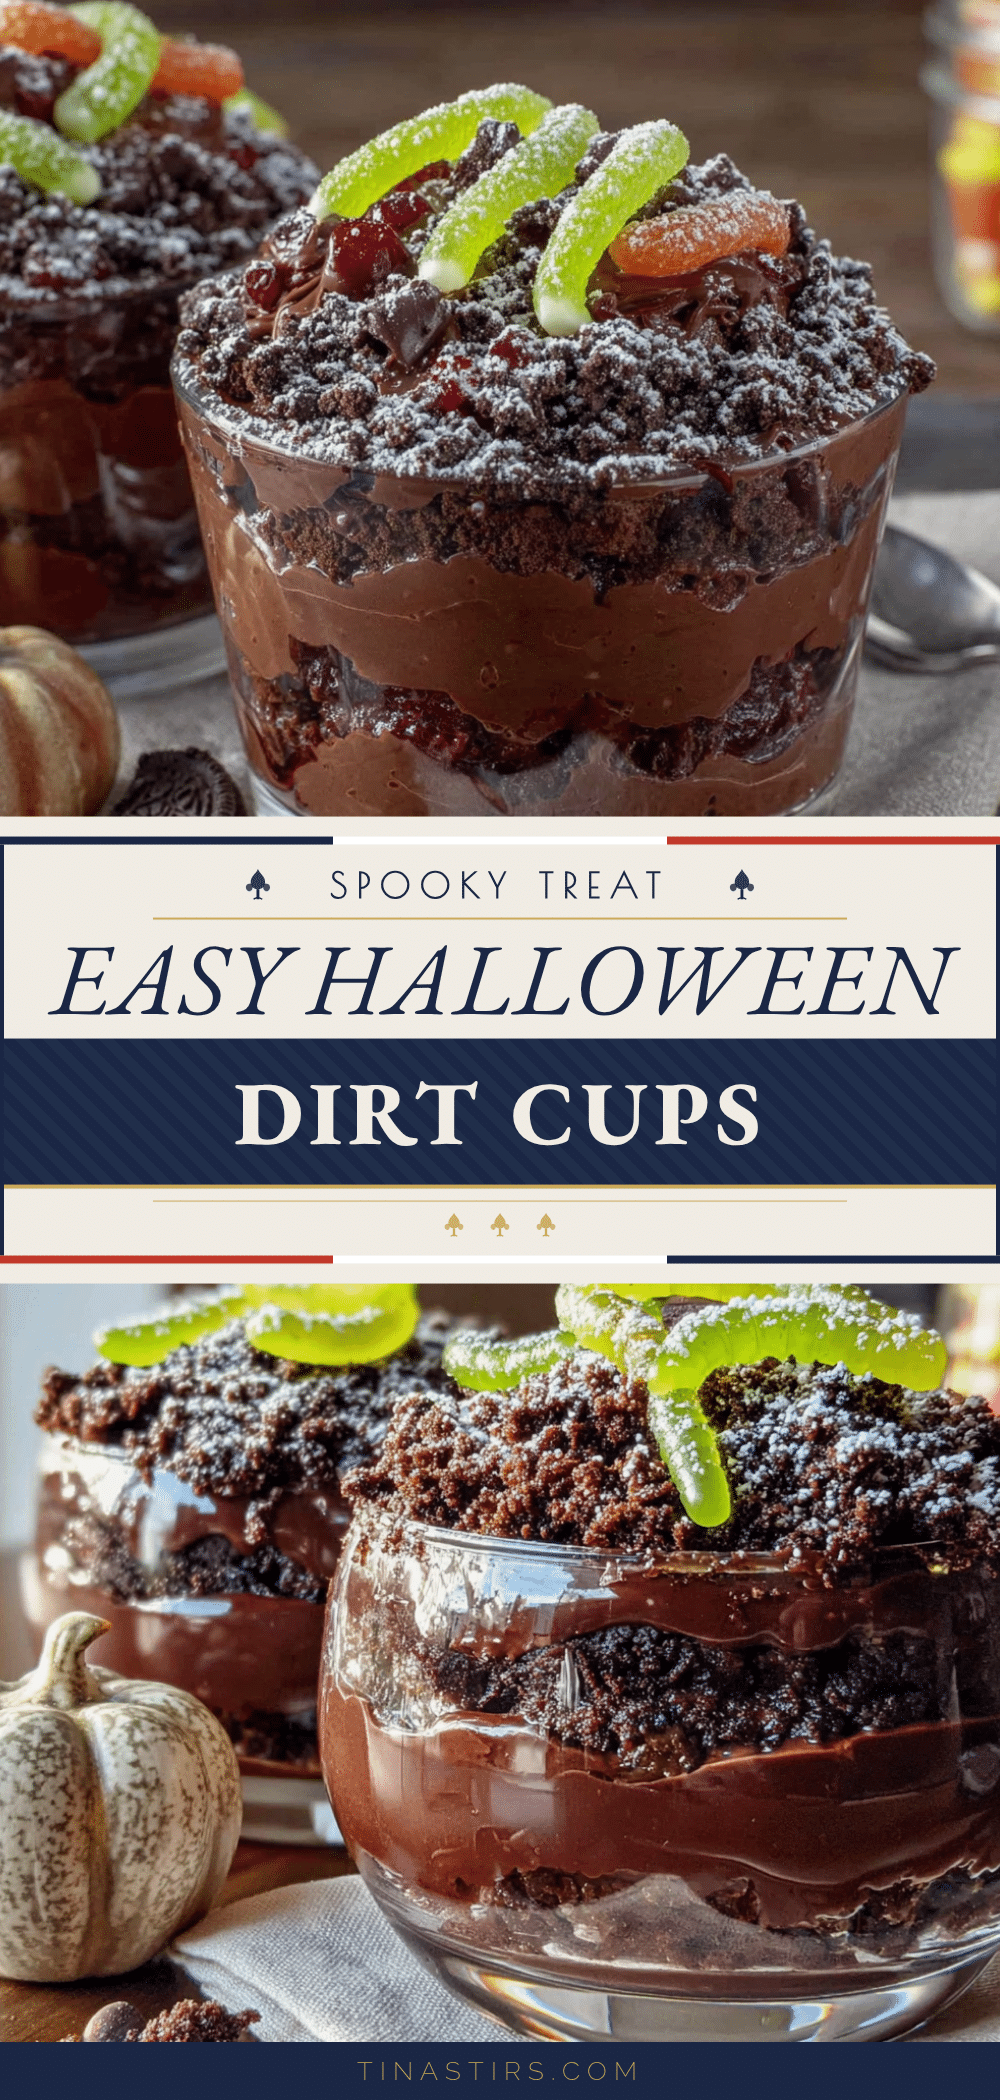
Easy Halloween Dirt Cups with Oreo Crumbs
These easy Halloween dirt cups are a quick, no-bake dessert made with layers of chocolate pudding, crushed Oreos, and gummy worms. Perfect for parties, they come together in 20 minutes and are a guaranteed crowd-pleaser.
- Prep Time: 20 minutes
- Cook Time: 0 minutes
- Total Time: 1 hour 20 minutes (includes chilling)
- Yield: 8 servings 1x
- Category: Dessert
- Cuisine: American
Ingredients
- 2 boxes (3.9 ounces each) chocolate instant pudding mix
- 3 cups cold milk
- 1 package (14.3 ounces) regular Oreo cookies
- 1 cup gummy worms
- 2–3 drops green food coloring (optional)
Instructions
- Crush the Oreos: Place the entire package of Oreos (cream filling and all) into a large zip-top bag. Seal, pushing out air. Use a rolling pin to crush into fine crumbs with some slightly chunkier bits. Set aside.
- Make the pudding: In a medium mixing bowl, whisk together the two boxes of instant pudding mix with 3 cups of cold milk. Whisk vigorously for about 2 minutes until the pudding starts to thicken. If desired, add 2-3 drops of green food coloring and whisk until evenly distributed. Let the pudding sit for 5 minutes to fully set.
- Prepare your cups: Arrange 6-8 small clear cups on a baking sheet or tray.
- Layer the first round: Spoon about 2 tablespoons of crushed Oreo crumbs into the bottom of each cup. Press down gently with the back of a spoon to create a compact base layer.
- Add the pudding layer: Spoon or pour the pudding over the Oreo layer, filling each cup about halfway (about 1/4 cup per cup). Tap the tray gently on the counter to settle the pudding and remove air bubbles.
- Add the worms: Take 2-3 gummy worms and press them gently into the pudding layer, letting a little bit stick out.
- Top with more Oreo crumbs: Sprinkle a generous layer of crushed Oreos (about 2 tablespoons per cup) over the pudding, covering the worms completely. Do not press down.
- Add the final worms: Poke one or two more gummy worms into the top Oreo layer, letting them wiggle out at different angles.
- Chill for at least 1 hour before serving. For best results, refrigerate overnight.
Notes
For best texture, add the top layer of gummy worms just before serving if making ahead. Use cold milk for proper pudding set. Don’t overcrush Oreos; leave some small chunks for texture. Regular instant pudding is preferred over sugar-free for firmer consistency.
Nutrition
- Serving Size: 1 cup
- Calories: 320
- Sugar: 28
- Sodium: 380
- Fat: 14
- Saturated Fat: 5
- Carbohydrates: 47
- Fiber: 1
- Protein: 4
Keywords: Halloween dirt cups, Oreo dirt cups, no-bake Halloween dessert, easy Halloween treat, chocolate pudding cups, gummy worms dessert