Love this? Save it for later!
Share the inspiration with your friends
The neighborhood cookie swap was in six hours and I’d completely forgotten. Everyone else would be bringing their grandmother’s secret recipes—elaborate laminated doughs, perfectly piped meringues, things that required stand mixers and hours of chill time. I had a half-empty jar of peanut butter, some sad-looking oats, and a bag of chocolate chips that was mostly air. Honestly, I almost just showed up with a store-bought apology.
But then I remembered these no-bake energy balls I’d thrown together during a particularly chaotic exam week in college. They weren’t fancy. They weren’t pretty. But they were fast, filling, and—let me tell you—they had saved my life more times than I’d like to admit. I mean, desperation is a great motivator. So I grabbed the peanut butter, dumped in some oats, added a handful of chocolate chips, and started rolling. The dough was sticky, my hands were a mess, and I was convinced I’d be the laughingstock of the swap.
Fast forward to the actual event. My little peanut butter energy balls sat next to a display of French macarons and a three-tiered cake that looked like it belonged in a bakery window. I almost hid them behind the napkins. But a friend grabbed one out of curiosity, took a bite, and her eyes went wide. By the end of the night, my tray was empty. People were asking for the recipe, not the macarons. These easy high-protein peanut butter energy balls had somehow won the day.
Maybe you’ve been there—scrambling for a last-minute contribution, feeling like you have nothing to offer. That’s the thing about this recipe. It doesn’t try to be impressive. It just works. And that’s why I keep making them, long after that cookie swap is over.
Why You’ll Love This Recipe
Let’s be real for a second. We all want to eat better, but we also want food that actually tastes good. These easy high-protein peanut butter energy balls are the perfect middle ground. I’ve tested this recipe at least a dozen times, tweaking the ratios, trying different add-ins, and even messing up a batch or two (too dry! too sticky!). What I’m giving you here is the version that works every single time.
- Quick & Easy: From start to finish, you’re looking at about 15 minutes. No oven, no stove, no complicated steps. Just mix, roll, and eat.
- Simple Ingredients: You probably have most of these in your pantry right now. No weird superfood powders or expensive specialty items.
- Perfect for Meal Prep: Make a batch on Sunday and grab one on your way out the door all week. They’re a lifesaver for busy mornings or afternoon slumps.
- Crowd-Pleaser: Kids love them, adults love them, and nobody guesses they’re actually good for you.
- Unbelievably Delicious: The texture is soft and chewy, the peanut butter flavor is rich, and the chocolate chips add just the right amount of sweetness.
What makes this recipe different from the dozens of other energy ball recipes out there? It’s the protein-to-flavor ratio. I’ve balanced the ingredients so you get a solid 7 grams of protein per ball without it tasting like a protein bar. The secret is using natural peanut butter (the kind that’s just peanuts and salt) and a touch of honey for sweetness. No weird aftertaste, no chalky texture. Just honest, satisfying food.
This is the kind of snack that makes you feel good about what you’re eating. It’s comfort food that actually fuels your body—faster, healthier, and with the same soul-soothing satisfaction as a cookie.
What Ingredients You Will Need
This recipe uses simple, wholesome ingredients to deliver bold flavor and satisfying texture without the fuss. Most of these are pantry staples, which is exactly why this recipe works for those last-minute cravings.
For the Energy Balls
- 1 cup natural peanut butter (creamy, no sugar added; I prefer the kind you have to stir—it’s less processed and has a better texture)
- 1/2 cup honey (or maple syrup for a vegan option; adds sweetness and helps bind everything together)
- 1 1/2 cups rolled oats (not instant oats—they get too mushy; old-fashioned oats give the best texture)
- 1/2 cup protein powder (vanilla or unflavored; I use a whey-based powder for best results, but plant-based works too)
- 1/3 cup dark chocolate chips (mini chips distribute better, but regular ones work fine)
- 1/4 cup ground flaxseed (adds fiber and healthy fats; you can skip it if you don’t have any)
- 1/2 teaspoon vanilla extract (pure vanilla makes a difference, but imitation works in a pinch)
- Pinch of salt (only if your peanut butter is unsalted)
Ingredient Tips: For the best texture, make sure your peanut butter is at room temperature. If it’s been in the fridge, it will be too stiff to mix properly. I’ve tried this recipe with almond butter and cashew butter, and both work well—just know the flavor will be milder. For a nut-free version, sunflower seed butter is your best bet, though the color will turn a little green from the natural reaction with the baking soda (don’t worry, it’s safe!).
Brand Recommendations: For peanut butter, I’m a big fan of the Kirkland brand from Costco—it’s just peanuts and salt, no additives. For protein powder, I’ve had great results with Optimum Nutrition’s vanilla whey, but any brand you like will work. Just avoid anything with a strong artificial sweetener aftertaste.
Equipment Needed
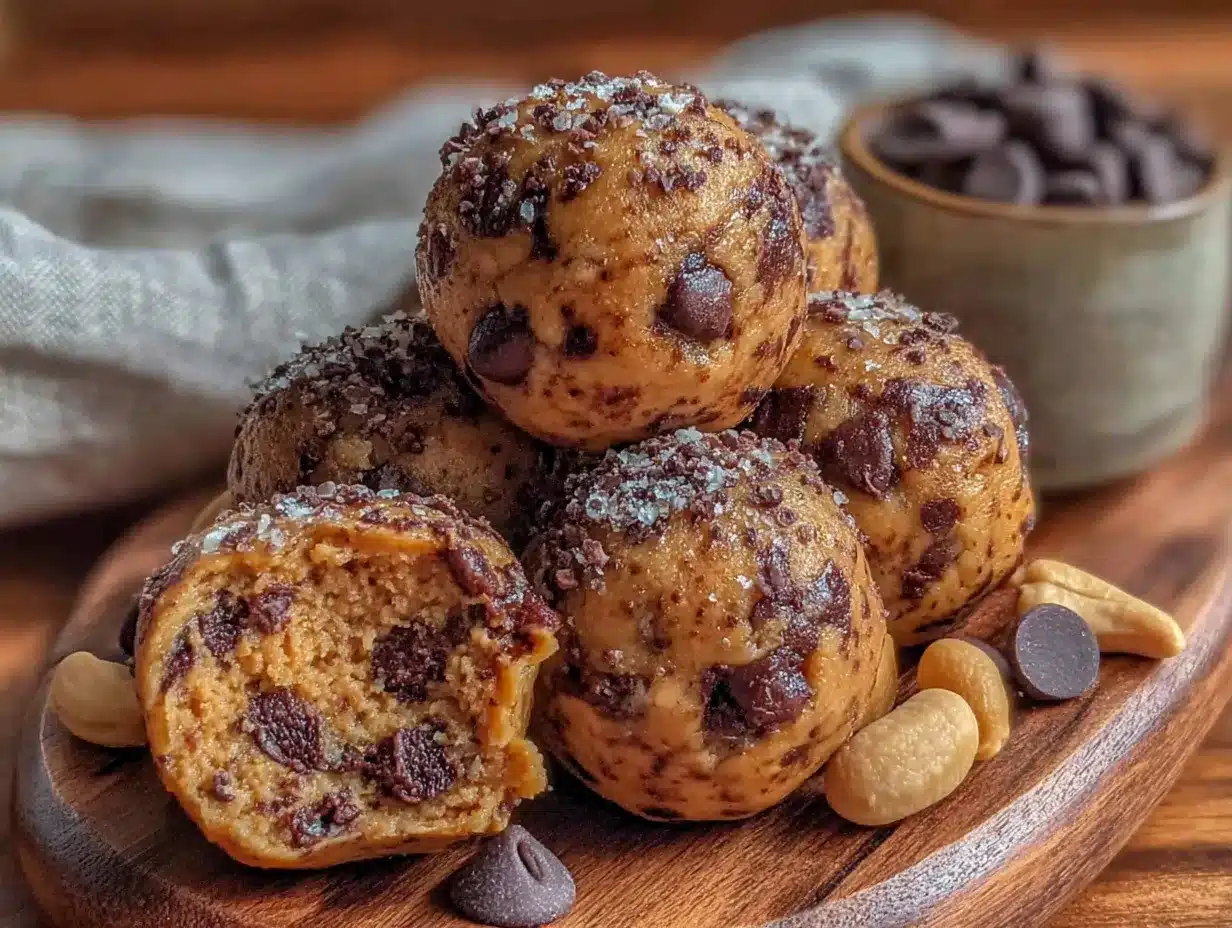
The beauty of this recipe is that you don’t need much. Here’s what you’ll need to have on hand:
- Large mixing bowl (any size works, but bigger makes mixing easier without spilling)
- Measuring cups and spoons (for accuracy—eyeballing can lead to dry or sticky dough)
- Rubber spatula or wooden spoon (for mixing; a spatula is easier for scraping the bowl clean)
- Baking sheet or large plate (to hold the rolled balls while you finish the batch)
- Parchment paper or wax paper (optional, but makes cleanup much easier)
- Small cookie scoop or tablespoon (for uniform balls; a tablespoon works just fine if you don’t have a scoop)
Budget-Friendly Options: If you don’t have a cookie scoop, just use two regular spoons to portion the dough. I’ve made these in a cramped dorm kitchen with nothing but a bowl and a fork—they still turned out great. The only thing I wouldn’t skip is the measuring cups, because the ratio is important for the right texture.
Maintenance Tip: If you use a cookie scoop, wash it right after use. The peanut butter residue can get sticky and hard to clean if it dries.
Preparation Method
Alright, let’s get rolling! This process is straightforward, but I’ve included all my little tricks to make sure your energy balls turn out perfect every time.
- Prep your workspace. Line a baking sheet or large plate with parchment paper. This gives you a clean surface to place the rolled balls on. Trust me, you don’t want to be transferring sticky balls from a bare counter.
- Mix the wet ingredients first. In your large mixing bowl, combine 1 cup of peanut butter, 1/2 cup of honey, and 1/2 teaspoon of vanilla extract. Stir until smooth and well combined. This should take about 30 seconds. The mixture should look glossy and uniform. If your peanut butter is particularly thick, microwave it for 10-15 seconds to soften it before mixing.
- Add the dry ingredients. Add 1 1/2 cups of rolled oats, 1/2 cup of protein powder, 1/4 cup of ground flaxseed, and a pinch of salt to the bowl. Stir everything together with your spatula or spoon. At first, it will look like a crumbly mess—don’t panic. Keep mixing until all the dry ingredients are fully incorporated and the dough starts to come together. This usually takes about 1-2 minutes of vigorous stirring.
- Fold in the chocolate chips. Add 1/3 cup of dark chocolate chips and fold them in gently. Make sure they’re evenly distributed throughout the dough. If you add them too early, they’ll get crushed during mixing.
- Check the consistency. The dough should be thick, slightly sticky, and hold together when pressed. If it’s too dry and crumbly, add 1 tablespoon of honey or a splash of milk (dairy or plant-based). If it’s too sticky to handle, add 1-2 tablespoons of oats. I’ve had to adjust for humidity before—it’s totally normal.
- Chill the dough (optional but recommended). Pop the bowl in the fridge for 15-20 minutes. This makes the dough easier to handle and less sticky. If you’re in a rush, you can skip this step, but the balls will be a bit messier to roll.
- Roll into balls. Scoop out about 1 tablespoon of dough (or use your cookie scoop) and roll it between your palms to form a smooth ball. Place it on the prepared baking sheet. Repeat until all the dough is used. You should get about 18-20 balls, depending on size.
- Final chill. Place the baking sheet in the fridge for at least 30 minutes to let the balls firm up. This step is important—it helps them hold their shape. If you skip it, they’ll be too soft and might fall apart when you try to eat them.
- Store and enjoy. Transfer the energy balls to an airtight container and keep them in the fridge. They’re ready to eat immediately after the final chill, but they get even better after a few hours as the flavors meld.
Sensory Cues: When you’re mixing, the dough should feel like a thick cookie dough—not too wet, not too dry. When you roll a ball, it should hold its shape without cracking. If it cracks, add a little more honey. If it’s too sticky to roll, add more oats.
Cooking Tips & Techniques
I’ve made these energy balls more times than I can count, and I’ve definitely learned a few things the hard way. Here are my best tips to save you from my mistakes.
Don’t overmix the dough. I know it’s tempting to keep stirring until everything is perfectly combined, but overmixing can make the oats break down and create a gummy texture. Just mix until everything is evenly incorporated—about 2 minutes max.
Use room temperature ingredients. Cold peanut butter is a nightmare to mix. If you forgot to take it out of the fridge, microwave it for 10-15 seconds. Same goes for honey—if it’s crystallized, warm it up slightly. Room temperature ingredients blend together much more smoothly.
Wet your hands slightly. If the dough is sticking to your palms while rolling, lightly dampen your hands with water. Not too much—just a tiny bit of moisture. This trick works like magic and prevents the dough from clinging to your skin.
Make uniform sizes. Using a cookie scoop or measuring tablespoon ensures all your balls are the same size. This matters more than you think—uniform balls chill at the same rate and look more professional. Plus, it helps with portion control if you’re tracking macros.
The chilling step is non-negotiable. I skipped the final chill once because I was in a hurry, and the balls were a sticky mess. They held together okay in the fridge, but they were too soft to eat out of hand. Give them that 30 minutes—it’s worth it.
My biggest failure: I once tried to use crunchy peanut butter because that’s all I had. The chunks of peanuts made the balls fall apart. Stick with creamy peanut butter for the best texture. If you want crunch, add the chocolate chips or some chopped nuts instead.
Variations & Adaptations
One of the best things about this recipe is how flexible it is. Here are some of my favorite variations, all tested and approved.
Vegan Version: Swap the honey for maple syrup or agave nectar, and use a plant-based protein powder. The texture will be slightly different—a bit softer—but still delicious. I’ve made this for vegan friends and they always ask for more.
Chocolate Lover’s Twist: Add 2 tablespoons of unsweetened cocoa powder to the dry ingredients. This gives the balls a rich, fudgy flavor. You might need to add an extra tablespoon of honey to balance the bitterness of the cocoa.
Nut-Free Option: Use sunflower seed butter instead of peanut butter. The flavor is milder and slightly earthy, but it works beautifully. Just be aware that the balls might turn a greenish color over time—that’s a natural reaction and totally safe to eat.
Seasonal Variation: In the fall, add 1/2 teaspoon of pumpkin pie spice and swap the chocolate chips for dried cranberries. In the summer, use white chocolate chips and add a tablespoon of freeze-dried strawberry powder. These seasonal twists keep the recipe from getting boring.
Lower-Carb Version: Replace the oats with unsweetened shredded coconut and almond flour. Use a low-carb protein powder and sugar-free chocolate chips. This version is much lower in carbs but still satisfying.
My personal favorite variation: I add 1/4 cup of chia seeds and 1/4 cup of cacao nibs. The chia seeds add extra fiber and omega-3s, and the cacao nibs give a satisfying crunch. It’s my go-to post-workout snack.
Serving & Storage Suggestions
These energy balls are incredibly versatile when it comes to serving. Here’s how I like to enjoy them.
Serving Temperature: They’re best served cold, straight from the fridge. The texture is firmer and more satisfying. If you leave them at room temperature for too long, they’ll soften up and become a bit sticky. I usually take one out of the fridge and let it sit for 2-3 minutes before eating—just enough to take the chill off.
Presentation Ideas: For a party, arrange them on a platter with a few fresh berries and a drizzle of melted chocolate. They look much fancier than they are. For a snack board, pair them with apple slices, cheese cubes, and a handful of almonds.
Perfect Pairings: These energy balls go great with a cup of coffee or tea in the afternoon. For a pre-workout snack, have one with a banana. For a post-workout recovery, pair two balls with a glass of milk or a protein shake.
Storage Instructions: Store the energy balls in an airtight container in the refrigerator. They’ll stay fresh for up to two weeks, though they rarely last that long in my house. You can also freeze them for up to three months—just place them in a freezer-safe bag or container. To thaw, transfer them to the fridge overnight or let them sit at room temperature for 15-20 minutes.
How Flavors Develop: These energy balls actually taste better the next day. The flavors meld together, and the texture becomes more uniform. I’ve found that day two is the sweet spot. So if you can resist eating them all on day one, you’re in for a treat.
Nutritional Information & Benefits
Let’s talk about what makes these energy balls a smart choice for your snack rotation.
Estimated Nutritional Values (per ball, based on 20 balls):
| Nutrient | Amount |
|---|---|
| Calories | 150 |
| Protein | 7g |
| Carbohydrates | 18g |
| Fiber | 3g |
| Fat | 8g |
| Sugar | 10g |
Health Benefits: The peanut butter provides healthy monounsaturated fats and protein to keep you full. The oats offer complex carbohydrates for sustained energy. The flaxseed adds omega-3 fatty acids and fiber for digestive health. And the dark chocolate chips? They’re packed with antioxidants. It’s a snack that actually works with your body, not against it.
Dietary Considerations: This recipe is naturally gluten-free if you use certified gluten-free oats. It’s also vegetarian and can be made vegan with simple swaps. The protein content makes it a great option for anyone looking to increase their protein intake without turning to shakes or bars.
Potential Allergens: This recipe contains peanuts and may contain dairy (depending on your chocolate chips and protein powder). For nut-free and dairy-free options, see the variations section above.
My Wellness Perspective: I believe in food that nourishes without feeling like a chore. These energy balls are my way of having a treat that also supports my active lifestyle. They’re not a meal replacement, but they’re a fantastic bridge between meals when you need something real.
Conclusion
Honestly, I think everyone needs a recipe like this in their back pocket. These easy high-protein peanut butter energy balls are the kind of snack that saves you on busy days, impresses at gatherings, and makes you feel good about what you’re eating. They’re proof that simple ingredients can create something genuinely satisfying.
I love this recipe because it’s forgiving. You can tweak it, adapt it, and make it your own. Maybe you’ll add dried cherries instead of chocolate chips. Maybe you’ll use almond butter and call it a day. The point is, it works. And once you make a batch, you’ll understand why I keep coming back to it.
So go ahead—mix up a batch this weekend. Try a variation that speaks to you. And when you take that first bite, I hope it makes you smile. If you make these, I’d love to hear about it. Drop a comment below, share your twist on the recipe, or tag me in your photos. Let’s keep the conversation going—because good food is meant to be shared.
Frequently Asked Questions
Can I make these without protein powder?
Yes, absolutely. Simply replace the 1/2 cup of protein powder with an additional 1/2 cup of rolled oats. The protein content will be lower, but the texture will still work well. You might need to add an extra tablespoon of honey to help bind the dough.
Why are my energy balls too dry?
This usually happens if your peanut butter is too thick or if you’ve added too many dry ingredients. Try adding 1-2 tablespoons of honey or a splash of milk (dairy or plant-based) to bring the dough together. If you’re using a very dry protein powder, you might need a bit more liquid.
Can I use quick oats instead of rolled oats?
You can, but the texture will be different. Quick oats are more finely processed and will create a softer, almost mushy texture. Rolled oats give the energy balls a pleasant chewiness. If quick oats are all you have, go for it—just know the final result will be less textured.
How long do these energy balls last at room temperature?
They can sit out for up to 2 hours safely, but they’ll become softer and stickier as they warm up. For best results, keep them refrigerated and only take out what you plan to eat. If you’re bringing them to a picnic or potluck, pack them in a cooler bag with an ice pack.
Can I double this recipe?
Absolutely. This recipe doubles beautifully. Just make sure you have a large enough bowl to mix everything comfortably. The only thing to watch out for is the chilling time—a larger batch might need a few extra minutes in the fridge to firm up properly before rolling.
Pin This Recipe!
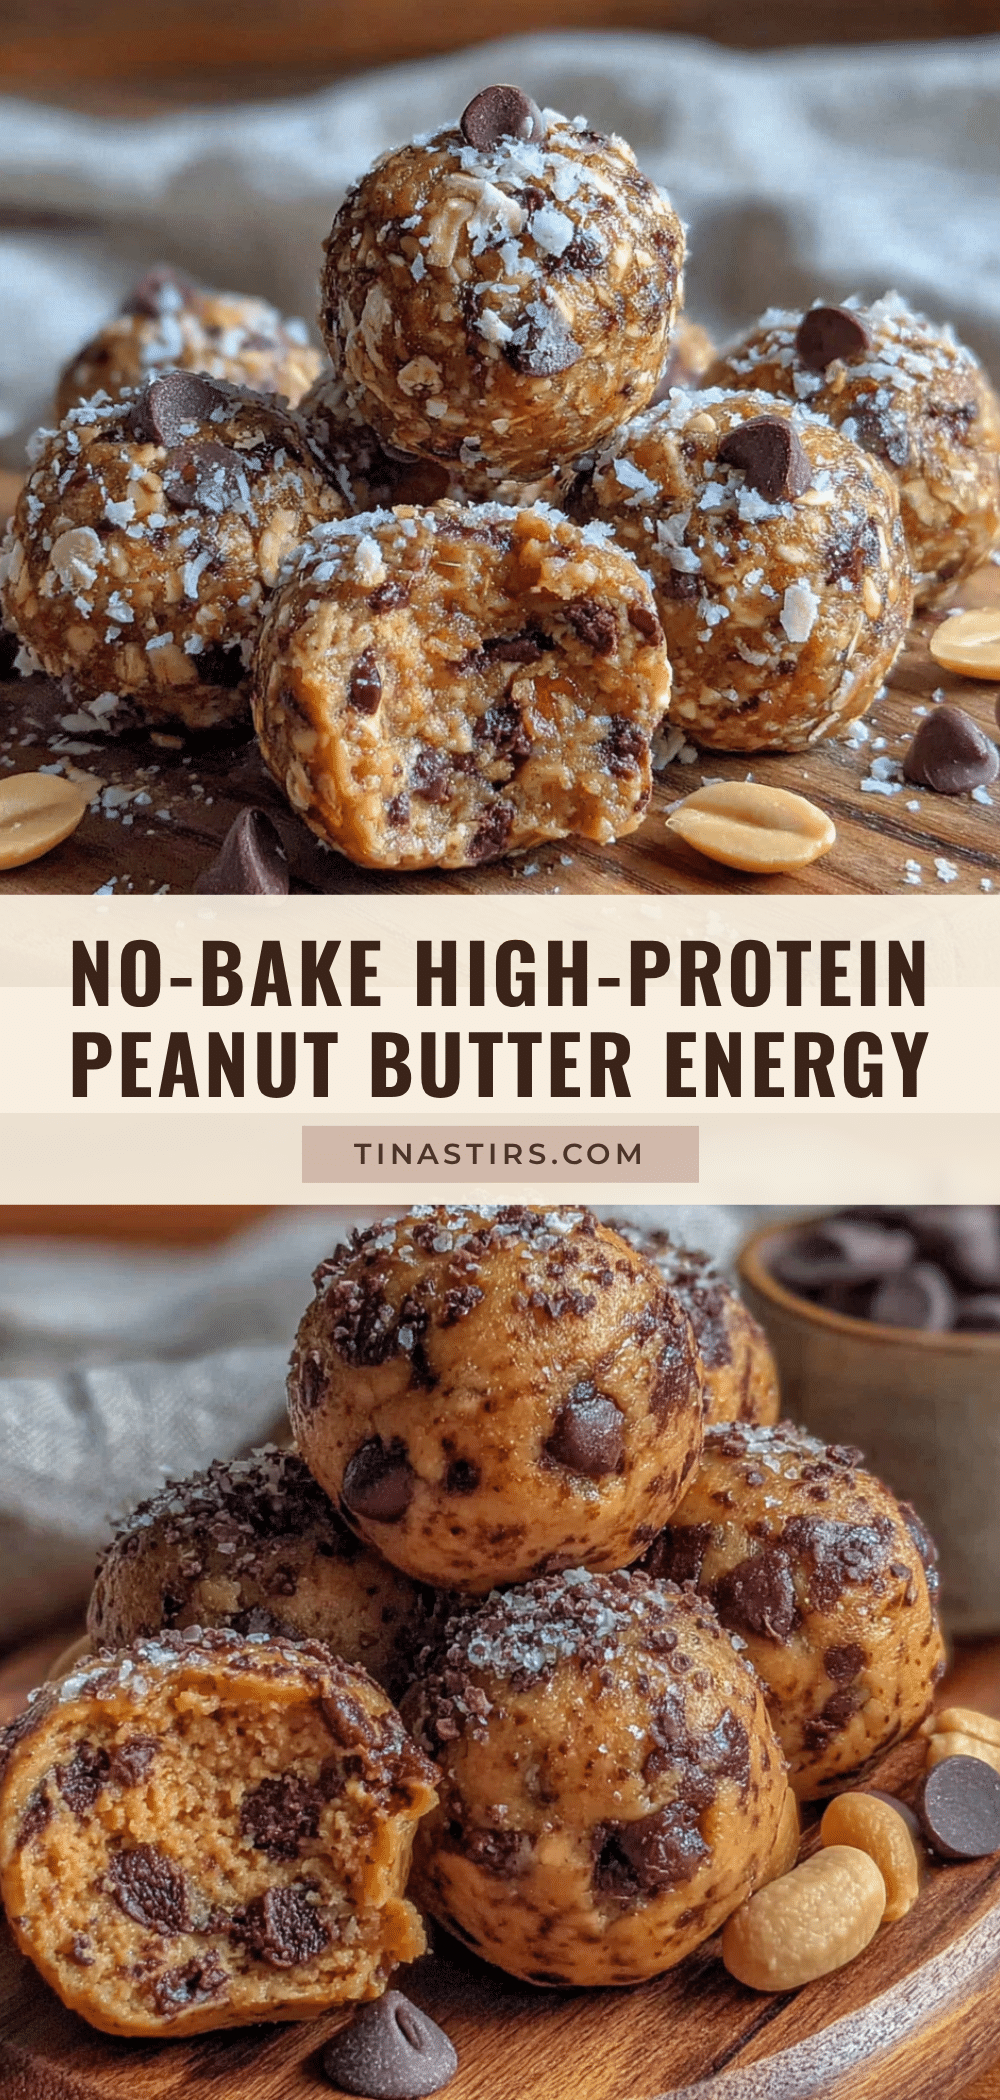
Easy High-Protein Peanut Butter Energy Balls: No Bake Best Snack

These no-bake peanut butter energy balls are quick, easy, and packed with protein. Made with simple pantry ingredients, they’re perfect for meal prep, busy mornings, or a healthy snack that tastes like a treat.
- Prep Time: 15 minutes
- Cook Time: 0 minutes
- Total Time: 45 minutes (includes chilling)
- Yield: 18-20 balls 1x
- Category: Snack
- Cuisine: American
Ingredients
- 1 cup natural peanut butter (creamy, no sugar added)
- 1/2 cup honey (or maple syrup for vegan)
- 1 1/2 cups rolled oats (old-fashioned)
- 1/2 cup protein powder (vanilla or unflavored)
- 1/3 cup dark chocolate chips (mini preferred)
- 1/4 cup ground flaxseed
- 1/2 teaspoon vanilla extract
- Pinch of salt (if peanut butter is unsalted)
Instructions
- Line a baking sheet or large plate with parchment paper.
- In a large mixing bowl, combine peanut butter, honey, and vanilla extract. Stir until smooth and well combined.
- Add rolled oats, protein powder, ground flaxseed, and salt. Stir until all dry ingredients are fully incorporated and the dough starts to come together (about 1-2 minutes).
- Fold in dark chocolate chips gently until evenly distributed.
- Check consistency: dough should be thick, slightly sticky, and hold together when pressed. If too dry, add 1 tablespoon honey or a splash of milk. If too sticky, add 1-2 tablespoons oats.
- Optional: Chill dough in the fridge for 15-20 minutes for easier handling.
- Scoop about 1 tablespoon of dough and roll between palms to form smooth balls. Place on prepared baking sheet. Repeat until all dough is used (about 18-20 balls).
- Refrigerate the baking sheet for at least 30 minutes to firm up the balls.
- Transfer to an airtight container and store in the fridge. Enjoy immediately or after a few hours for best flavor.
Notes
For best texture, use room temperature peanut butter. If dough is too sticky, wet hands slightly when rolling. Chilling is essential for firm balls. These taste even better the next day as flavors meld.
Nutrition
- Serving Size: 1 ball
- Calories: 150
- Sugar: 10
- Sodium: 80
- Fat: 8
- Saturated Fat: 2
- Carbohydrates: 18
- Fiber: 3
- Protein: 7
Keywords: peanut butter energy balls, no bake snack, high protein snack, healthy snack, meal prep snack, energy balls, gluten free snack


