Love this? Save it for later!
Share the inspiration with your friends
I was supposed to be making a full-sized apple crisp. It was a Tuesday night, I had a bag of Honeycrisps sitting on the counter, and I had this grand vision of a bubbling, golden dessert that would fill the house with that unmistakable fall smell. But my neighbor, Sarah, had just dropped off a tiny casserole dish she’d found at a garage sale—cute, impractical, maybe eight inches across. And honestly, I was already distracted. I’d forgotten to buy oats. The butter was still cold. And somewhere between pouring my coffee and answering a text from my mom, I realized I had no business making a 9×13 pan of anything. So I grabbed three apples, a handful of oats I found hiding in the back of the pantry, and just went for it.
What came out of the oven was nothing like the plan. It was smaller, simpler, and somehow better. The apples softened into this jammy, cinnamon-spiced filling while the topping—crispy, buttery, just sweet enough—formed a perfect golden crust. I stood there in my kitchen, fork in hand, eating straight from the dish, and I thought, why has no one told me to make it this way all along?
Maybe you’ve been there—wanting a cozy fall dessert but not wanting to commit to a whole pan of leftovers that you’ll be eating for a week. Or maybe you live alone, or it’s just two of you, and a full crisp feels like overkill. That’s where this Easy Small-Batch Apple Crisp for Two comes in. It’s everything you love about the classic dessert but scaled down to exactly what you need. No waste, no guilt, just a warm, comforting bowl of fall goodness that feels like a hug on a cool evening. Let me tell you, this happy little accident has become my go-to, and I have a feeling it’s about to become yours too.
Why You’ll Love This Recipe
Let’s be real—I’ve tested a lot of apple crisp recipes over the years. Some were too sweet, some were too soggy, and others just didn’t hit that nostalgic note I was craving. But this one? It’s the Goldilocks of fall desserts. It took me three tries to get the topping-to-apple ratio just right, and I’m so glad I stuck with it.
- Quick & Easy : From start to finish, this comes together in about 35 minutes. Most of that is hands-off oven time, so you can relax while it bakes.
- Simple Ingredients : You probably have everything you need already—apples, oats, flour, butter, brown sugar, and cinnamon. No fancy grocery trips required.
- Perfect for Date Night or Cozy Nights In : Whether it’s a quiet evening with your partner, a small gathering, or just a treat-for-yourself moment, this is the ideal portion size.
- Crowd-Pleaser : Every time I’ve served this—even to skeptics who thought small-batch meant less flavor—I’ve gotten rave reviews. The texture and flavor combo is pure comfort.
- Unbelievably Delicious : The apples get tender and almost caramelized, while the oat topping stays crunchy and golden. It’s the kind of dessert that makes you close your eyes after the first bite.
What makes this recipe different from the rest? It’s the ratio. I’ve tweaked the topping to have just enough butter to bind without becoming greasy, and the apples are tossed in a light coating of cornstarch and sugar so they release their juices slowly. No runny, watery filling here. Plus, I use a mix of tart and sweet apples for that perfect balance. It’s not just another apple crisp—it’s the best version for two.
Honestly, this recipe isn’t just good. It’s the kind that makes you want to curl up on the couch with a blanket and a spoon. It’s comfort food reimagined—smaller, faster, but with the same soul-soothing satisfaction. Perfect for impressing a date without stress, or turning a simple Tuesday into something memorable.
What Ingredients You Will Need
This recipe uses simple, wholesome ingredients to deliver that classic apple crisp flavor without the fuss. Most are pantry staples, and the apples are the star of the show. Here’s what you’ll need:
For the Apple Filling
- 2 medium apples (about 300g or 10.5 oz total) – I recommend a mix of one tart apple (like Granny Smith) and one sweet apple (like Honeycrisp or Fuji). This gives the filling a complex, balanced flavor. Peel, core, and slice them into 1/4-inch thick pieces.
- 2 tablespoons granulated sugar (25g) – Adds sweetness and helps draw out the apple juices.
- 1 tablespoon light brown sugar (12g), packed – Adds a touch of molasses depth.
- 1 teaspoon ground cinnamon – The essential fall spice. I prefer McCormick or Simply Organic for consistent flavor.
- 1/4 teaspoon ground nutmeg (optional but recommended) – Adds warmth. Freshly grated is best if you have it.
- 1 tablespoon cornstarch (8g) – This thickens the juices as the apples bake, preventing a watery filling.
- 1 tablespoon lemon juice (15ml) – Fresh squeezed is ideal. It prevents browning and brightens the apple flavor.
- Pinch of salt – Just a tiny bit to balance the sweetness.
For the Crisp Topping
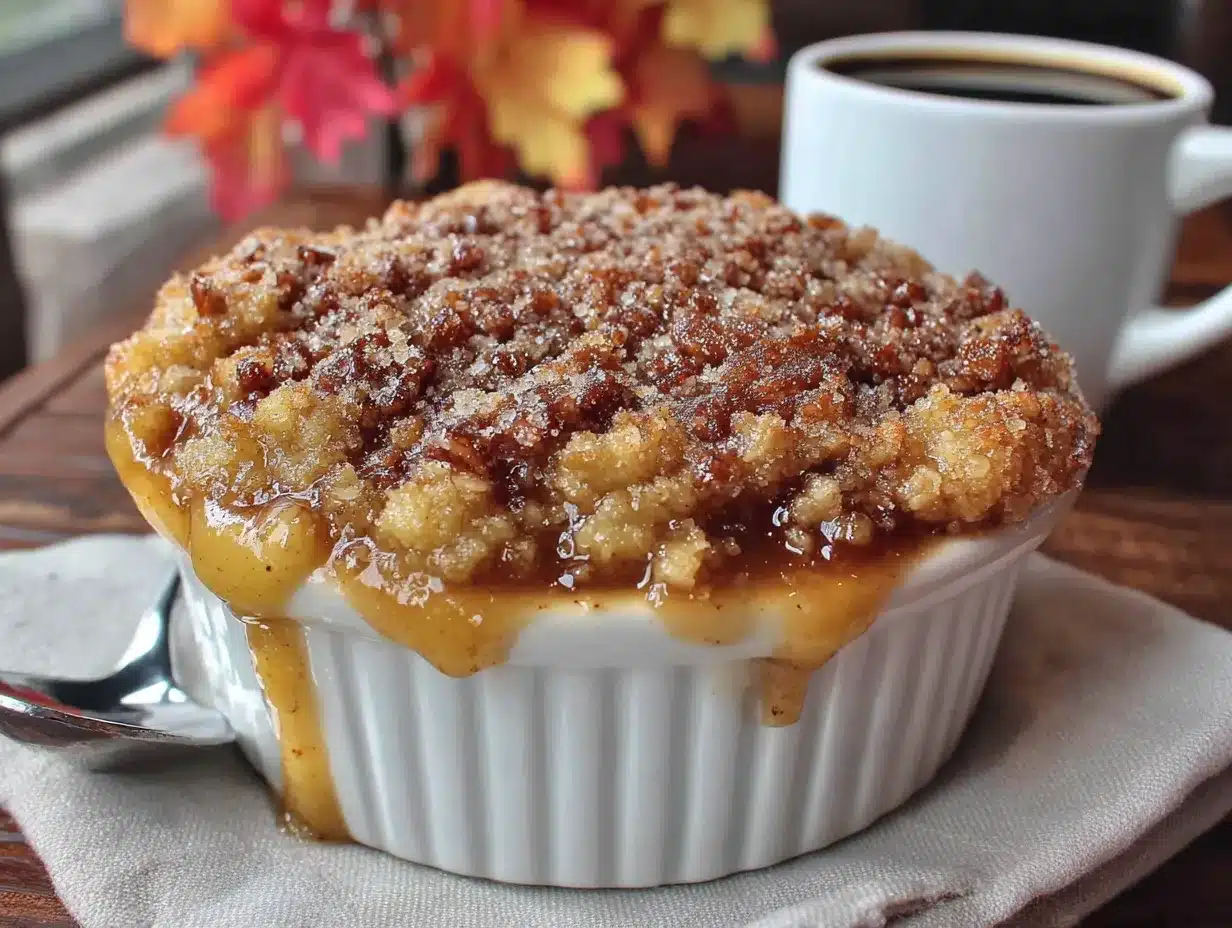
- 1/4 cup old-fashioned rolled oats (20g) – Do not use quick oats; they get mushy. Old-fashioned oats give that perfect chewy-crunchy texture.
- 1/4 cup all-purpose flour (30g) – You can substitute with whole wheat pastry flour or a gluten-free 1:1 blend if needed.
- 1/4 cup light brown sugar (50g), packed – For sweetness and that caramelized crunch.
- 1/4 teaspoon ground cinnamon – To tie the topping to the filling.
- 3 tablespoons unsalted butter (42g), cold and cut into small cubes – Cold butter is key for a crumbly, not greasy, topping. I use Kerrygold for its richness.
- Pinch of salt
Ingredient Tips: For the apples, look for firm apples that hold their shape during baking. Granny Smith is a must for that tart contrast. If you only have sweet apples, add an extra tablespoon of lemon juice to balance. For a dairy-free version, use cold coconut oil or vegan butter in the topping. And if you’re out of oats, you can substitute with an equal amount of chopped pecans or walnuts for a different but delicious texture.
Equipment Needed
You don’t need much for this recipe, which is part of its charm. Here’s what I use:
- Two 8-ounce (240ml) ramekins or one small baking dish (about 6×6 inches or 1-quart capacity) – I love using individual ramekins for that personal-sized dessert feel. If you don’t have ramekins, a small cast-iron skillet or even a shallow baking dish works perfectly.
- Mixing bowls – One medium bowl for the apples and one small bowl for the topping.
- Chef’s knife and cutting board – For peeling and slicing the apples.
- Measuring cups and spoons – Accuracy matters, especially with the cornstarch and spices.
- Pastry cutter or fork – To cut the butter into the topping. You can also use your fingertips, but a pastry cutter keeps the butter cold longer.
- Baking sheet – Place the ramekins on a baking sheet to catch any drips. Trust me, you don’t want to scrape burnt sugar off your oven rack.
If you don’t have ramekins, don’t sweat it. I’ve made this in a small loaf pan before, and it worked great. Just adjust the baking time by a few minutes if the dish is deeper. Also, a microplane is handy if you’re grating fresh nutmeg, but it’s not essential.
Preparation Method
Let’s get to the fun part. Follow these steps, and you’ll have a perfect small-batch apple crisp in no time.
- Preheat your oven to 350°F (175°C). Place a rack in the center position. While it’s heating, get your apples ready.
- Prepare the apples. Peel, core, and slice 2 medium apples into 1/4-inch thick slices. You want them uniform so they cook evenly. I usually cut each apple into 8 wedges, then slice each wedge crosswise into 3-4 pieces. Place them in a medium mixing bowl.
- Toss the apples with the filling ingredients. Add 2 tablespoons granulated sugar, 1 tablespoon packed brown sugar, 1 teaspoon cinnamon, 1/4 teaspoon nutmeg (if using), 1 tablespoon cornstarch, 1 tablespoon lemon juice, and a pinch of salt to the bowl. Use a spatula or your hands to gently toss everything until the apples are evenly coated. Let them sit for 5 minutes while you make the topping. This gives the cornstarch time to start absorbing the juices.
- Make the crisp topping. In a small bowl, combine 1/4 cup oats, 1/4 cup flour, 1/4 cup packed brown sugar, 1/4 teaspoon cinnamon, and a pinch of salt. Whisk to combine. Add the 3 tablespoons of cold, cubed butter. Use a pastry cutter, fork, or your fingers to work the butter into the dry ingredients until the mixture looks like coarse sand with some pea-sized butter lumps. Don’t overmix—those little butter bits create the flaky, crunchy texture. If the butter starts to soften, pop the bowl in the fridge for 5 minutes.
- Assemble the crisps. Divide the apple mixture evenly between your two ramekins or your small baking dish. The apples should be mounded slightly—they’ll settle as they bake. Sprinkle the topping evenly over the apples, pressing down gently with your fingers to make sure it sticks.
- Bake. Place the ramekins on a baking sheet (this catches any bubbling juices). Bake for 25-30 minutes, or until the topping is golden brown and the filling is bubbling up around the edges. The apples should be tender when pierced with a fork. If the topping is browning too quickly but the apples aren’t done, tent loosely with foil for the last 5 minutes.
- Cool slightly and serve. Let the crisp rest on a wire rack for at least 10 minutes. This allows the filling to set up—if you dig in right away, it will be runny. Serve warm, preferably with a scoop of vanilla ice cream or a dollop of whipped cream.
Pro tip from my kitchen: The first time I made this, I forgot to put the baking sheet under the ramekins. Let’s just say my oven had a smoky caramel aroma for a week. Learn from my mistake! Also, if your apples are very juicy, you might need an extra minute or two of baking. Look for those bubbles around the edge—that’s your cue.
Cooking Tips & Techniques
Over the years, I’ve learned a few things the hard way so you don’t have to. Here are my best tips for nailing this small-batch apple crisp every time.
Choose the right apples. This is non-negotiable. Soft apples like Red Delicious or McIntosh will turn into applesauce. Stick with firm varieties like Granny Smith, Honeycrisp, Braeburn, or Pink Lady. I’ve even used a mix of Gala and Granny Smith in a pinch, and it worked well. The tartness of the Granny Smith cuts through the sweetness beautifully.
Keep the butter cold. I cannot stress this enough. If your butter is too soft, the topping will turn into a paste and bake into a dense, greasy layer. Cut the butter into cubes and pop them in the freezer for 5 minutes before using. When you’re mixing the topping, work quickly. If your hands are warm, use a pastry cutter instead of your fingers.
Don’t skip the cornstarch. I once thought I could skip it and just use extra flour. Big mistake. The filling was soupy and the topping got soggy. Cornstarch creates a glossy, thick sauce that clings to the apples. If you’re out of cornstarch, you can use arrowroot powder or tapioca starch in the same amount.
Let it rest. I know it’s hard to wait when your kitchen smells like heaven, but letting the crisp sit for 10 minutes after baking is crucial. The filling continues to thicken as it cools. If you serve it immediately, it will be a runny mess. Trust the process.
Multitask like a pro. While the apples are macerating in the sugar mixture, make the topping. While the crisp is baking, clean up your dishes. This recipe is so quick that you can have the kitchen spotless by the time dessert is ready. That’s my kind of baking.
Variations & Adaptations
This recipe is a great base, but don’t be afraid to make it your own. Here are some variations I’ve tried and loved.
- Gluten-Free Version: Substitute the all-purpose flour with a 1:1 gluten-free flour blend (I like Bob’s Red Mill). Make sure your oats are certified gluten-free. The texture will be slightly more delicate, but it still tastes amazing.
- Vegan Version: Use cold coconut oil or vegan butter in the topping. For the filling, everything is already plant-based. Serve with coconut whipped cream or a vegan ice cream.
- Add Some Crunch: Mix 1/4 cup of chopped pecans or walnuts into the topping. Toast them lightly in a dry pan first for extra flavor. I did this for a Friendsgiving potluck, and it was the first dish to disappear.
- Spice It Up: Add 1/4 teaspoon of ground ginger or cardamom to the apple mixture. Or try a pinch of cloves for a more intense, warming flavor. I once added a tiny pinch of black pepper to the filling, and it gave the apples this incredible depth.
- Berry-Apple Crisp: Swap one of the apples for 1/2 cup of fresh or frozen cranberries, raspberries, or blueberries. Reduce the sugar by 1 tablespoon if using sweet berries. The tart pop of cranberries with apples is a fall dream.
- Single Serving: Halve the recipe and bake in one large ramekin. Reduce baking time to 20-22 minutes. Perfect for a solo treat on a quiet night.
My personal favorite variation is adding a tablespoon of bourbon or dark rum to the apple mixture. It adds a warmth that pairs beautifully with the cinnamon. Just be careful—you might want to eat the whole thing yourself.
Serving & Storage Suggestions
This crisp is best served warm, straight from the oven. The contrast between the hot, tender apples and the cold, creamy ice cream is pure magic. Here’s how I like to serve it:
- Temperature: Let it cool for 10 minutes, then serve while still warm. Not piping hot, but warm enough to melt a scoop of vanilla ice cream.
- Toppings: A generous scoop of vanilla bean ice cream is classic. For a lighter option, try a dollop of lightly sweetened whipped cream or a drizzle of heavy cream. For a touch of elegance, sprinkle with a little flaky sea salt or a dusting of cinnamon.
- What to serve alongside: This crisp is rich enough on its own, but it pairs beautifully with a cup of hot coffee, spiced chai, or a glass of cold milk. For a dinner party, serve it after a light main course like roasted chicken or a fall salad.
Storage: If you have leftovers (unlikely, but possible!), cover the ramekins with plastic wrap or transfer the crisp to an airtight container. It will keep in the refrigerator for up to 3 days. The topping will soften over time, but it’s still delicious.
Reheating: The best way to reheat is in the oven at 300°F (150°C) for 10-15 minutes. This helps re-crisp the topping. You can use the microwave in a pinch, but the topping will be soft. If microwaving, heat in 30-second bursts until warm.
Freezer: You can freeze the assembled but unbaked crisp. Wrap the ramekins tightly in plastic wrap and then foil. Freeze for up to 3 months. Bake from frozen, adding 10-15 minutes to the bake time. I’ve done this for last-minute guests, and it works like a charm.
One thing I love about this recipe is that the flavors actually get better after a day in the fridge. The apples absorb more of the cinnamon and brown sugar, creating an even deeper, more jammy filling. So don’t worry if you have leftovers—they’re a treat the next day too.
Nutritional Information & Benefits
While this is definitely a treat, it’s not as indulgent as you might think. Here’s the approximate nutritional breakdown for one serving (without ice cream):
- Calories: ~380
- Fat: 14g
- Carbohydrates: 64g
- Fiber: 6g
- Sugar: 42g
- Protein: 4g
Apples are a great source of fiber and vitamin C, and the oats provide some whole grains and soluble fiber, which is good for heart health. The cinnamon has anti-inflammatory properties, and the small portion size makes it easy to enjoy without overdoing it. If you’re watching your sugar intake, you can reduce the brown sugar in the topping by a tablespoon or use a sugar substitute like coconut sugar.
Dietary Considerations: This recipe can easily be made dairy-free, vegan, or gluten-free with simple substitutions. It is nut-free as written, but check your oats for cross-contamination if you have a severe allergy. It contains gluten if using regular flour and oats.
I’m not one to obsess over numbers, but I love that this dessert feels indulgent without being a total sugar bomb. It’s the kind of treat that satisfies your sweet tooth and leaves you feeling cozy, not sluggish.
Conclusion
This Easy Small-Batch Apple Crisp for Two is proof that great things really do come in small packages. It started as a kitchen mistake—a too-small dish and a distracted cook—and ended up becoming one of my most beloved recipes. It’s quick, it’s simple, and it delivers all the warm, spiced, buttery goodness of a full-sized crisp without the leftovers that taunt you from the fridge.
I hope you give this recipe a try, whether it’s for a quiet night in, a date night dessert, or just because you deserve a little fall comfort. Don’t be afraid to customize it with your favorite spices or add-ins. That’s the beauty of cooking—making a recipe your own.
I’d love to hear how it turns out for you! Drop a comment below and let me know if you tried any variations, or share a photo of your crisp on social media and tag me. Your feedback and creativity are what make this community so special. Until next time, happy baking—and remember, sometimes the best recipes come from the moments we least expect them.
Frequently Asked Questions
Can I use quick oats instead of old-fashioned oats?
I don’t recommend it. Quick oats are more finely ground and will absorb too much moisture, resulting in a mushy, dense topping. Old-fashioned rolled oats give that perfect chewy-crunchy texture that makes a crisp so satisfying. If you only have quick oats, you can pulse them in a food processor a few times to create a more textured blend, but the results won’t be the same.
What’s the best apple for apple crisp?
For the best texture and flavor, use a mix of tart and sweet apples. Granny Smith is my go-to for tartness because it holds its shape beautifully. Pair it with a sweet apple like Honeycrisp, Fuji, or Braeburn. Avoid Red Delicious or McIntosh as they break down too much. If you only have one type, use Granny Smith and add an extra tablespoon of brown sugar to balance the tartness.
Can I make this apple crisp ahead of time?
Absolutely! You can assemble the crisp (without baking) up to 24 hours in advance. Cover the ramekins with plastic wrap and store them in the refrigerator. When you’re ready to bake, add 5-10 minutes to the baking time since you’re starting from cold. The topping might not be as crunchy as freshly made, but it’s still delicious. You can also bake it fully, let it cool, and reheat it in the oven.
Why is my apple crisp runny?
This usually happens for one of two reasons: either you didn’t let it rest after baking, or you didn’t use enough cornstarch. The cornstarch needs time to thicken the apple juices as they heat up, and the crisp needs at least 10 minutes of resting time after baking for the filling to set. If your apples were exceptionally juicy, you can increase the cornstarch to 1.5 tablespoons next time.
Can I double this recipe?
Yes, and it’s super easy! Simply double all the ingredients and bake in an 8×8-inch baking dish or a 9-inch pie plate. Increase the baking time to 35-40 minutes, or until the filling is bubbly and the topping is golden. This is perfect for when you have guests over and want a slightly larger dessert without committing to a full 9×13 pan.
Pin This Recipe!
Easy Small-Batch Apple Crisp for Two

A perfectly portioned apple crisp for two, featuring tender cinnamon-spiced apples and a buttery oat topping. Ready in about 35 minutes, this cozy dessert is ideal for date nights or quiet evenings in.
- Prep Time: 10 minutes
- Cook Time: 25-30 minutes
- Total Time: 35-40 minutes
- Yield: 2 servings 1x
- Category: Dessert
- Cuisine: American
Ingredients
- 2 medium apples (about 300g or 10.5 oz total), peeled, cored, and sliced into 1/4-inch thick pieces
- 2 tablespoons granulated sugar (25g)
- 1 tablespoon light brown sugar (12g), packed
- 1 teaspoon ground cinnamon
- 1/4 teaspoon ground nutmeg (optional but recommended)
- 1 tablespoon cornstarch (8g)
- 1 tablespoon lemon juice (15ml), fresh squeezed
- Pinch of salt
- 1/4 cup old-fashioned rolled oats (20g)
- 1/4 cup all-purpose flour (30g)
- 1/4 cup light brown sugar (50g), packed
- 1/4 teaspoon ground cinnamon
- 3 tablespoons unsalted butter (42g), cold and cut into small cubes
- Pinch of salt
Instructions
- Preheat your oven to 350°F (175°C). Place a rack in the center position.
- Prepare the apples: Peel, core, and slice 2 medium apples into 1/4-inch thick slices. Place them in a medium mixing bowl.
- Toss the apples with the filling ingredients: Add 2 tablespoons granulated sugar, 1 tablespoon packed brown sugar, 1 teaspoon cinnamon, 1/4 teaspoon nutmeg (if using), 1 tablespoon cornstarch, 1 tablespoon lemon juice, and a pinch of salt to the bowl. Gently toss until the apples are evenly coated. Let them sit for 5 minutes.
- Make the crisp topping: In a small bowl, combine 1/4 cup oats, 1/4 cup flour, 1/4 cup packed brown sugar, 1/4 teaspoon cinnamon, and a pinch of salt. Whisk to combine. Add the 3 tablespoons of cold, cubed butter. Use a pastry cutter, fork, or your fingers to work the butter into the dry ingredients until the mixture looks like coarse sand with some pea-sized butter lumps.
- Assemble the crisps: Divide the apple mixture evenly between two 8-ounce ramekins or a small baking dish. Sprinkle the topping evenly over the apples, pressing down gently.
- Bake: Place the ramekins on a baking sheet. Bake for 25-30 minutes, or until the topping is golden brown and the filling is bubbling around the edges. If the topping browns too quickly, tent loosely with foil for the last 5 minutes.
- Cool slightly and serve: Let the crisp rest on a wire rack for at least 10 minutes. Serve warm, preferably with vanilla ice cream or whipped cream.
Notes
For best results, use a mix of tart and sweet apples (e.g., Granny Smith and Honeycrisp). Keep the butter cold for a crumbly topping. Let the crisp rest for 10 minutes after baking to allow the filling to set. If you don’t have ramekins, a small loaf pan or cast-iron skillet works well.
Nutrition
- Serving Size: 1 ramekin (about 1/2
- Calories: 380
- Sugar: 42
- Sodium: 150
- Fat: 14
- Saturated Fat: 8
- Carbohydrates: 64
- Fiber: 6
- Protein: 4
Keywords: apple crisp, small batch, dessert for two, fall dessert, easy apple crisp, apple crisp for two


